| Badge | Materials | ||
|---|---|---|---|
| Kokiri Sword I | Old Rag (1x) | ||
| Kokiri Sword II | Gibdo Bandage (1x) | Old Rag (1x) | |
| Kokiri Sword III | Essence of Icy Big Poe (1x) | Old Rag (1x) | |
| Kokiri Sword IV | ReDead Bandage (1x) | Old Rag (1x) | |
| Stamina Fruit I | Shield Moblin Helmet (1x) | ||
| Stamina Fruit II | Darunia's Spikes (1x) | King Dodongo's Claws (1x) | Shield Moblin Helmet (3x) |
| Stamina Fruit III | Darunia's Bracelet (1x) | King Dodongo's Claws (2x) | Metal Moblin Shield (2x) |
| Digging Mitts I | Shield Moblin Helmet (3x) | ||
| Digging Mitts II | Darunia's Spikes (1x) | King Dodongo's Claws (1x) | Shield Moblin Helmet (3x) |
| Digging Mitts III | Darunia's Bracelet (1x) | King Dodongo's Claws (2x) | Metal Moblin Shield (2x) |
| Din's Fire I | Lizalfos Scale (1x) | Old Rag (1x) | |
| Din's Fire II | Fiery Aeralfos Leather (1x) | Old Rag (1x) | |
| Din's Fire III | Darunia's Bracelet (1x) | King Dodongo's Claws (2x) | Metal Moblin Shield (2x) |
| Hover Boots I | Shield Moblin Helmet (2x) | ||
| Hover Boots II | Darunia's Spikes (1x) | King Dodongo's Claws (1x) | Shield Moblin Helmet (3x) |
| Hover Boots III | Darunia's Bracelet (1x) | King Dodongo's Claws (2x) | Metal Moblin Shield (2x) |
| Fierce Deity's Mask I | Fiery Aeralfos Leather (1x) | Old Rag (1x) | |
| Fierce Deity's Mask II | Darunia's Bracelet (1x) | King Dodongo's Claws (2x) | Metal Moblin Shield (2x) |
Tag: sourceedit |
Tag: sourceedit |
||
| Line 252: | Line 252: | ||
Princess Ruto Alternate Costume (HWL).png|[[w:c:zelda:Laruto|Laruto]] re-color costume in Hyrule Warriors Legends | Princess Ruto Alternate Costume (HWL).png|[[w:c:zelda:Laruto|Laruto]] re-color costume in Hyrule Warriors Legends | ||
Princess Ruto Alternate Costume 2 (HWL).png|[[w:c:zelda:Quill|Quill]] re-color costume from the Master Wind Waker pack | Princess Ruto Alternate Costume 2 (HWL).png|[[w:c:zelda:Quill|Quill]] re-color costume from the Master Wind Waker pack | ||
Princess Ruto Alternate Costume 3 (HWL DLC).png|Re-color costume from the Phantom Hourglass and Spirit Tracks pack | |||
</gallery> | </gallery> | ||
|-|Videos= | |-|Videos= | ||
Revision as of 04:34, 2 September 2016
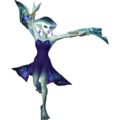
Princess Ruto (ルト姫, Ruto-hime) is a playable character in Hyrule Warriors. Players can unlock her in the game's Adventure Mode. She originated from Ocarina of Time.
Role in Game
When Impa and Sheik entered the Era of The Hero of Time, a fairy named Navi says that the Gorons kidnapped the Zora Princess Ruto. After rescuing her, she will tell the player that in order to get into the Water Temple is to open the floodgates. Afterwards, she will retreated into the temple to find the Mirror of Truth. But when she does, Wizzro (disguised as Zelda) imprisoned her in the Central Chamber of the temple.
After Lake Hylia, Ruto will only appear if Darunia is playable. If played as Darunia, Ruto will activate the Statue of Waves and Flames in The Temple of The Sacred Sword.
After defeating Cia, Ruto and Darunia will go back to their time. Lana recalls them in Gerudo Desert to aid the Hyrulean Forces against Ganondorf.
In the final battle, if the player chooses Darunia, Ruto will take his place in defeating the southern Argorok, and stalling Ganondorf for the player to reclaim the Castle Keep.
Character Information
Personality
Princess Ruto is a tomboyish, proud, but kind individual. She is rather shy to those whom she trusts.
Quotes
See also: Princess Ruto/Quotes
Gameplay
| Keys: | Y Normal Attack ▲ | X Charge Attack ▲ | A Special Technique ▲ | B Evade |
Ruto users a Wave Meter, located underneath her special attack gauge. It fills up in portions each time Ruto finishes a charge attack. When it's completely filled, the scales on her arms will glow blue.
- X: If her Wave Meter is full or even partially full, Ruto will stand in place fire off small waves of water like a turret until her Wave Meter drains, finishing with a giant wave that hits a large area in front.
- Y, X: Ruto dives into a puddle in front of her, then pops out of another one, knocking enemies back. Fills up 1/3 of her Wave Meter.
- Y, Y, X: Ruto dives into a puddle, then swims forward while underwater, hitting any enemies in her path. She then pops out, knocking back any enemies nearby. The direction she swims in can be manipulated with the control stick. Fills up 1/3 of her Wave Meter.
- Y, Y, Y, X: Ruto creates a water sphere/bubble where she stands, entrapping enemies in it. She then swims around in it while damaging them, and finishes by exploding the bubble. Fills up 1/2 of her Wave Meter.
- Y, Y, Y, Y, X: Ruto dives into a puddle, only to pop out and dive into another. She repeats this three times, and then leaps out of a puddle in the center, knocking back enemies. Fills up 1/4 of her Wave Meter.
- Y, Y, Y, Y, Y, X: Ruto goes under water, then summons a massive wave that travels forward, damaging any enemies that gets caught in it. Fills up 1/2 of her Wave Meter.
- Y, Y, Y, Y, Y, Y, Y: Ruto does four water slashes with her hands, and then sends out a ring of water in front of her. She'll jump and throw orbs of water in front of her, then dive into a pool of water, only to emerge out of it a few seconds later, knocking back enemies.
- A: Ruto extends her left arm and winks before diving underwater and rapidly swims in a clockwise circular path along the ground, generating a Maelstrom, vacuuming in and trapping nearby enemies. After swimming seven laps she dives underwater, disappearing momentarily before diving high out of the water causing a waterspout to knock the enemies upwards.
- Focus Spirit + A: Ruto twirls around 360° clockwise as she leaps into the air and fires multiple fish-shaped water projectiles towards the ground at an angle.
- Focus Spirit Finisher: Ruto slams the ground to create a large shockwave.
- Weak Point Smash: Ruto ensnares enemies in a large bubble of water, then summons a waterspout to finish them off.
Fighting Style
Princess Ruto's Zora Scale provides her with mastery over water, with her attacks making use of her swift mobility in water along with aquatic arrays and projectiles. She can summon pools of water almost anywhere, including the ground, allowing her to dive in and swim through it, effectively letting her "swim" through solid ground and earth. Many of these attacks are very wide ranged and powerful hitting, while also allowing her to re-position herself on the battlefield, allowing her to be slippery and untouchable while plowing through fields of enemies.
Weapons
| Weapon Information (Element: Water) | ||
|---|---|---|
| Description: An amulet of the Zora people, imbued with the power of water. Each Combo Attack fills a water gauge. Press the Strong Attack button to expend the water for a powerful distance attack! | ||
| Silver Scale | Skill Slots: 1~2 | |
.png)
|
Base Attack: 80 | 1★ Attack: 88 |
| 2★ Attack: 96 | 3★ Attack: 104 | |
| 4★ Attack: 112 | 5★ Attack: 120 | |
| Golden Scale | Skill Slots: 3~4 | |
.png)
|
Base Attack: 150 | 1★ Attack: 165 |
| 2★ Attack: 180 | 3★ Attack: 195 | |
| 4★ Attack: 210 | 5★ Attack: 225 | |
| Water Dragon Scale | Skill Slots: 6~8 | |
.png)
|
Base Attack: 280 | 1★ Attack: 308 |
| 2★ Attack: 336 | 3★ Attack: 364 | |
| 4★ Attack: 392 | 5★ Attack: 420 | |
| 8-Bit Clock (HW) | Skill Slots: 6~8 | |
.png)
|
Base Attack: 280 | 1★ Attack: 308 |
| 2★ Attack: 336 | 3★ Attack: 364 | |
| 4★ Attack: 392 | 5★ Attack: 420 | |
| Water Dragon Scale + (Legends) | Skill Slots: 7~8 | |
|
|
Base Attack: 500 | 1★ Attack: 550 |
| 2★ Attack: 600 | 3★ Attack: 650 | |
| 4★ Attack: 700 | 5★ Attack: 750 | |
| Sun Dragon Scale (Legends) | Skill Slots: 7~8 | |
|
|
Base Attack: 500 | 1★ Attack: 550 |
| 2★ Attack: 600 | 3★ Attack: 650 | |
| 4★ Attack: 700 | 5★ Attack: 750 | |
| Secondary Element: Light | ||
Badge Materials
- See also: Hyrule Warriors/Badges
| Badge | Materials | ||
|---|---|---|---|
| Empty Bottle I | Monster Tooth (1x) | ||
| Empty Bottle II | ReDead Bandage (1x) | Monster Tooth (1x) | |
| Empty Bottle III | King Dodongo's Crystal (1x) | Darunia's Spikes (2x) | Metal Moblin Shield (2x) |
| Hornet Larvae I | Shield Moblin Helmet (1x) | ||
| Hornet Larvae II | Darunia's Spikes (1x) | King Dodongo's Claws (1x) | Shield Moblin Helmet (3x) |
| Hornet Larvae III | King Dodongo's Crystal (1x) | Darunia's Spikes (2x) | Metal Moblin Shield (2x) |
| Nayru's Love I | Shield Moblin Helmet (3x) | ||
| Nayru's Love II | Darunia's Spikes (1x) | King Dodongo's Claws (1x) | Shield Moblin Helmet (3x) |
| Nayru's Love III | King Dodongo's Crystal (1x) | Darunia's Spikes (2x) | Metal Moblin Shield (2x) |
| Goron Tunic I | Shield Moblin Helmet (2x) | ||
| Goron Tunic II | Darunia's Spikes (1x) | King Dodongo's Claws (1x) | Shield Moblin Helmet (3x) |
| Goron Tunic III | King Dodongo's Crystal (1x) | Darunia's Spikes (2x) | Metal Moblin Shield (2x) |
| Zora Tunic I | Shield Moblin Helmet (2x) | ||
| Zora Tunic II | Darunia's Spikes (1x) | King Dodongo's Claws (1x) | Shield Moblin Helmet (3x) |
| Zora Tunic III | King Dodongo's Crystal (1x) | Darunia's Spikes (2x) | Metal Moblin Shield (2x) |
| Magic Armor I | Shield Moblin Helmet (2x) | ||
| Magic Armor II | Darunia's Spikes (1x) | King Dodongo's Claws (1x) | Shield Moblin Helmet (3x) |
| Magic Armor III | King Dodongo's Crystal (1x) | Darunia's Spikes (2x) | Metal Moblin Shield (2x) |
| Sacred Shield I | Shield Moblin Helmet (2x) | ||
| Sacred Shield II | Darunia's Spikes (1x) | King Dodongo's Claws (1x) | Shield Moblin Helmet (3x) |
| Sacred Shield III | King Dodongo's Crystal (1x) | Darunia's Spikes (2x) | Metal Moblin Shield (2x) |
| Mirror Shield I | Shield Moblin Helmet (2x) | ||
| Mirror Shield II | Darunia's Spikes (1x) | King Dodongo's Claws (1x) | Shield Moblin Helmet (3x) |
| Mirror Shield III | King Dodongo's Crystal (1x) | Darunia's Spikes (2x) | Metal Moblin Shield (2x) |
| Badge | Materials | ||
|---|---|---|---|
| Farore's Wind I | Metal Plate (1x) | ||
| Farore's Wind II | Darunia's Spikes (1x) | King Dodongo's Claws (1x) | Shield Moblin Helmet (3x) |
| Farore's Wind III | Darunia's Bracelet (1x) | Darunia's Spikes (2x) | Metal Moblin Shield (2x) |
| Goron's Bracelet I | Shield Moblin Helmet (2x) | ||
| Goron's Bracelet II | Darunia's Bracelet (1x) | Darunia's Spikes (2x) | Metal Moblin Shield (2x) |
| Hawkeye I | Shield Moblin Helmet (2x) | ||
| Hawkeye II | Darunia's Bracelet (1x) | Darunia's Spikes (2x) | Metal Moblin Shield (2x) |
| Beetle I | Shield Moblin Helmet (2x) | ||
| Beetle II | Darunia's Bracelet (1x) | Darunia's Spikes (2x) | Metal Moblin Shield (2x) |
| Whip I | Shield Moblin Helmet (2x) | ||
| Whip II | Darunia's Bracelet (1x) | Darunia's Spikes (2x) | Metal Moblin Shield (2x) |
Heart Locations
| Stage | Unlock Method |
|---|---|
| Stage | Unlock Method |
|---|---|
Gallery
-

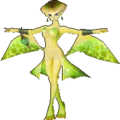
Adventure Mode sprite
-
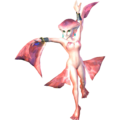
Lulu costume from the Master Quest pack
-
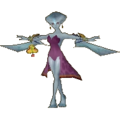
Rutela from the Twilight Princess pack
-

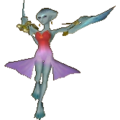
Zora Mask costume from the Majora's Mask pack
-
Laruto re-color costume in Hyrule Warriors Legends
-
Quill re-color costume from the Master Wind Waker pack
-
Re-color costume from the Phantom Hourglass and Spirit Tracks pack


.png)
.png)
.png)
-
Zora Scale play demo
External Links
| This Hyrule Warriors related article is a stub. You can help the wiki by expanding it. |