| Image | Information |
|---|---|
| Light Elemental Fairies | |
.png)
|
Initial Skill: Hard Worker |
| Location: Adventure Map - H7 | |
.png)
|
Initial Skill: Invincible Weakling |
| Location: Great Sea Map - D2 | |
.png)
|
Initial Skill: Repair Technician |
| Location: Master Quest Map - L2 | |
.png)
|
Initial Skill: Special Regain |
| Location: Twilight Map - G1 | |
.png)
|
Initial Skill: Magic Sponge |
| Location: Koholint Island Map - G6 (DLC) | |
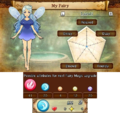
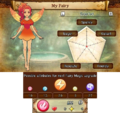
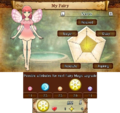
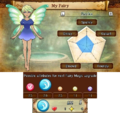
My Fairy (マイフェアリー) is a customizable feature introduced in Hyrule Warriors Legends. They can be found hiding within brown pots in Adventure Mode. Once a fairy is obtained, players may choose to keep or leave it. At first players can only raise up to three fairies (five in Definitive Edition), but can earn the right to raise more as players beat Adventure Mode maps.
Fairies have individual elements and personal preferences. Match their preferences with appropriate food and attire to boost their capabilities and level them up. If a fairy's trust level is high enough, they may reward the player with a gift.
During special events, players will receive a free SpotPass fairy for download. These fairies come with pre-set stats and do not take up space. Once released, they cannot be obtained again.
- Facilities
- Dining Room - Feed fairies.
- Salon - Edit attire.
- School - Change fairy's rental skills.
- Party - Exchange rental skills with other players.
- Fairy Magic
Fairy Magic is usable once the player's magic gauge reaches a certain amount. It deals heavy damage to nearby foes and surrounds the player character within a temporary barrier; the barrier's effects vary on the fairy's element.
- Fire: Bombos - Lowers enemies' defenses.
- Water: Ether - Boosts allies' defenses.
- Lightning: Quake - Slows enemies.
- Light: Shine - Continuously heal allies.
- Dark: Shade - Continuously drains enemies' health.
As the fairy grows stronger and gains more than one element, its magic can generate additional effects while receiving more power and range.
Fairy Location
| Image | Information |
|---|---|
| Dark Elemental Fairies | |
.png)
|
Initial Skill: Fill Special Attack |
| Location: Adventure Map - N1 | |
.png)
|
Initial Skill: Dream Sphere |
| Location: Great Sea Map - A1 | |
.png)
|
Initial Skill: Total Focus |
| Location: Master Quest Map - F5 | |
.png)
|
Initial Skill: Health Sponge |
| Location: Twilight Map - C7 | |
.png)
|
Initial Skill: Glass Canon |
| Location: Adventure Map - L8 (DLC) | |
| Image | Information |
|---|---|
| Fire Elemental Fairies | |
.png)
|
Initial Skill: Heart Bonds |
| Location: Adventure Map - A3 | |
.png)
|
Initial Skill: Special Bonds |
| Location: Great Sea Map - N6 | |
.png)
|
Initial Skill: Keep Keeper |
| Location: Master Quest Map - N5 | |
.png)
|
Initial Skill: Special Regain |
| Location: Termina Map - K7 | |
| Image | Information |
|---|---|
| Water Elemental Fairies | |
.png)
|
Initial Skill: Health Regain |
| Location: Adventure Map - P7 | |
.png)
|
Initial Skill: Dream Sphere |
| Location: Great Sea Map - J4 | |
.png)
|
Initial Skill: Wall of Water |
| Location: Master Quest Map - K8 | |
.png)
|
Initial Skill: Health Sponge |
| Location: Termina Map - E4 | |
.png)
|
Initial Skill: Special Fountain |
| Location: Grand Travels Map - I7 (DLC) | |
| Image | Information |
|---|---|
| Lightning Elemental Fairies | |
.png)
|
Initial Skill: Extreme Gusts |
| Location: Adventure Map - F3 | |
.png)
|
Initial Skill: Invincible Weakling |
| Location: Great Sea Map - B6 | |
.png)
|
Initial Skill: Extreme Evasion |
| Location: Master Quest Map - B4 | |
.png)
|
Initial Skill: Marathon Runner |
| Location: Termina Map - I3 | |
| Image | Information |
|---|---|
| Event Fairies | |
|
|
Initial Skill: N/A (Name: Lazuli) |
| Location: N/A (SpotPass) | |
|
|
Initial Skill: N/A (Name: Scarlet) |
| Location: N/A (SpotPass) | |
|
|
Initial Skill: N/A (Name: Magnolia) |
| Location: N/A (SpotPass) | |
Food
Food can raise a fairy's level, stats, affection, and may potentially change their personality traits. In order to be able to collect food of certain types they must first be found, dropped by breaking brown pots in enemy keeps. Once first found in this manner, enemies will then have a chance of dropping it after that. Enemies will only drop food types that players have already found once before via breaking pots. If players want to find a specific kind of food, it will reappear in the same Adventure Mode square where it was first located.
- Elemental Stats
- Fire (FIR) - Additional bonus for fire fairies.
- Water (WTR) - Additional bonus for water fairies.
- Lightning (LTN) - Additional bonus for lightning fairies.
- Light (LIT) - Additional bonus for light fairies.
- Darkness (DRK) - Additional bonus for dark fairies.
- Personality Traits
- Sparkly (SPK)
- Relaxed (RLX)
- Valiant (VAL)
- Dizzy (DIZ)
- Friendly (FRN)
- Aspiring (ASP)
- Resolute (RES)
- Shrewd (SHR)
- Eager (EAG)
- Smiley (SMI)
| Information | SPK | RLX | VAL | DIZ | FRN | ASP | RES | SHR | EAG | SMI | ||
|---|---|---|---|---|---|---|---|---|---|---|---|---|
.png)
|
Weird Egg | 2 | 0 | 2 | 0 | -1 | 0 | 2 | 0 | 0 | 0 | |
| Element: LIT | Rank: Bronze | FIR: 0 | WTR: 0 | LTN: 0 | LIT: 1 | DRK: 0 | ||||||
| Location: | ||||||||||||
|
|
Tasty Weird Egg | 5 | -2 | 2 | 0 | 0 | 0 | 5 | 0 | 2 | 0 | |
| Element: LIT | Rank: Silver | FIR: 0 | WTR: 0 | LTN: 0 | LIT: 2 | DRK: 0 | ||||||
| Location: | ||||||||||||
|
|
Delicious Weird Egg | 10 | -5 | 5 | -2 | 2 | 0 | 5 | -2 | 2 | 0 | |
| Element: LIT | Rank: Gold | FIR: 0 | WTR: 0 | LTN: 0 | LIT: 3 | DRK: 0 | ||||||
| Location: Adventure Map - A3, P6 | ||||||||||||
.png)
|
All-purpose Bait | 0 | 0 | -1 | 0 | 2 | 0 | 2 | 0 | 0 | 2 | |
| Element: LIT | Rank: Bronze | FIR: 0 | WTR: 0 | LTN: 0 | LIT: 1 | DRK: 0 | ||||||
| Location: | ||||||||||||
|
|
Tasty All-purpose Bait | 2 | 0 | 0 | 0 | 5 | 0 | 2 | 0 | -2 | 5 | |
| Element: LIT | Rank: Silver | FIR: 0 | WTR: 0 | LTN: 0 | LIT: 2 | DRK: 0 | ||||||
| Location: | ||||||||||||
|
|
Delicious All-purpose Bait | 2 | 0 | 2 | 0 | 5 | -2 | 5 | -2 | -5 | 10 | |
| Element: LIT | Rank: Gold | FIR: 0 | WTR: 0 | LTN: 0 | LIT: 3 | DRK: 0 | ||||||
| Location: Great Sea Map - B6, N3 | ||||||||||||
.png)
|
Ordon Goat Cheese | 0 | 2 | 2 | 0 | 0 | 0 | 2 | 0 | -1 | 0 | |
| Element: DRK | Rank: Bronze | FIR: 0 | WTR: 0 | LTN: 0 | LIT: 0 | DRK: 1 | ||||||
| Location: | ||||||||||||
|
|
Tasty Ordon Goat Cheese | 0 | 2 | 5 | -2 | 0 | 2 | 5 | 0 | 0 | 0 | |
| Element: DRK | Rank: Silver | FIR: 0 | WTR: 0 | LTN: 0 | LIT: 0 | DRK: 2 | ||||||
| Location: | ||||||||||||
|
|
Delicious Ordon Goat Cheese | -2 | 5 | 10 | -5 | 0 | 2 | 5 | -2 | 2 | 0 | |
| Element: DRK | Rank: Gold | FIR: 0 | WTR: 0 | LTN: 0 | LIT: 0 | DRK: 3 | ||||||
| Location: Twilight Map - F3, M6 | ||||||||||||
.png)
|
Meat | 0 | -1 | 2 | 0 | 0 | 0 | 0 | 2 | 2 | 0 | |
| Element: FIR | Rank: Bronze | FIR: 1 | WTR: 0 | LTN: 0 | LIT: 0 | DRK: 0 | ||||||
| Location: | ||||||||||||
|
|
Tasty Meat | 0 | 0 | 5 | -2 | 2 | 0 | 0 | 5 | 2 | 0 | |
| Element: FIR | Rank: Silver | FIR: 2 | WTR: 0 | LTN: 0 | LIT: 0 | DRK: 0 | ||||||
| Location: | ||||||||||||
|
|
Delicious Meat | 0 | 2 | 10 | -5 | 2 | 0 | -2 | 5 | 5 | -2 | |
| Element: FIR | Rank: Gold | FIR: 3 | WTR: 0 | LTN: 0 | LIT: 0 | DRK: 0 | ||||||
| Location: Termina Map - F5, F6 | ||||||||||||
.png)
|
Gratitude Crystal (Fire) | 5 | 5 | 5 | 5 | 5 | 5 | 5 | 5 | 5 | 5 | |
| Element: FIR | Rank: Silver | FIR: 2 | WTR: 0 | LTN: 0 | LIT: 0 | DRK: 0 | ||||||
| Location: | ||||||||||||
|
|
Gratitude Crystal (Fire) | 10 | 10 | 10 | 10 | 10 | 10 | 10 | 10 | 10 | 10 | |
| Element: FIR | Rank: Gold | FIR: 3 | WTR: 0 | LTN: 0 | LIT: 0 | DRK: 0 | ||||||
| Location: | ||||||||||||
.png)
|
Gratitude Crystal (Water) | 5 | 5 | 5 | 5 | 5 | 5 | 5 | 5 | 5 | 5 | |
| Element: WTR | Rank: Silver | FIR: 0 | WTR: 2 | LTN: 0 | LIT: 0 | DRK: 0 | ||||||
| Location: | ||||||||||||
|
|
Gratitude Crystal (Water) | 10 | 10 | 10 | 10 | 10 | 10 | 10 | 10 | 10 | 10 | |
| Element: WTR | Rank: Gold | FIR: 0 | WTR: 3 | LTN: 0 | LIT: 0 | DRK: 0 | ||||||
| Location: | ||||||||||||
.png)
|
Gratitude Crystal (Lightning) | 5 | 5 | 5 | 5 | 5 | 5 | 5 | 5 | 5 | 5 | |
| Element: LTN | Rank: Silver | FIR: 0 | WTR: 0 | LTN: 2 | LIT: 0 | DRK: 0 | ||||||
| Location: | ||||||||||||
|
|
Gratitude Crystal (Lightning) | 10 | 10 | 10 | 10 | 10 | 10 | 10 | 10 | 10 | 10 | |
| Element: LTN | Rank: Gold | FIR: 0 | WTR: 0 | LTN: 3 | LIT: 0 | DRK: 0 | ||||||
| Location: | ||||||||||||
.png)
|
Gratitude Crystal (Light) | 5 | 5 | 5 | 5 | 5 | 5 | 5 | 5 | 5 | 5 | |
| Element: LIT | Rank: Silver | FIR: 0 | WTR: 0 | LTN: 0 | LIT: 2 | DRK: 0 | ||||||
| Location: | ||||||||||||
|
|
Gratitude Crystal (Light) | 10 | 10 | 10 | 10 | 10 | 10 | 10 | 10 | 10 | 10 | |
| Element: LIT | Rank: Gold | FIR: 0 | WTR: 0 | LTN: 0 | LIT: 3 | DRK: 0 | ||||||
| Location: | ||||||||||||
.png)
|
Gratitude Crystal (Dark) | 5 | 5 | 5 | 5 | 5 | 5 | 5 | 5 | 5 | 5 | |
| Element: DRK | Rank: Silver | FIR: 0 | WTR: 0 | LTN: 0 | LIT: 0 | DRK: 2 | ||||||
| Location: | ||||||||||||
|
|
Gratitude Crystal (Dark) | 10 | 10 | 10 | 10 | 10 | 10 | 10 | 10 | 10 | 10 | |
| Element: DRK | Rank: Gold | FIR: 0 | WTR: 0 | LTN: 0 | LIT: 0 | DRK: 3 | ||||||
| Location: | ||||||||||||
| Information | SPK | RLX | VAL | DIZ | FRN | ASP | RES | SHR | EAG | SMI | ||
|---|---|---|---|---|---|---|---|---|---|---|---|---|
.png)
|
Lon Lon Milk | 2 | 0 | -1 | 0 | 0 | 0 | 5 | 0 | 2 | 0 | |
| Element: LIT | Rank: Bronze | FIR: 0 | WTR: 0 | LTN: 0 | LIT: 1 | DRK: 0 | ||||||
| Location: | ||||||||||||
|
|
Tasty Lon Lon Milk | 2 | 0 | 0 | 0 | 2 | 0 | 5 | -2 | 5 | 0 | |
| Element: LIT | Rank: Silver | FIR: 0 | WTR: 0 | LTN: 0 | LIT: 2 | DRK: 0 | ||||||
| Location: | ||||||||||||
|
|
Delicious Lon Lon Milk | 5 | -2 | 2 | 0 | 2 | 0 | 10 | -5 | 5 | -2 | |
| Element: LIT | Rank: Gold | FIR: 0 | WTR: 0 | LTN: 0 | LIT: 3 | DRK: 0 | ||||||
| Location: Adventure Map - E2, P7 | ||||||||||||
.png)
|
Pumpkin Soup | 0 | 0 | 0 | -1 | 2 | 0 | 2 | 0 | 2 | 0 | |
| Element: FIR | Rank: Bronze | FIR: 1 | WTR: 0 | LTN: 0 | LIT: 0 | DRK: 0 | ||||||
| Location: | ||||||||||||
|
|
Tasty Pumpkin Soup | 2 | 0 | 0 | 0 | 2 | 0 | 5 | -2 | 5 | 0 | |
| Element: FIR | Rank: Silver | FIR: 2 | WTR: 0 | LTN: 0 | LIT: 0 | DRK: 0 | ||||||
| Location: | ||||||||||||
|
|
Delicious Pumpkin Soup | 2 | 0 | 0 | 2 | 5 | -2 | 10 | -5 | 5 | -2 | |
| Element: FIR | Rank: Gold | FIR: 3 | WTR: 0 | LTN: 0 | LIT: 0 | DRK: 0 | ||||||
| Location: Master Quest Map - F5, O7 | ||||||||||||
.png)
|
Sacred Water | 2 | 0 | 0 | -1 | 2 | 0 | 2 | 0 | 0 | 0 | |
| Element: WTR | Rank: Bronze | FIR: 0 | WTR: 1 | LTN: 0 | LIT: 0 | DRK: 0 | ||||||
| Location: | ||||||||||||
|
|
Tasty Sacred Water | 5 | -2 | 0 | 0 | 5 | 0 | 2 | 0 | 2 | 0 | |
| Element: WTR | Rank: Silver | FIR: 0 | WTR: 2 | LTN: 0 | LIT: 0 | DRK: 0 | ||||||
| Location: | ||||||||||||
|
|
Delicious Sacred Water | 10 | -5 | 0 | 2 | 5 | -2 | 5 | -2 | 2 | 0 | |
| Element: WTR | Rank: Gold | FIR: 0 | WTR: 3 | LTN: 0 | LIT: 0 | DRK: 0 | ||||||
| Location: Master Quest Map - C5, N2 | ||||||||||||
.png)
|
Elixir Soup | 0 | 0 | -1 | 0 | 2 | 0 | 2 | 0 | 0 | 2 | |
| Element: FIR | Rank: Bronze | FIR: 1 | WTR: 0 | LTN: 0 | LIT: 0 | DRK: 0 | ||||||
| Location: | ||||||||||||
|
|
Tasty Elixir Soup | 2 | 0 | 0 | 0 | 2 | 0 | 5 | 0 | -2 | 5 | |
| Element: FIR | Rank: Silver | FIR: 2 | WTR: 0 | LTN: 0 | LIT: 0 | DRK: 0 | ||||||
| Location: | ||||||||||||
|
|
Delicious Elixir Soup | 2 | 0 | 2 | 0 | 5 | -2 | 5 | -2 | -5 | 10 | |
| Element: FIR | Rank: Gold | FIR: 3 | WTR: 0 | LTN: 0 | LIT: 0 | DRK: 0 | ||||||
| Location: Great Sea Map - A1, C7 | ||||||||||||
.png)
|
Great Fairy's Tears | 0 | 2 | 0 | 0 | 0 | 2 | 2 | 0 | -1 | 0 | |
| Element: LIT | Rank: Bronze | FIR: 0 | WTR: 0 | LTN: 0 | LIT: 1 | DRK: 0 | ||||||
| Location: | ||||||||||||
|
|
Tasty Great Fairy's Tears | 0 | 5 | 2 | 0 | -2 | 5 | 2 | 0 | 0 | 0 | |
| Element: LIT | Rank: Silver | FIR: 0 | WTR: 0 | LTN: 0 | LIT: 2 | DRK: 0 | ||||||
| Location: | ||||||||||||
|
|
Delicious Great Fairy's Tears | -2 | 5 | 2 | 0 | -5 | 10 | 5 | -2 | 2 | 0 | |
| Element: LIT | Rank: Gold | FIR: 0 | WTR: 0 | LTN: 0 | LIT: 3 | DRK: 0 | ||||||
| Location: Twilight Map - G8, L1 | ||||||||||||
.png)
|
Chateau Romani | 0 | 0 | 2 | 0 | 2 | 0 | 0 | 2 | -1 | 0 | |
| Element: DRK | Rank: Bronze | FIR: 0 | WTR: 0 | LTN: 0 | LIT: 0 | DRK: 1 | ||||||
| Location: | ||||||||||||
|
|
Tasty Chateau Romani | 0 | 2 | 5 | -2 | 5 | 0 | 0 | 2 | 0 | 0 | |
| Element: DRK | Rank: Silver | FIR: 0 | WTR: 0 | LTN: 0 | LIT: 0 | DRK: 2 | ||||||
| Location: | ||||||||||||
|
|
Delicious Chateau Romani | 0 | 2 | 10 | -5 | 5 | -2 | -2 | 5 | 2 | 0 | |
| Element: DRK | Rank: Gold | FIR: 0 | WTR: 0 | LTN: 0 | LIT: 0 | DRK: 3 | ||||||
| Location: Termina Map - G6, J4 | ||||||||||||
.png)
|
Bottled Water | 0 | 2 | -1 | 0 | 2 | 0 | 0 | 2 | 0 | 0 | |
| Element: WTR | Rank: Bronze | FIR: 0 | WTR: 1 | LTN: 0 | LIT: 0 | DRK: 0 | ||||||
| Location: | ||||||||||||
|
|
Tasty Bottled Water | 0 | 5 | 0 | 0 | 5 | -2 | 0 | 2 | 2 | 0 | |
| Element: WTR | Rank: Silver | FIR: 0 | WTR: 2 | LTN: 0 | LIT: 0 | DRK: 0 | ||||||
| Location: | ||||||||||||
|
|
Delicious Bottled Water | -2 | 5 | 2 | 0 | 10 | -5 | -2 | 5 | 2 | 0 | |
| Element: WTR | Rank: Gold | FIR: 0 | WTR: 3 | LTN: 0 | LIT: 0 | DRK: 0 | ||||||
| Location: Termina Map - E4, K7 | ||||||||||||
.png)
|
Hot Spring Water | 0 | 2 | 0 | 0 | -1 | 0 | 0 | 2 | 2 | 0 | |
| Element: FIR | Rank: Bronze | FIR: 1 | WTR: 0 | LTN: 0 | LIT: 0 | DRK: 0 | ||||||
| Location: | ||||||||||||
|
|
Tasty Hot Spring Water | -2 | 5 | 2 | 0 | 0 | 0 | 0 | 2 | 5 | 0 | |
| Element: FIR | Rank: Silver | FIR: 2 | WTR: 0 | LTN: 0 | LIT: 0 | DRK: 0 | ||||||
| Location: | ||||||||||||
|
|
Delicious Hot Spring Water | -5 | 10 | 2 | 0 | 2 | 0 | -2 | 5 | 5 | -2 | |
| Element: FIR | Rank: Gold | FIR: 3 | WTR: 0 | LTN: 0 | LIT: 0 | DRK: 0 | ||||||
| Location: Termina Map - G8, I1 | ||||||||||||
| Information | SPK | RLX | VAL | DIZ | FRN | ASP | RES | SHR | EAG | SMI | ||
|---|---|---|---|---|---|---|---|---|---|---|---|---|
.png)
|
Odd Mushroom | 0 | 0 | 2 | 0 | 2 | 0 | 2 | 0 | -1 | 0 | |
| Element: DRK | Rank: Bronze | FIR: 0 | WTR: 0 | LTN: 0 | LIT: 0 | DRK: 1 | ||||||
| Location: | ||||||||||||
|
|
Tasty Odd Mushroom | 2 | 0 | 5 | -2 | 2 | 0 | 5 | 0 | 0 | 0 | |
| Element: DRK | Rank: Silver | FIR: 0 | WTR: 0 | LTN: 0 | LIT: 0 | DRK: 2 | ||||||
| Location: | ||||||||||||
|
|
Delicious Odd Mushroom | 2 | 0 | 10 | -5 | 5 | -2 | 5 | 2 | 0 | 0 | |
| Element: DRK | Rank: Gold | FIR: 0 | WTR: 0 | LTN: 0 | LIT: 0 | DRK: 3 | ||||||
| Location: Adventure Map - A4, G5 | ||||||||||||
.png)
|
Deku Nut | -1 | 0 | 2 | 0 | 2 | 0 | 2 | 0 | 0 | 0 | |
| Element: LTN | Rank: Bronze | FIR: 0 | WTR: 0 | LTN: 1 | LIT: 0 | DRK: 0 | ||||||
| Location: | ||||||||||||
|
|
Tasty Deku Nut | 0 | 0 | 5 | 0 | 5 | -2 | 2 | 0 | 2 | 0 | |
| Element: LTN | Rank: Silver | FIR: 0 | WTR: 0 | LTN: 2 | LIT: 0 | DRK: 0 | ||||||
| Location: | ||||||||||||
|
|
Delicious Deku Nut | 2 | 0 | 5 | -2 | 10 | -5 | 5 | -2 | 2 | 0 | |
| Element: LTN | Rank: Gold | FIR: 0 | WTR: 0 | LTN: 3 | LIT: 0 | DRK: 0 | ||||||
| Location: Adventure Map - I8, N1 | ||||||||||||
.png)
|
Magic Beans | 2 | 0 | -1 | 0 | 2 | 0 | 0 | 0 | 2 | 0 | |
| Element: WTR | Rank: Bronze | FIR: 0 | WTR: 1 | LTN: 0 | LIT: 0 | DRK: 0 | ||||||
| Location: | ||||||||||||
|
|
Tasty Magic Beans | 5 | 0 | 0 | 0 | 5 | -2 | 2 | 0 | 2 | 0 | |
| Element: WTR | Rank: Silver | FIR: 0 | WTR: 2 | LTN: 0 | LIT: 0 | DRK: 0 | ||||||
| Location: | ||||||||||||
|
|
Delicious Magic Beans | 5 | -2 | 2 | 0 | 10 | -5 | 2 | 0 | 5 | -2 | |
| Element: WTR | Rank: Gold | FIR: 0 | WTR: 3 | LTN: 0 | LIT: 0 | DRK: 0 | ||||||
| Location: Adventure Map - A2, F3, L8 | ||||||||||||
.png)
|
Life Tree Fruit | 0 | 0 | 0 | -1 | 2 | 0 | 2 | 0 | 2 | 0 | |
| Element: LIT | Rank: Bronze | FIR: 0 | WTR: 0 | LTN: 0 | LIT: 1 | DRK: 0 | ||||||
| Location: | ||||||||||||
|
|
Tasty Life Tree Fruit | 5 | -2 | 0 | 0 | 5 | 0 | 2 | 0 | 2 | 0 | |
| Element: LIT | Rank: Silver | FIR: 0 | WTR: 0 | LTN: 0 | LIT: 2 | DRK: 0 | ||||||
| Location: | ||||||||||||
|
|
Delicious Life Tree Fruit | 2 | 0 | 0 | 2 | 10 | -5 | 5 | -2 | 5 | -2 | |
| Element: LIT | Rank: Gold | FIR: 0 | WTR: 0 | LTN: 0 | LIT: 3 | DRK: 0 | ||||||
| Location: Master Quest Map - E3, M4 | ||||||||||||
.png)
|
Light Fruit | 2 | 0 | 0 | -1 | 2 | 0 | 0 | 0 | 2 | 0 | |
| Element: LIT | Rank: Bronze | FIR: 0 | WTR: 0 | LTN: 0 | LIT: 1 | DRK: 0 | ||||||
| Location: | ||||||||||||
|
|
Tasty Light Fruit | 5 | -2 | 0 | 0 | 5 | 0 | 2 | 0 | 2 | 0 | |
| Element: LIT | Rank: Silver | FIR: 0 | WTR: 0 | LTN: 0 | LIT: 2 | DRK: 0 | ||||||
| Location: | ||||||||||||
|
|
Delicious Light Fruit | 10 | -5 | 0 | 2 | 5 | -2 | 2 | 0 | 5 | -2 | |
| Element: LIT | Rank: Gold | FIR: 0 | WTR: 0 | LTN: 0 | LIT: 3 | DRK: 0 | ||||||
| Location: Master Quest Map - F1, L2 | ||||||||||||
.png)
|
Stamina Fruit | 2 | 0 | 0 | 0 | -1 | 0 | 2 | 0 | 2 | 0 | |
| Element: FIR | Rank: Bronze | FIR: 1 | WTR: 0 | LTN: 0 | LIT: 0 | DRK: 0 | ||||||
| Location: | ||||||||||||
|
|
Tasty Stamina Fruit | 5 | 0 | 0 | 2 | 0 | 0 | 5 | -2 | 2 | 0 | |
| Element: FIR | Rank: Silver | FIR: 2 | WTR: 0 | LTN: 0 | LIT: 0 | DRK: 0 | ||||||
| Location: | ||||||||||||
|
|
Delicious Stamina Fruit | 5 | -2 | 0 | 2 | 2 | 0 | 10 | -5 | 5 | -2 | |
| Element: FIR | Rank: Gold | FIR: 3 | WTR: 0 | LTN: 0 | LIT: 0 | DRK: 0 | ||||||
| Location: Master Quest Map - E6, I3 | ||||||||||||
.png)
|
Water Fruit | -1 | 0 | 0 | 2 | 2 | 0 | 2 | 0 | 0 | 0 | |
| Element: WTR | Rank: Bronze | FIR: 0 | WTR: 1 | LTN: 0 | LIT: 0 | DRK: 0 | ||||||
| Location: | ||||||||||||
|
|
Tasty Water Fruit | 0 | 0 | 0 | 5 | 2 | 0 | 5 | -2 | 2 | 0 | |
| Element: WTR | Rank: Silver | FIR: 0 | WTR: 2 | LTN: 0 | LIT: 0 | DRK: 0 | ||||||
| Location: | ||||||||||||
|
|
Delicious Water Fruit | 2 | 0 | -2 | 5 | 5 | -2 | 10 | -5 | 2 | 0 | |
| Element: WTR | Rank: Gold | FIR: 0 | WTR: 3 | LTN: 0 | LIT: 0 | DRK: 0 | ||||||
| Location: Master Quest Map - G5, K8 | ||||||||||||
.png)
|
Hyoi Pear | -1 | 0 | 2 | 0 | 2 | 0 | 0 | 0 | 0 | 2 | |
| Element: LTN | Rank: Bronze | FIR: 0 | WTR: 0 | LTN: 1 | LIT: 0 | DRK: 0 | ||||||
| Location: | ||||||||||||
|
|
Tasty Hyoi Pear | 0 | 0 | 5 | 0 | 2 | 0 | 2 | 0 | -2 | 5 | |
| Element: LTN | Rank: Silver | FIR: 0 | WTR: 0 | LTN: 2 | LIT: 0 | DRK: 0 | ||||||
| Location: | ||||||||||||
|
|
Delicious Hyoi Pear | 2 | 0 | 5 | -2 | 5 | -2 | 2 | 0 | -5 | 10 | |
| Element: LTN | Rank: Gold | FIR: 0 | WTR: 0 | LTN: 3 | LIT: 0 | DRK: 0 | ||||||
| Location: Great Sea Map - A5, N6 | ||||||||||||
.png)
|
Carrot | -1 | 0 | 2 | 0 | 0 | 0 | 0 | 2 | 0 | 2 | |
| Element: LTN | Rank: Bronze | FIR: 0 | WTR: 0 | LTN: 1 | LIT: 0 | DRK: 0 | ||||||
| Location: | ||||||||||||
|
|
Tasty Carrot | 0 | 0 | 2 | 0 | 2 | 0 | -2 | 5 | 0 | 5 | |
| Element: LTN | Rank: Silver | FIR: 0 | WTR: 0 | LTN: 2 | LIT: 0 | DRK: 0 | ||||||
| Location: | ||||||||||||
|
|
Delicious Carrot | 2 | 0 | 5 | -2 | 2 | 0 | -5 | 10 | -2 | 5 | |
| Element: LTN | Rank: Gold | FIR: 0 | WTR: 0 | LTN: 3 | LIT: 0 | DRK: 0 | ||||||
| Location: Great Sea Map - D2, H6 | ||||||||||||
.png)
|
Ember Seeds | 0 | 0 | 2 | 0 | -1 | 0 | 0 | 2 | 2 | 0 | |
| Element: FIR | Rank: Bronze | FIR: 1 | WTR: 0 | LTN: 0 | LIT: 0 | DRK: 0 | ||||||
| Location: | ||||||||||||
|
|
Tasty Ember Seeds | 0 | 2 | 5 | -2 | 0 | 0 | 0 | 2 | 5 | 0 | |
| Element: FIR | Rank: Silver | FIR: 2 | WTR: 0 | LTN: 0 | LIT: 0 | DRK: 0 | ||||||
| Location: | ||||||||||||
|
|
Delicious Ember Seeds | 0 | 2 | 10 | -5 | 2 | 0 | -2 | 5 | 5 | -2 | |
| Element: FIR | Rank: Gold | FIR: 3 | WTR: 0 | LTN: 0 | LIT: 0 | DRK: 0 | ||||||
| Location: Termina Map - F3, K7 | ||||||||||||
.png)
|
Scent Seeds | 0 | 0 | 2 | 0 | 2 | 0 | 0 | 2 | -1 | 0 | |
| Element: DRK | Rank: Bronze | FIR: 0 | WTR: 0 | LTN: 0 | LIT: 0 | DRK: 1 | ||||||
| Location: | ||||||||||||
|
|
Tasty Scent Seeds | 0 | 2 | 5 | 0 | 2 | 0 | -2 | 5 | 0 | 0 | |
| Element: DRK | Rank: Silver | FIR: 0 | WTR: 0 | LTN: 0 | LIT: 0 | DRK: 2 | ||||||
| Location: | ||||||||||||
|
|
Delicious Scent Seeds | 0 | 2 | 5 | -2 | 5 | -2 | -5 | 10 | 2 | 0 | |
| Element: DRK | Rank: Gold | FIR: 0 | WTR: 0 | LTN: 0 | LIT: 0 | DRK: 3 | ||||||
| Location: Termina Map - I3, M8 | ||||||||||||
.png)
|
Pegasus Seeds | 0 | -1 | 0 | 0 | 2 | 0 | 0 | 2 | 2 | 0 | |
| Element: LTN | Rank: Bronze | FIR: 0 | WTR: 0 | LTN: 1 | LIT: 0 | DRK: 0 | ||||||
| Location: | ||||||||||||
|
|
Tasty Pegasus Seeds | 0 | 0 | 2 | 0 | 2 | 0 | -2 | 5 | 5 | 0 | |
| Element: LTN | Rank: Silver | FIR: 0 | WTR: 0 | LTN: 2 | LIT: 0 | DRK: 0 | ||||||
| Location: | ||||||||||||
|
|
Delicious Pegasus Seeds | 0 | 2 | 2 | 0 | 5 | -2 | -5 | 10 | 5 | -2 | |
| Element: LTN | Rank: Gold | FIR: 0 | WTR: 0 | LTN: 3 | LIT: 0 | DRK: 0 | ||||||
| Location: Termina Map - H5, J8 | ||||||||||||
.png)
|
Gale Seeds | 0 | 2 | 2 | 0 | 2 | 0 | 0 | 0 | -1 | 0 | |
| Element: WTR | Rank: Bronze | FIR: 0 | WTR: 1 | LTN: 0 | LIT: 0 | DRK: 0 | ||||||
| Location: | ||||||||||||
|
|
Tasty Gale Seeds | 0 | 2 | 5 | -2 | 5 | 0 | 0 | 2 | 0 | 0 | |
| Element: WTR | Rank: Silver | FIR: 0 | WTR: 2 | LTN: 0 | LIT: 0 | DRK: 0 | ||||||
| Location: | ||||||||||||
|
|
Delicious Gale Seeds | -2 | 5 | 10 | -5 | 5 | -2 | 0 | 2 | 2 | 0 | |
| Element: WTR | Rank: Gold | FIR: 0 | WTR: 3 | LTN: 0 | LIT: 0 | DRK: 0 | ||||||
| Location: Termina Map - L2, N7 | ||||||||||||
.png)
|
Mystery Seeds | 0 | 2 | 2 | 0 | 2 | 0 | 0 | -1 | 0 | 0 | |
| Element: LIT | Rank: Bronze | FIR: 0 | WTR: 0 | LTN: 0 | LIT: 1 | DRK: 0 | ||||||
| Location: | ||||||||||||
|
|
Tasty Mystery Seeds | 0 | 5 | 2 | 0 | 5 | -2 | 0 | 0 | 2 | 0 | |
| Element: LIT | Rank: Silver | FIR: 0 | WTR: 0 | LTN: 0 | LIT: 2 | DRK: 0 | ||||||
| Location: | ||||||||||||
|
|
Delicious Mystery Seeds | -2 | 5 | 5 | -2 | 10 | -5 | 0 | 2 | 2 | 0 | |
| Element: LIT | Rank: Gold | FIR: 0 | WTR: 0 | LTN: 0 | LIT: 3 | DRK: 0 | ||||||
| Location: Termina Map - G2, P4 | ||||||||||||
.png)
|
Pumpkin | -1 | 0 | 0 | 0 | 2 | 0 | 2 | 0 | 2 | 0 | |
| Element: LIT | Rank: Bronze | FIR: 0 | WTR: 0 | LTN: 0 | LIT: 1 | DRK: 0 | ||||||
| Location: | ||||||||||||
|
|
Tasty Pumpkin | 0 | 0 | 0 | 2 | 2 | 0 | 2 | 0 | 5 | -2 | |
| Element: LIT | Rank: Silver | FIR: 0 | WTR: 0 | LTN: 0 | LIT: 2 | DRK: 0 | ||||||
| Location: | ||||||||||||
|
|
Delicious Pumpkin | 2 | 0 | 0 | 2 | 5 | -2 | 5 | -2 | 10 | -5 | |
| Element: LIT | Rank: Gold | FIR: 0 | WTR: 0 | LTN: 0 | LIT: 3 | DRK: 0 | ||||||
| Location: Master Quest Map - I7, N5 | ||||||||||||
| Information | SPK | RLX | VAL | DIZ | FRN | ASP | RES | SHR | EAG | SMI | ||
|---|---|---|---|---|---|---|---|---|---|---|---|---|
.png)
|
Greengill | 0 | 0 | -1 | 0 | 0 | 2 | 2 | 0 | 2 | 0 | |
| Element: WTR | Rank: Bronze | FIR: 0 | WTR: 1 | LTN: 0 | LIT: 0 | DRK: 0 | ||||||
| Location: | ||||||||||||
|
|
Tasty Greengill | 0 | 2 | 0 | 0 | -2 | 5 | 2 | 0 | 5 | 0 | |
| Element: WTR | Rank: Silver | FIR: 0 | WTR: 2 | LTN: 0 | LIT: 0 | DRK: 0 | ||||||
| Location: | ||||||||||||
|
|
Delicious Greengill | 0 | 2 | 2 | 0 | -5 | 10 | 5 | -2 | 5 | -2 | |
| Element: WTR | Rank: Gold | FIR: 0 | WTR: 3 | LTN: 0 | LIT: 0 | DRK: 0 | ||||||
| Location: Twilight Map - E5, I5 | ||||||||||||
.png)
|
Ordon Catfish | 0 | 2 | 2 | 0 | 0 | 2 | -1 | 0 | 0 | 0 | |
| Element: WTR | Rank: Bronze | FIR: 0 | WTR: 1 | LTN: 0 | LIT: 0 | DRK: 0 | ||||||
| Location: | ||||||||||||
|
|
Tasty Ordon Catfish | -2 | 5 | 5 | 0 | 0 | 2 | 0 | 0 | 2 | 0 | |
| Element: WTR | Rank: Silver | FIR: 0 | WTR: 2 | LTN: 0 | LIT: 0 | DRK: 0 | ||||||
| Location: | ||||||||||||
|
|
Delicious Ordon Catfish | -5 | 10 | 5 | -2 | -2 | 5 | 2 | 0 | 2 | 0 | |
| Element: WTR | Rank: Gold | FIR: 0 | WTR: 3 | LTN: 0 | LIT: 0 | DRK: 0 | ||||||
| Location: Twilight Map - G4, N5 | ||||||||||||
.png)
|
Hyrule Bass | 0 | 2 | 2 | 0 | 0 | 0 | 2 | 0 | -1 | 0 | |
| Element: WTR | Rank: Bronze | FIR: 0 | WTR: 1 | LTN: 0 | LIT: 0 | DRK: 0 | ||||||
| Location: | ||||||||||||
|
|
Tasty Hyrule Bass | -2 | 5 | 2 | 0 | 0 | 2 | 5 | 0 | 0 | 0 | |
| Element: WTR | Rank: Silver | FIR: 0 | WTR: 2 | LTN: 0 | LIT: 0 | DRK: 0 | ||||||
| Location: | ||||||||||||
|
|
Delicious Hyrule Bass | -5 | 10 | 5 | -2 | 0 | 2 | 5 | -2 | 2 | 0 | |
| Element: WTR | Rank: Gold | FIR: 0 | WTR: 3 | LTN: 0 | LIT: 0 | DRK: 0 | ||||||
| Location: Twilight Map - C3, I4 | ||||||||||||
.png)
|
Hylian Pike | 0 | 2 | 0 | 0 | 0 | -1 | 2 | 0 | 2 | 0 | |
| Element: WTR | Rank: Bronze | FIR: 0 | WTR: 1 | LTN: 0 | LIT: 0 | DRK: 0 | ||||||
| Location: | ||||||||||||
|
|
Tasty Hylian Pike | 0 | 2 | 2 | 0 | 0 | 0 | 5 | -2 | 5 | 0 | |
| Element: WTR | Rank: Silver | FIR: 0 | WTR: 2 | LTN: 0 | LIT: 0 | DRK: 0 | ||||||
| Location: | ||||||||||||
|
|
Delicious Hylian Pike | -2 | 5 | 2 | 0 | 0 | 2 | 10 | -5 | 5 | -2 | |
| Element: WTR | Rank: Gold | FIR: 0 | WTR: 3 | LTN: 0 | LIT: 0 | DRK: 0 | ||||||
| Location: Twilight Map - C2, D1 | ||||||||||||
.png)
|
Reekfish | 0 | 2 | 2 | 0 | 0 | -1 | 2 | 0 | 0 | 0 | |
| Element: WTR | Rank: Bronze | FIR: 0 | WTR: 1 | LTN: 0 | LIT: 0 | DRK: 0 | ||||||
| Location: | ||||||||||||
|
|
Tasty Reekfish | 0 | 2 | 5 | -2 | 0 | 0 | 5 | 0 | 2 | 0 | |
| Element: WTR | Rank: Silver | FIR: 0 | WTR: 2 | LTN: 0 | LIT: 0 | DRK: 0 | ||||||
| Location: | ||||||||||||
|
|
Delicious Reekfish | -2 | 5 | 10 | -5 | 0 | 2 | 5 | -2 | 2 | 0 | |
| Element: WTR | Rank: Gold | FIR: 0 | WTR: 3 | LTN: 0 | LIT: 0 | DRK: 0 | ||||||
| Location: Twilight Map - E8, I7 | ||||||||||||
.png)
|
Hylian Loach | 0 | 2 | -1 | 0 | 0 | 2 | 0 | 0 | 2 | 0 | |
| Element: WTR | Rank: Bronze | FIR: 0 | WTR: 1 | LTN: 0 | LIT: 0 | DRK: 0 | ||||||
| Location: | ||||||||||||
|
|
Tasty Hylian Loach | 0 | 2 | 0 | 0 | 0 | 5 | 2 | 0 | 5 | -2 | |
| Element: WTR | Rank: Silver | FIR: 0 | WTR: 2 | LTN: 0 | LIT: 0 | DRK: 0 | ||||||
| Location: | ||||||||||||
|
|
Delicious Hylian Loach | -2 | 5 | 2 | 0 | -2 | 5 | 2 | 0 | 10 | -5 | |
| Element: WTR | Rank: Gold | FIR: 0 | WTR: 3 | LTN: 0 | LIT: 0 | DRK: 0 | ||||||
| Location: Twilight Map - H4, H8 | ||||||||||||
| Information | SPK | RLX | VAL | DIZ | FRN | ASP | RES | SHR | EAG | SMI | ||
|---|---|---|---|---|---|---|---|---|---|---|---|---|
.png)
|
Mushroom Spores | 2 | 0 | 0 | 2 | 2 | 0 | -1 | 0 | 0 | 0 | |
| Element: LTN | Rank: Bronze | FIR: 0 | WTR: 0 | LTN: 1 | LIT: 0 | DRK: 0 | ||||||
| Location: | ||||||||||||
|
|
Tasty Mushroom Spores | 5 | -2 | 0 | 2 | 5 | 0 | 0 | 0 | 2 | 0 | |
| Element: LTN | Rank: Silver | FIR: 0 | WTR: 0 | LTN: 2 | LIT: 0 | DRK: 0 | ||||||
| Location: | ||||||||||||
|
|
Delicious Mushroom Spores | 10 | -5 | -2 | 5 | 5 | -2 | 2 | 0 | 2 | 0 | |
| Element: LTN | Rank: Gold | FIR: 0 | WTR: 0 | LTN: 3 | LIT: 0 | DRK: 0 | ||||||
| Location: Master Quest Map - B4, H4 | ||||||||||||
.png)
|
Skullfish | 0 | -1 | 2 | 0 | 0 | 2 | 2 | 0 | 0 | 0 | |
| Element: DRK | Rank: Bronze | FIR: 0 | WTR: 0 | LTN: 0 | LIT: 0 | DRK: 1 | ||||||
| Location: | ||||||||||||
|
|
Tasty Skullfish | 0 | 0 | 5 | -2 | 0 | 2 | 5 | 0 | 2 | 0 | |
| Element: DRK | Rank: Silver | FIR: 0 | WTR: 0 | LTN: 0 | LIT: 0 | DRK: 2 | ||||||
| Location: | ||||||||||||
|
|
Delicious Skullfish | 0 | 2 | 10 | -5 | -2 | 5 | 5 | -2 | 2 | 0 | |
| Element: DRK | Rank: Gold | FIR: 0 | WTR: 0 | LTN: 0 | LIT: 0 | DRK: 3 | ||||||
| Location: Twilight Map - D7, E2 | ||||||||||||
.png)
|
Bombfish | 0 | -1 | 2 | 0 | 0 | 0 | 2 | 0 | 5 | 0 | |
| Element: DRK | Rank: Bronze | FIR: 0 | WTR: 0 | LTN: 0 | LIT: 0 | DRK: 1 | ||||||
| Location: | ||||||||||||
|
|
Tasty Bombfish | 0 | 0 | 5 | 0 | 0 | 2 | 2 | 0 | 5 | -2 | |
| Element: DRK | Rank: Silver | FIR: 0 | WTR: 0 | LTN: 0 | LIT: 0 | DRK: 2 | ||||||
| Location: | ||||||||||||
|
|
Delicious Bombfish | 0 | 2 | 5 | -2 | 0 | 2 | 5 | -2 | 10 | -5 | |
| Element: DRK | Rank: Gold | FIR: 0 | WTR: 0 | LTN: 0 | LIT: 0 | DRK: 3 | ||||||
| Location: Twilight Map - F6, G1 | ||||||||||||
.png)
|
Chu Jelly | 0 | 2 | 2 | 0 | 0 | -1 | 2 | 0 | 0 | 0 | |
| Element: LTN | Rank: Bronze | FIR: 0 | WTR: 0 | LTN: 1 | LIT: 0 | DRK: 0 | ||||||
| Location: | ||||||||||||
.png)
|
Tasty Chu Jelly | 0 | 5 | 2 | 0 | 0 | 0 | 5 | -2 | 2 | 0 | |
| Element: LTN | Rank: Silver | FIR: 0 | WTR: 0 | LTN: 2 | LIT: 0 | DRK: 0 | ||||||
| Location: | ||||||||||||
.png)
|
Delicious Chu Jelly | -2 | 5 | 5 | -2 | 0 | 2 | 10 | -5 | 2 | 0 | |
| Element: LTN | Rank: Gold | FIR: 0 | WTR: 0 | LTN: 3 | LIT: 0 | DRK: 0 | ||||||
| Location: Twilight Map - J8, K3 | ||||||||||||
.png)
|
Bee Larvae | 0 | 0 | 2 | 0 | 0 | -1 | 2 | 0 | 2 | 0 | |
| Element: LTN | Rank: Bronze | FIR: 0 | WTR: 0 | LTN: 1 | LIT: 0 | DRK: 0 | ||||||
| Location: | ||||||||||||
|
|
Tasty Bee Larvae | 0 | 2 | 5 | 0 | 0 | 0 | 2 | 0 | 5 | -2 | |
| Element: LTN | Rank: Silver | FIR: 0 | WTR: 0 | LTN: 2 | LIT: 0 | DRK: 0 | ||||||
| Location: | ||||||||||||
|
|
Delicious Bee Larvae | 0 | 2 | 5 | -2 | 0 | 2 | 5 | -2 | 10 | -5 | |
| Element: LTN | Rank: Gold | FIR: 0 | WTR: 0 | LTN: 3 | LIT: 0 | DRK: 0 | ||||||
| Location: Twilight Map - D5, H1 | ||||||||||||
.png)
|
Rock Sirloin | 0 | -1 | 2 | 0 | 0 | 0 | 0 | 2 | 2 | 0 | |
| Element: FIR | Rank: Bronze | FIR: 1 | WTR: 0 | LTN: 0 | LIT: 0 | DRK: 0 | ||||||
| Location: | ||||||||||||
|
|
Tasty Rock Sirloin | 0 | 0 | 5 | 0 | 2 | 0 | -2 | 5 | 2 | 0 | |
| Element: FIR | Rank: Silver | FIR: 2 | WTR: 0 | LTN: 0 | LIT: 0 | DRK: 0 | ||||||
| Location: | ||||||||||||
|
|
Delicious Rock Sirloin | 0 | 2 | 5 | -2 | 2 | 0 | -5 | 10 | 5 | -2 | |
| Element: FIR | Rank: Gold | FIR: 3 | WTR: 0 | LTN: 0 | LIT: 0 | DRK: 0 | ||||||
| Location: Termina Map - N1, O3 | ||||||||||||
Wear
Apparel is divided into five categories: tops, bottoms, decorations, headgear, and accessories. Other than providing cosmetic changes, clothes can enhance Fairy Magic or lower its cost. They can be found in treasure chests and may allude to preexisting Zelda characters.
- Attributes
- Tops, Decorations, Accessories - Raises elemental damage caused by Fairy Magic.
- Bottoms, Headwear - Lowers elemental cost of Fairy Magic.
- * Indicates entire outfits that take up both top and bottom slots.
| Fire Elemental Wear | |||
|---|---|---|---|
.png) |
Wind Robe (Red) * | .png) |
Skyloft Shirt (Pink) |
| Obtain: Great Sea Map - C2 | Obtain: Master Quest Map - M2 | ||
.png) |
Skyloft Shawl (Red) | .png) |
Skyloft Apron (Red) |
| Obtain: Master Quest Map - F7 | Obtain: Master Quest Map - L1 | ||
.png) |
Skyloft Shirt (Green) | .png) |
Hero's Clothes (Red) |
| Obtain: Master Quest Map - C8 | Obtain: Twilight Map - F4 | ||
.png) |
Ranch Top (Red) | Royal Tunic (Red) | |
| Obtain: Termina Map - N4 | Obtain: 7-Eleven DLC (3DS) Starter (SWITCH) | ||
.png) |
Prince's Cape | .png) |
Chancellor's Jacket |
| Obtain: Koholint Island Map - H3 | Obtain: Grand Travels Map - D5 | ||
.png) |
Dark Beast Top | Pirate Vest (Red) | |
| Obtain: Lorule Map - L4 | Obtain: Adventure Map - I2 (SWITCH) | ||
| Water Elemental Wear | |||
.png) |
Zora Tunic | .png) |
Pirate Vest (Blue) |
| Obtain: Adventure Map - M3 | Obtain: Adventure Map - I2 (3DS) Starter (SWITCH) | ||
.png) |
Island Dress (Blue) * | .png) |
Skyloft Apron (Blue) |
| Obtain: Adventure Map - O8 | Obtain: Master Quest Map - H4 | ||
.png) |
Outset Shirt | .png) |
Hero's Clothes (Blue) |
| Obtain: Master Quest Map - J2 | Obtain: Twilight Map - B3 | ||
.png) |
Merchant Coat | .png) |
Koholint Dress * |
| Obtain: Wind Waker Map - E4 | Obtain: Koholint Island Map - I6 | ||
.png) |
Captain's Jacket | .png) |
Destiny Top |
| Obtain: Grand Travels Map - P2 | Obtain: Grand Travels Map - N3 | ||
.png) |
Queen's Top | ||
| Obtain: Lorule Map - O7 | |||
| Lightning Elemental Wear | |||
.png) |
Sheikah Shirt | .png) |
Skyloft Shirt (Red) |
| Obtain: Adventure Map - E4 | Obtain: Master Quest Map - E7 | ||
.png) |
Skyloft Shawl (Green) | .png) |
Hero's Clothes (Yellow) |
| Obtain: Master Quest Map - L6 | Obtain: Twilight Map - E3 | ||
.png) |
Magic Top | .png) |
Rito Dress * |
| Obtain: Twilight Map - J4 (3DS) Starter (SWITCH) |
Obtain: Wind Waker Map - M2 | ||
.png) |
Rancher Poncho | .png) |
Dreamer Top |
| Obtain: Wind Waker Map - M7 | Obtain: Koholint Island Map - A1 | ||
.png) |
Egg Dress * | .png) |
Armored Top |
| Obtain: Koholint Island Map - F1 | Obtain: Grand Travels Map - I2 | ||
.png) |
Beautiful Cape | ||
| Obtain: Lorule Map - E4 | |||
| Light Elemental Wear | |||
.png) |
Kokiri Cardigan | .png) |
Royal Tunic (Pink) |
| Obtain: Adventure Map - I5 | Obtain: Adventure Map - K1 | ||
.png) |
Wind Robe (Black) * | .png) |
Island Dress (White) * |
| Obtain: Great Sea Map - G7 | Obtain: Great Sea Map - C7 | ||
.png) |
Skyloft Shirt (Yellow) | .png) |
Skyloft Shirt (White) |
| Obtain: Master Quest Map - A4 | Obtain: Master Quest Map - G5 | ||
.png) |
Skyloft Shawl (Pink) | .png) |
Skyloft Apron (Green) |
| Obtain: Master Quest Map - N2 | Obtain: Master Quest Map - O7 | ||
.png) |
Spirit Dress * | .png) |
Butterfly Blouse (Green) |
| Obtain: Adventure Map - B8 | Obtain: Twilight Map - G4 | ||
.png) |
Hero's Clothes (Green) | .png) |
Ranch Top (Orange) |
| Obtain: Twilight Map - N6 | Obtain: Termina Map - H5 | ||
.png) |
Deku Dress * | .png) |
Happiness Dress * |
| Obtain: Termina Map - G8 | Obtain: Termina Map - O3 | ||
| Twilight Top (White) | Classic Green Tunic * | ||
| Obtain: UK Pre-Order Bonus (3DS) Twilight Map - J4 (SWITCH) |
Obtain: Hyrule 3DS Bonus (3DS) Starter (SWITCH) | ||
| Darkness Elemental Wear | |||
.png) |
Royal Tunic (Purple) | .png) |
Skyloft Shirt (Green) |
| Obtain: Adventure Map - O2 | Obtain: Master Quest Map - J7 | ||
.png) |
Skyloft Shawl (Blue) | .png) |
Skyloft Apron (Purple) |
| Obtain: Master Quest Map - C3 | Obtain: Master Quest Map - P2 | ||
.png) |
Demon Lord Cape (Red) | .png) |
Demon Lord Shirt |
| Obtain: Adventure Map - A8 | Obtain: Master Quest Map - P4 | ||
.png) |
Twilight Top (Black) | .png) |
Hero's Clothes (Purple) |
| Obtain: Twilight Map - D4 | Obtain: Twilight Map - J3 | ||
.png) |
Butterfly Blouse (Black) | .png) |
Forest Top |
| Obtain: Twilight Map - E6 | Obtain: Termina Map - J4 | ||
| Demon Lord Cape (Black) | .png) |
Skull Dress * | |
| Obtain: Famitsu DLC (3DS) Starter (SWITCH) |
Obtain: Wind Waker Map - B7 | ||
.png) |
Usurper Robe | .png) |
Rabbit Robe * |
| Obtain: Wind Waker Map - I5 | Lorule Map - D7 | ||
.png) |
Witch's Dress * | Hero's Clothes (Black) | |
| Obtain: Lorule Map - A1 | Obtain: Adventure Map - A5 (SWITCH) | ||
| Fire Elemental Wear | |||
|---|---|---|---|
.png) |
Skyloft Skirt (Pink) | .png) |
Skyloft Slacks (Red) |
| Obtain: Master Quest Map - M7 | Obtain: Master Quest Map - N3 | ||
.png) |
Ranch Skirt (Blue) | .png) |
Balloon Shorts |
| Obtain: Termina Map - F5 | Obtain: Termina Map - I5 | ||
| Royal Skirt (Red) | .png) |
Prince's Trousers | |
| Obtain: 7-Eleven DLC (3DS) Starter (SWITCH) |
Obtain: Koholint Island Map - J3 | ||
.png) |
Chancellor's Trousers | .png) |
Skyloft Slacks (Yellow) |
| Obtain: Grand Travels Map - A3 | Obtain: Grand Travels Map - J8 | ||
.png) |
Dark Beast Skirt | Pirate Slacks (Black) | |
| Obtain: Lorule Map - N2 | Obtain: Adventure Map N8 (SWITCH) | ||
| Water Elemental Wear | |||
.png) |
Zora Skirt | .png) |
Pirate Slacks (White) |
| Obtain: Adventure Map - J5 | Obtain: Adventure Map - N8 (3DS) Starter (SWITCH) | ||
.png) |
Skyloft Skirt (Blue) | .png) |
Skyloft Slacks (Blue) |
| Obtain: Master Quest Map - E6 | Obtain: Master Quest Map - O6 | ||
.png) |
Captain's Trousers | .png) |
Destiny Skirt |
| Obtain: Grand Travels Map - P6 | Obtain: Grand Travels Map - M1 | ||
.png) |
Queen's Skirt | ||
| Obtain: Lorule Map - M8 | |||
| Lightning Elemental Wear | |||
.png) |
Sheikah Leggings | .png) |
Skyloft Skirt (Yellow) |
| Obtain: Adventure Map - I3 | Obtain: Master Quest Map - K4 | ||
.png) |
Magic Skirt | .png) |
Rancher Skirt |
| Obtain: Twilight Map - L4 (3DS) Starter (SWITCH) |
Obtain: Wind Waker Map - E6 | ||
.png) |
Dreamer Skirt | .png) |
Armored Trousers |
| Obtain: Koholint Island Map - N1 | Obtain: Grand Travels Map - E4 | ||
.png) |
Beautiful Trousers | ||
| Obtain: Lorule Map - D3 | |||
| Light Elemental Wear | |||
.png) |
Kokiri Shorts | .png) |
Royal Skirt (Pink) |
| Obtain: Adventure Map - I7 | Obtain: Adventure Map - C2 | ||
.png) |
Skyloft Slacks (Pink) | .png) |
Butterfly Skirt (Green) |
| Obtain: Master Quest Map - E2 | Obtain: Twilight Map - K1 | ||
.png) |
Hero's Trousers (Tan) | .png) |
Ranch Skirt (Pink) |
| Obtain: Twilight Map - I6 | Obtain: Termina Map - J8 | ||
| Twilight Skirt (White) | |||
| Obtain: UK Pre-Order Bonus (3DS) Twilight Map - L4 (SWITCH) | |||
| Darkness Elemental Wear | |||
.png) |
Royal Skirt (Purple) | .png) |
Skyloft Skirt (Purple) |
| Obtain: Adventure Map - P3 | Obtain: Master Quest Map - P7 | ||
.png) |
Skyloft Slacks (Green) | .png) |
Demon Lord Slacks (White) |
| Obtain: Master Quest Map - J8 | Obtain: Adventure Map - B6 | ||
| File:Twilight Skirt (HWL).png | Twilight Skirt (Black) | .png) |
Butterfly Skirt (Black) |
| Obtain: Twilight Map - F6 | Obtain: Twilight Map - D5 | ||
| Demon Lord Slacks (Black) | .png) |
Usurper Pants | |
| Obtain: Famitsu DLC (3DS) Starter (SWITCH) |
Obtain: Wind Waker Map - L1 | ||
.png) |
Forest Trousers | Hero's Trousers (Black) | |
| Obtain: Grand Travels Map - D7 | Obtain: Master Wind Waker Map L4 (SWITCH) | ||
| Fire Elemental Wear | |||
|---|---|---|---|
.png) |
Swirly Cheeks | .png) |
Goron Facepaint (Brown) |
| Obtain: Great Sea Map - G1 | Obtain: Twilight Map - M5 | ||
.png) |
Musical Aura | ||
| Obtain: Koholint Island Map - N5 | |||
| Water Elemental Wear | |||
.png) |
Sheikah Facepaint (Gray) | .png) |
Pirate Aura |
| Obtain: Adventure Map - A5 (3DS) Starter (SWITCH) |
Obtain: Great Sea Map - N3 | ||
.png) |
Island Aura (Blue & Pink) | .png) |
Korok Aura |
| Obtain: Great Sea Map - E7 | Obtain: Wind Waker Map - K11 | ||
.png) |
Koholint Aura | .png) |
Shell Aura |
| Obtain: Koholint Island Map - J2 | Obtain: Lorule Map - K7 | ||
| Lightning Elemental Wear | |||
.png) |
Sheikah Facepaint (Red) | .png) |
Treasure Aura |
| Obtain: Adventure Map - E6 | Obtain: Great Sea Map - H6 | ||
.png) |
Farore's Aura | .png) |
Goron Facepaint (Orange) |
| Obtain: Great Sea Map - E5 | Obtain: Twilight Map - G8 | ||
.png) |
Star Aura | .png) |
Dreamer Aura |
| Obtain: Wind Waker Map - G5 | Obtain: Koholint Island Map - C2 | ||
.png) |
Beautiful Aura | ||
| Obtain: Lorule Map - H4 | |||
| Light Elemental Wear | |||
.png) |
Wind Aura | .png) |
Island Aura (Yellow & Purple) |
| Obtain: Great Sea Map - L5 | Obtain: Great Sea Map - A5 | ||
.png) |
Butterfly Makeup | .png) |
Insect Aura |
| Obtain: Twilight Map - H5 | Obtain: Wind Waker Map - C2 | ||
.png) |
Writer's Glasses | ||
| Obtain: Koholint Island Map - A4 | |||
| Darkness Elemental Wear | |||
.png) |
Goron Facepaint (Red) | .png) |
Moon's Aura |
| Obtain: Twilight Map - D8 | Obtain: Termina Map - A2 | ||
.png) |
Fierce Deity Facepaint | .png) |
Twilight Aura |
| Obtain: Termina Map - C1 | Obtain: Wind Waker Map - B1 | ||
| Fire Elemental Wear | |||
|---|---|---|---|
.png) |
Postman's Hat (Red) | Royal Hood (Red) | |
| Obtain: Termina Map - M8 | Obtain: 7-Eleven DLC (3DS) Starter (SWITCH) | ||
.png) |
Fox Mask | .png) |
Artist's Beret |
| Obtain: Wind Waker Map - N3 | Obtain: Koholint Island Map - L5 | ||
.png) |
Bow-Wow Headband | .png) |
Chancellor's Hat |
| Obtain: Koholint Island Map - D3 | Obtain: Grand Travels - B8 | ||
| Water Elemental Wear | |||
.png) |
Kokiri Band (Pink) | .png) |
King of Red Lions Mask |
| Obtain: Adventure Map - G6 | Obtain: Adventure Map - G2 (3DS) Starter (SWITCH) | ||
.png) |
Postman Hat (Blue) | .png) |
Deku Tiara (Red & Green) |
| Obtain: Termina Map - G2 | Obtain: Termina Map - N7 | ||
.png) |
Hyrule Crown | .png) |
Koholint Hibiscus |
| Obtain: Wind Waker Map - H4 | Obtain: Koholint Island Map - I1 | ||
.png) |
Toronbo Sun Hat | .png) |
Anouki Headband |
| Obtain: Koholint Island Map - E6 | Obtain: Grand Travels Map - B1 | ||
.png) |
Destiny Tiara | .png) |
Queen's Crown |
| Obtain: Grand Travels Map - L5 | Obtain: Lorule Map - G7 | ||
| Lightning Elemental Wear | |||
.png) |
Kokiri Band (Yellow) | .png) |
Rito Mask |
| Obtain: Adventure Map - K7 | Obtain: Great Sea Map - M2 | ||
.png) |
Bunny Hood (Yellow) | .png) |
Pretty Ribbon |
| Obtain: Termina Map - G6 | Obtain: Koholint Island Map - E4 | ||
.png) |
Dreamer Bandana | .png) |
Armored Helmet |
| Obtain: Koholint Island Map - M3 | Obtain: Grand Travels Map - J1 | ||
| Light Elemental Wear | |||
.png) |
Kokiri Band (Orange) | .png) |
Royal Hood (Pink) |
| Obtain: Adventure Map - G5 | Obtain: Adventure Map - D1 | ||
.png) |
Korok Mask | .png) |
Butterfly Headband (Pink) |
| Obtain: Great Sea Map - K6 | Obtain: Twilight Map - B2 | ||
.png) |
Deku Tiara (Pink & Gold) | .png) |
Happiness Tiara |
| Obtain: Termina Map - H8 | Obtain: Termina Map - L2 | ||
| Classic Green Hood | |||
| Obtain: Hyrule 3DS Bonus (3DS) Starter (SWITCH) | |||
| Darkness Elemental Wear | |||
.png) |
Royal Hood (Purple) | .png) |
Phantom Horns |
| Obtain: Adventure Map - P1 | Obtain: Great Sea Map - B1 | ||
.png) |
Bone Hat | .png) |
Fused Shadow Mask |
| Obtain: Master Quest Map - I7 | Obtain: Twilight Map - E4 | ||
.png) |
Butterfly Headband (Black) | .png) |
Bunny Hood (Purple) |
| Obtain: Twilight Map - H4 | Obtain: Termina Map - N5 | ||
.png) |
Trickster Mask | .png) |
Usurper Crown |
| Obtain: Termina Map - A1 | Obtain: Wind Waker Map - I3 | ||
.png) |
Rabbit Hood | .png) |
Witch's Hat |
| Obtain: Lorule Map - M6 | Obtain: Lorule Map - G4 | ||
| Fire Elemental Wear | |||
|---|---|---|---|
.png) |
Zora Earrings (Red) | .png) |
Demon Lord Earrings (Black) |
| Obtain: Adventure Map - N3 | Obtain: Master Quest Map - C1 | ||
.png) |
Snowhead Necklace (Black) | .png) |
Fire Earrings |
| Obtain: Termina Map - I1 | Obtain: Wind Waker Map - L4 (3DS) Starter (SWITCH) | ||
| Pirate Bandana (Orange) | |||
| Obtain: Adventure Map O4 (SWITCH) | |||
| Water Elemental Wear | |||
.png) |
Zora Earrings (Purple) | .png) |
Pirate Bandana (Pink) |
| Obtain: Adventure Map - L5 | Obtain: Adventure Map - O4 (3DS) Starter (SWITCH) | ||
.png) |
Snowhead Necklace (Blue) | .png) |
Destiny Necklace |
| Obtain: Termina Map - N1 | Obtain: Grand Travels Map - M4 | ||
| Lightning Elemental Wear | |||
.png) |
Demon Lord Earrings (White) | .png) |
Gerudo Jewel |
| Obtain: Master Quest Map - O3 | Obtain: Wind Waker Map - G2 | ||
.png) |
Rupee Earrings | ||
| Obtain: Lorule Map - I6 | |||
| Light Elemental Wear | |||
.png) |
Zora Earrings (Yellow) | Twilight Jewel (White) | |
| Obtain: Adventure Map - O6 | Obtain: UK Pre-Order Bonus (3DS) Adventure Map G2 (SWITCH) | ||
| Darkness Elemental Wear | |||
.png) |
Demon Lord Earrings (Blue) | .png) |
Twilight Jewel (Black) |
| Obtain: Adventure Map - C7 | Obtain: Twilight Map - E7 | ||
.png) |
Lorulean Earrings | ||
| Obtain: Lorule Map - M5 | |||
Rental Skills
Rental skills are organized by their general effect in battle and can only be unlocked by nurturing a companion fairy. The type of skill unlocked depends on the fairy's personality traits. It is possible to learn more by refreshing a fairy's level back to 1, resetting most of its prior traits while keeping available skills.
If the player is connected to the local wireless network, they can rent a passive skill from another player's My Fairy prior to battle under the Helper tab. Renting has real world time limits which are indicated next to each player's category.
| Skill | Required Traits | Effects |
|---|---|---|
| Fill Special Attack | Sparkly (50) Valiant (75) |
Makes hearts restore special attack gauge as well. |
| Fill Magic | Sparkly (50) Dizzy (75) |
Makes hearts restore magic gauge as well. |
| Heart Bonds | Friendly (50) Eager (75) |
Health replenishes according to the fairy's trust. |
| Special Bonds | Friendly (50) Smiley (75) |
Special attack gauge replenishes according to the fairy's trust. |
| Magic Bonds | Eager (50) Dizzy (75) |
Magic gauge replenishes according to the fairy's trust. |
| Hard Worker | Resolute (50) Sparkly (75) |
Replenishes hearts when health reaches 0. |
| Dream Sphere | Smiley (50) Valiant (50) |
Creates a shock wave that momentarily stops enemy movement. |
| Invincible Weakling | Smiley (50) Resolute (75) |
Makes the user invincible, but decreases attack damage. |
| Health Regain | Eager (50) Resolute (75) |
Replenishes health. |
| Extreme Gusts | Valiant (50) Friendly (75) |
Creates a shock wave that makes enemies get blown away when running. |
| Skill | Required Traits | Effects |
|---|---|---|
| Special Regain | Friendly (100) Resolute (100) Smiley (125) |
Replenishes special attack gauge. |
| Total Focus | Friendly (100) Resolute (100) Eager (125) |
Replenishes health, special attack, and magic gauge when inside allied keeps. |
| Repair Technician | Friendly (100) Sparkly (100) Resolute (125) |
Replenish allied keep gauges while inside allied keeps. |
| Wall of Water | Sparkly (100) Valiant (100) Smiley (125) |
A barrier appears that protects warriors from all damage. |
| Keep Keeper | Smiley (100) Resolute (100) Valiant (125) |
Attack damage increases when inside keeps. |
| Marathon Runner | Smiley (100) Sparkly (100) Friendly (125) |
Allows the user and allied players to move from one place to another much faster. |
| Elemental Magician | Eager (100) Relaxed (100) Aspiring (125) |
Weapon's attribute is overwritten by the fairy's main attribute. |
| Health Sponge | Friendly (100) Dizzy (100) Sparkly (125) |
Restores health every time the user inflicts damage on enemies. |
| Special Sponge | Valiant (100) Aspiring (100) Relaxed (125) |
Replenishes special attack gauge every time the user inflicts damage on enemies. |
| Magic Sponge | Eager (100) Relaxed (100) Shrewd (125) |
Replenishes Magic gauge every time the user inflicts damage on enemies. |
| XP Master | Eager (100) Resolute (100) Dizzy (125) |
Increases experience gained from defeating enemies. |
| Rupee Master | Friendly (100) Shrewd (100) Relaxed (125) |
Increases Rupees gained from defeating enemies. |
| Extreme Evasion | Eager (100) Valiant (100) Sparkly (125) |
Creates a shock wave that makes enemies trip when evading. |
| Skill | Required Traits | Effects |
|---|---|---|
| Material Master | Relaxed (200) Valiant (200) Aspiring (225) Resolute (225) |
Increases rare material drop rate. |
| Food Master | Aspiring (200) Resolute (200) Eager (225) Relaxed (225) |
Increases food drop rate |
| Weapon Master | Eager (200) Relaxed (200) Friendly (225) Shrewd (225) |
Increases weapon drop rate. |
| Extreme Crush | Friendly (200) Sparkly (200) Valiant (225) Smiley (225) |
Creates a shock wave that knocks down surrounding enemies. |
| Glass Cannon | Sparkly (200) Resolute (200) Friendly (225) Dizzy (225) |
Increases attack damage, but reduces health and defenses to 1 hit. |
| Special Fountain | Eager (200) Resolute (200) Valiant (225) Sparkly (225) |
Special attack gauge stays maxed out. |
| Magic Fountain | Relaxed (200) Valiant (200) Eager (225) Shrewd (225) |
Magic gauge stays maxed out. |
| Wall of Water+ | Valiant (200) Aspiring (200) Sparkly (225) Smiley (225) |
A barrier appears that protects warriors from all damage. |
| XP Master+ | Sparkly (200) Eager (200) Dizzy (225) Resolute (225) |
Increases experience gained from defeating enemies. |
| Rupee Master+ | Dizzy (200) Friendly (200) Shrewd (200) Relaxed (225) |
Increases Rupees gained from defeating enemies. |
| Skill | Required Traits | Effects |
|---|---|---|
| Food Master+ | Valiant (200) Relaxed (225) Aspiring (225) Resolute (225) Eager (255) |
Increases rare food drop rate. |
| Material Master+ | Smiley (200) Relaxed (225) Valiant (225) Aspiring (225) Resolute (255) |
Increases material drop rate. |
| Weapon Master+ | Dizzy (200) Relaxed (225) Shrewd (225) Eager (225) Friendly (255) |
Increases weapon drop rate. |
| Special Fountain+ | Aspiring (200) Valiant (225) Resolute (225) Eager (225) Sparkly (255) |
Special Attack gauge is always full. |
| Magic Fountain+ | Aspiring (200) Relaxed (225) Valiant (225) Eager (225) Shrewd (255) |
Magic gauge is always full. |
| Extreme Crush+ | Resolute (200) Sparkly (225) Valiant (225) Friendly (225) Smiley (255) |
Creates a shock wave that knocks down nearby enemies. |
Gallery
-
Lazuli from the E3 2016 SpotPass Event
-
Scarlet from the Link's Awakening Pack SpotPass Event
-
Neris from the 1.4.0 Update
-

Magnolia from the July 21 SpotPass
-
Becka from the 1.5.0 Update


.png)
| This Hyrule Warriors related article is a stub. You can help the wiki by expanding it. |