| Badge | Materials | ||
|---|---|---|---|
| Kokiri Sword I | Metal Plate (1x) | ||
| Kokiri Sword II | Aeralfos Leather (1x) | Metal Plate (1x) | |
| Kokiri Sword III | Fiery Aeralfos Leather (1x) | Metal Plate (1x) | |
| Kokiri Sword IV | Piece of Darknut Armor (1x) | Metal Plate (1x) | |
| Stamina Fruit I | Dinolfos Fang (1x) | ||
| Stamina Fruit II | Zant's Magic Gem (1x) | The Imprisoned's Scales (1x) | Dinolfos Fang (3x) |
| Stamina Fruit III | Zant's Helmet (1x) | The Imprisoned's Scales (2x) | Dinolfos Arm Guard (2x) |
| Digging Mitts I | Dinolfos Fang (3x) | ||
| Digging Mitts II | Zant's Magic Gem (1x) | The Imprisoned's Scales (1x) | Dinolfos Fang (3x) |
| Digging Mitts III | Zant's Helmet (1x) | The Imprisoned's Scales (2x) | Dinolfos Arm Guard (2x) |
| Din's Fire I | Piece of Darknut Armor (1x) | Metal Plate (1x) | |
| Din's Fire II | ReDead Bandage (1x) | Metal Plate (1x) | |
| Din's Fire III | Zant's Helmet (1x) | The Imprisoned's Scales (2x) | Dinolfos Arm Guard (2x) |
| Hover Boots I | Dinolfos Fang (3x) | ||
| Hover Boots II | Zant's Magic Gem (1x) | The Imprisoned's Scales (1x) | Dinolfos Fang (3x) |
| Hover Boots III | Zant's Helmet (1x) | The Imprisoned's Scales (2x) | Dinolfos Arm Guard (2x) |
| Fierce Deity's Mask I | Big Poe Necklace (1x) | Metal Plate (1x) | |
| Fierce Deity's Mask II | Zant's Helmet (1x) | The Imprisoned's Scales (2x) | Dinolfos Arm Guard (2x) |
Agitha (アゲハ, Ageha) is a playable character in Hyrule Warriors. Players can unlock her in the game's Adventure Mode. She originally appeared in Twilight Princess.
Role in Game
When Cia used the Gate of Souls to open a portal to the Era of Twilight, Agitha was cornered by a group of monsters. When Lana and the Hyrulean Army saved her, Agitha decided to assist them in gratitude. Learning that Lana was looking for the Gate of Souls, she gave the White Sorceress a Goddess Butterfly, an insect that could lead others wherever they wanted to go.
Before Lana could use the butterfly to its full extent, the beautiful butterfly was captured by Midna, who was conducting a search of her own. Concerned for her friend, Agitha followed Midna, but returned to Kakariko Village at Lana's suggestion while the Hyrulean forces battled Cia and Midna's armies. After Lana managed to convince Midna that they had a common enemy in Cia, Agitha joined the united forces in traveling to the Twilight Realm, where they battled the Usurper King, Zant.
From this point on Agitha will only appear in story mode stages if there is a stage where Midna is selectable participant for the player. While Midna is in the players possession, Agitha will take her role in the stories events, such as activating the Twilight statue in the Sealed Grounds.
After the final battle with Cia, Agitha and Midna are returned to their respectful homes through Lana's magic. Agitha later returns along with the others in the Gerudo Desert, after Link, Zelda, and Lana are forced to retreat after Ganondorf has conquered Hyrule.
Such as before, during the final battle if the player selects Midna, Agitha will take the role of battling Argorok in the north end of the map during the battle with Ganondorf.
Character Information
Development
According to producer Hayashi, she is in the game because "about 95%" of the development team fell in love with her.
Personality
Agitha is a kind yet strange girl with a fondness for bugs. Taking pride in her self-proclaimed title, she enjoys collecting different species of insects to lavishly care for them at her home. During battle Agitha is like Xiaoqiao, in the aspect she sees battle as somewhat of a game to be played. However she is capable of becoming serious if the situation calls for it, dropping the "it's a game" mentality to do her best to ensure her forces' success.
Quotes
See also: Agitha/Quotes
Gameplay
| Keys: | Y Normal Attack ▲ | X Charge Attack ▲ | A Special Technique ▲ | B Evade |
With moves that involve Agitha being in the air, pressing X while airborne will summon a large butterfly for her to ride on. While on the butterfly, Agitha's resource bar will slowly deplete, allowing players to know when the ride ends. Pressing Y will cause it to spin about and damage enemies directly under neath. Pressing X will cause it to dive-bomb the enemies directly below, sending enemies flying and forcefully ending the ride.
- X: Agitha summons a large butterfly and rides around on it.
- Y, X: Agitha unleashes a stream of butterflies that fly upward, taking any enemies with them.
- Y, Y, X: Agitha hops in place while a large green summoning circle appears on the ground in front of her, and a giant green beetle appears to blast enemies into the air with its pincers.
- Y, Y, Y, X: Agitha sends a tornado flying forwards, which sucks in enemies and traps them.
- Y, Y, Y, Y, X:Agitha leaps up into the air, and a large green beetle then charges forward from underneath her. She then floats back down using her parasol.
- Y, Y, Y, Y, Y: Agitha swings her basket in a wide sweep in front of her, then thrusts forward with her parasol. She then rises into the air riding a tornado, then slams down onto the ground in front of her. She then releases golden butterflies in all cardinal directions.
- A: Agitha sprouts wings on her back, flies up and then uses her wings to create large gusts of wind that send enemies flying. This move mostly hits in front of her in an area effect.
- Focus Spirit + A: Agitha turns around and browses through her basket. She then lifts her basket up, summoning butterflies to fly out of it and damage foes behind her.
- Focus Spirit Finisher: Agitha summons three butterflies, then hops up, causing an explosion.
- Weak Point Smash: A giant beetle swoops in to knock enemies up, then a giant butterfly appears and does the same.
Fighting Style
Agitha has a bit of a hard learning curve. And while Agitha uses a parasol to hit foes, her real weapons are the insects she summons at her command, which deal high amounts of damage. She can use them to attack foes or travel more easily. Some of her moves have air-launching traits, which follow up to allow her to ride her butterfly, allowing players to stay in mid-air more often than not. This makes her good at taking out large groups of enemies, as well as keeping her out of harms way. However she has fairly low defenses, making her somewhat of a Glass Canon. Her C3 is easy to spam due to Dodge-Canceling, enabling her to get up to 3 giant beetles out on the field at once on some occasions.
Her abilities are homages to the insect-hunting side quest in Twilight Princess. The Female Golden Butterfly and the Male Golden Beetle references her preference to collect insects in pairs "so they won't be lonely."
Weapons
| Weapon Information (Element: Light) | ||
|---|---|---|
| Description: The beloved parasol of the insect kingdom's princess. The basket is filled to bursting with insects. Use the Strong Attack button to fight from the back of an enormous butterfly! | ||
| Butterfly Parasol | Skill Slots: 1~2 | |
.png)
|
Base Attack: 80 | 1★ Attack: 88 |
| 2★ Attack: 96 | 3★ Attack: 104 | |
| 4★ Attack: 112 | 5★ Attack: 120 | |
| Luna Parasol | Skill Slots: 3~4 | |
.png)
|
Base Attack: 150 | 1★ Attack: 165 |
| 2★ Attack: 180 | 3★ Attack: 195 | |
| 4★ Attack: 210 | 5★ Attack: 225 | |
| Princess Parasol | Skill Slots: 6~8 | |
.png)
|
Base Attack: 280 | 1★ Attack: 308 |
| 2★ Attack: 336 | 3★ Attack: 364 | |
| 4★ Attack: 392 | 5★ Attack: 420 | |
| 8-Bit Rupee (HW) | Skill Slots: 6~8 | |
.png)
|
Base Attack: 280 | 1★ Attack: 308 |
| 2★ Attack: 336 | 3★ Attack: 364 | |
| 4★ Attack: 392 | 5★ Attack: 420 | |
| Princess Parasol + (Legends) | Skill Slots: 7~8 | |
|
|
Base Attack: 500 | 1★ Attack: 550 |
| 2★ Attack: 600 | 3★ Attack: 650 | |
| 4★ Attack: 700 | 5★ Attack: 750 | |
| Incandescent Parasol (Legends) | Skill Slots: 7~8 | |
|
|
Base Attack: 500 | 1★ Attack: 550 |
| 2★ Attack: 600 | 3★ Attack: 650 | |
| 4★ Attack: 700 | 5★ Attack: 750 | |
| Secondary Element: Fire | ||
Badge Materials
- See also: Hyrule Warriors/Badges
| Badge | Materials | ||
|---|---|---|---|
| Empty Bottle I | Old Rag (1x) | ||
| Empty Bottle II | Piece of Darknut Armor (1x) | Old Rag (1x) | |
| Empty Bottle III | The Imprisoned's Pillar (1x) | Zant's Magic Gem (2x) | Dinolfos Arm Guard (2x) |
| Hornet Larvae I | Dinolfos Fang (1x) | ||
| Hornet Larvae II | Zant's Magic Gem (1x) | The Imprisoned's Scales (1x) | Dinolfos Fang (3x) |
| Hornet Larvae III | The Imprisoned's Pillar (1x) | Zant's Magic Gem (2x) | Dinolfos Arm Guard (2x) |
| Nayru's Love I | Dinolfos Fang (3x) | ||
| Nayru's Love II | Zant's Magic Gem (1x) | The Imprisoned's Scales (1x) | Dinolfos Fang (3x) |
| Nayru's Love III | The Imprisoned's Pillar (1x) | Zant's Magic Gem (2x) | Dinolfos Arm Guard (2x) |
| Goron Tunic I | Dinolfos Fang (2x) | ||
| Goron Tunic II | Zant's Magic Gem (1x) | The Imprisoned's Scales (1x) | Dinolfos Fang (3x) |
| Goron Tunic III | The Imprisoned's Pillar (1x) | Zant's Magic Gem (2x) | Dinolfos Arm Guard (2x) |
| Zora Tunic I | Dinolfos Fang (2x) | ||
| Zora Tunic II | Zant's Magic Gem (1x) | The Imprisoned's Scales (1x) | Dinolfos Fang (3x) |
| Zora Tunic III | The Imprisoned's Pillar (1x) | Zant's Magic Gem (2x) | Dinolfos Arm Guard (2x) |
| Magic Armor I | Dinolfos Fang (2x) | ||
| Magic Armor II | Zant's Magic Gem (1x) | The Imprisoned's Scales (1x) | Dinolfos Fang (3x) |
| Magic Armor III | The Imprisoned's Pillar (1x) | Zant's Magic Gem (2x) | Dinolfos Arm Guard (2x) |
| Sacred Shield I | Dinolfos Fang (2x) | ||
| Sacred Shield II | Zant's Magic Gem (1x) | The Imprisoned's Scales (1x) | Dinolfos Fang (3x) |
| Sacred Shield III | The Imprisoned's Pillar (1x) | Zant's Magic Gem (2x) | Dinolfos Arm Guard (2x) |
| Mirror Shield I | Dinolfos Fang (2x) | ||
| Mirror Shield II | Zant's Magic Gem (1x) | The Imprisoned's Scales (1x) | Dinolfos Fang (3x) |
| Mirror Shield III | The Imprisoned's Pillar (1x) | Zant's Magic Gem (2x) | Dinolfos Arm Guard (2x) |
| Badge | Materials | ||
|---|---|---|---|
| Farore's Wind I | Monster Tooth (1x) | ||
| Farore's Wind II | Zant's Magic Gem (1x) | The Imprisoned's Scales (1x) | Dinolfos Fang (3x) |
| Farore's Wind III | Zant's Helmet (1x) | Zant's Magic Gem (2x) | Dinolfos Arm Guard (2x) |
| Goron's Bracelet I | Dinolfos Fang (2x) | ||
| Goron's Bracelet II | Zant's Helmet (1x) | Zant's Magic Gem (2x) | Dinolfos Arm Guard (2x) |
| Hawkeye I | Dinolfos Fang (2x) | ||
| Hawkeye II | Zant's Helmet (1x) | Zant's Magic Gem (2x) | Dinolfos Arm Guard (2x) |
| Beetle I | Dinolfos Fang (2x) | ||
| Beetle II | Zant's Helmet (1x) | Zant's Magic Gem (2x) | Dinolfos Arm Guard (2x) |
| Whip I | Dinolfos Fang (2x) | ||
| Whip II | Zant's Helmet (1x) | Zant's Magic Gem (2x) | Dinolfos Arm Guard (2x) |
Gallery
-

Adventure Mode sprite
-

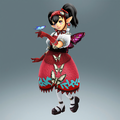
Black Lolita costume from the Master Quest pack
-

Sweet Lolita costume from the Twilight Princess pack
-

Don Gero's Mask costume from the Majora's Mask pack
-

Gothic Lolita re-color costume in Hyrule Warriors Legends
-
Crazy Tracy re-color costume from the Link's Awakening pack
-
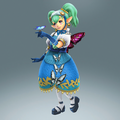
Seres re-color costume from the A Link Between Worlds pack


.png)
.png)
.png)
External Links
| This Hyrule Warriors related article is a stub. You can help the wiki by expanding it. |