|
|
| (26 intermediate revisions by 8 users not shown) |
| Line 1: |
Line 1: |
| The following is a list of common troop and officer types found in the ''[[Dynasty Warriors (series)|Dynasty Warriors]]'' series. General troops are often limited to simple 3-to-4 chain basic combos, while generic officers always have 4 chain basic combos while often using more varieties of moves and acting more aggressive. | | The following is a list of common troop and officer types found in the ''[[Dynasty Warriors (series)|Dynasty Warriors]]'' series. General troops are often limited to simple 3-to-4 chain basic combos, while generic officers always have 4 chain basic combos while often using more varieties of moves and acting more aggressive (or in ''Dynasty Warriors 3'', 5 chain combos due to having second tier weapons by default). |
|
| |
|
| A notable trait between generic troops and officers are their Musou Attacks; generic troops unlike with officers/generals cannot clash with higher ranking units with their Musou Attacks, and will always get interrupted by any attack done by an officer or player. Said Musou Attacks also lack any invincibility, hence being easy to interrupt. | | A notable trait between generic troops and officers are their Musou Attacks; generic troops unlike with officers/generals cannot clash with higher ranking units with their Musou Attacks, and will always get interrupted by any attack done by an officer or player. Said Musou Attacks also lack any invincibility, hence being easy to interrupt. |
| | |
| | However, a little-known trick is that when a leader of a unit of troops (normally the lead of 4 peons) is defeated first (being units such as First Bows, Majors, Guard Captains/Elite Guards, etc.), then their respective subordinates within their unit will falter somewhat in two ways; one is where they might retreat and act rather unorganized at a distance, or if the player runs away from them to process them off-screen (outside of the close-zoomed minimap range), then they will disappear. This can be useful when trying to thin the number of enemy troops quickly for both oneself or their allies (and if not surrounded too roughly), and/or especially when dealing with more infamous units such as archers or sorcerers. |
|
| |
|
| In ''[[Dynasty Warriors 6]]'', generic officers, depending on the difficulty level set, can perform a Special Attack such as Volley. However, the Special Attack depends on the generic officer using it. Heroes and Large Warriors possess Swift Attack, Warriors and Rulers utilize Volley, Advisers inflict Fire, and Strategists have Rockfall. | | In ''[[Dynasty Warriors 6]]'', generic officers, depending on the difficulty level set, can perform a Special Attack such as Volley. However, the Special Attack depends on the generic officer using it. Heroes and Large Warriors possess Swift Attack, Warriors and Rulers utilize Volley, Advisers inflict Fire, and Strategists have Rockfall. |
| | |
| | ==MAJOR NOTE== |
| | It is heavily noted that most units tend to do major damage and/or take not as much damage solely in ''Dynasty Warriors 3'' due to its infamous stats scaling with Player 1's current stats depending on the difficulty and regardless of playing solo or co-op. Overall enemy unit defense stats are scaled with the current attack stats of Player 1's character, and likewise their overall damage output is scales vs. Player 1's defense stats. As a result, enemy generals on higher difficulties can be hard to eliminate quickly without effort involved though above all, enemies can inflict major overall damage (from basic attacks, arrows from archers and hazards alike) to especially AI-controlled allied units whose stats are not accounted for such scaling vs. Player 1 (the allied commander of a stage in particular is in just as much major danger). |
| | |
| | Likewise however, it's possible to exploit this by slotting in an underdeveloped character in the P1 slot to have all enemies severely hampered in stats for Player 2 to mop up and/or tank with ease, and by proxy have allied units all survive decently against as morale is gradually built up. |
|
| |
|
| ==Troops== | | ==Troops== |
| Line 9: |
Line 16: |
| These are the most poorly armored troops in ''Dynasty Warriors''. Common troops include: | | These are the most poorly armored troops in ''Dynasty Warriors''. Common troops include: |
| [[Image:Dynasty Warriors Unit - Private.png|150px|right]] | | [[Image:Dynasty Warriors Unit - Private.png|150px|right]] |
| *'''Private''' - Privates will serve as the games' main fodder, coming at the player by the hundreds. They, like peasants, can wield a sword, spear, halberd or pike. Spear-wielding Privates will usually charge at the player in unison with an attack similar to [[Zhao Yun]]'s {{T}}/C1 attack in his appearances before ''Dynasty Warriors 6''. Halberd-wielding Privates do something similar with a jump attack. [[Shi Huan]] in ''Dynasty Warriors 3'' is the only generic officer to use the model of a Private, but also uses a heavy ranking moveset like the rest (that is until his model has been corrected in ''Xtreme Legends''). | | *'''Private''' - Privates will serve as the games' main fodder, coming at the player by the hundreds. They, like peasants, can wield a sword, spear, halberd or pike. Spear-wielding Privates in ''Dynasty Warriors 5'' will usually charge at the player in unison with an attack similar to [[Zhao Yun]]'s {{T}}/C1 attack in his appearances before ''Dynasty Warriors 6''. Halberd-wielding Privates do something similar with a jump attack. [[Shi Huan]] in ''Dynasty Warriors 3'' is the only generic officer to use the model of a Private, but also uses a heavy ranking moveset like the rest (that is until his model has been corrected in ''Xtreme Legends''). |
|
| |
|
| :*'''''Peasant''''' - Peasants are the weakest Common Troop as they can be defeated in just one hit by almost any character with any weapon. They wield a sword, and in ''Dynasty Warriors 6'', Peasants wielded no weapons, except for their Chieftains, who carried swords. | | :*'''''Peasant''''' - Peasants are the weakest Common Troop as they can be defeated in just one hit by almost any character with any weapon. They wield a sword, and in ''Dynasty Warriors 6'', Peasants wielded no weapons, except for their Chieftains, who carried swords. |
| :*'''''Corporal''''' - Corporals are rare and stronger versions of the Common Troop, but they generally are no more different than them. They normally appear in older games via higher-ranked stages in terms of difficulty.[[Image:Dynasty Warriors Unit - Sergeant.png|150px|right]] | | :*'''''Corporal''''' - Corporals are rare and stronger versions of the Common Troop, but they generally are no more different than them. They normally appear in older games via higher-ranked stages in terms of difficulty. |
| | [[Image:Dynasty Warriors Unit - Sergeant.png|150px|right]] |
|
| |
|
| *'''Major''' - The highest ranking of all generic troops. A single Major will lead a unit of five, containing four Privates (or four Guards for Major Guards). | | *'''Major''' - The highest ranking of all generic troops. A single Major will lead a unit of five, containing four Privates (or four Guards for Major Guards). |
| Line 24: |
Line 32: |
|
| |
|
| [[Image:Dynasty Warriors Unit - Archer.png|150px|right]] | | [[Image:Dynasty Warriors Unit - Archer.png|150px|right]] |
| *'''Archer''' - A support unit from beginning to end, their role is to assist the vanguard by sniping enemies from a long distance with bows and crossbows. While their potency may vary in each installment of the series, archers are a considerable threat when in groups. They often wear little to no armor to allow for faster mobility. In most older games, especially games where stagger can be inflicted, their staggering/"guard breaking" state animates much faster than with the other units, but has no differences anywhere else. When approached up close, they will try to run away to gain distance. | | *'''Archer''' - A support unit from beginning to end, their role is to assist the vanguard by sniping enemies from a long distance with bows and crossbows. While their potency may vary in each installment of the series, archers are a considerable threat when in groups. They often wear little to no armor to allow for faster mobility. When approached up close, they will try to run away to gain distance, and they have uniquely faster animated guard crush/stagger animations vs. other units that still takes up the same amount of frames as the rest in games where stagger can be inflicted. |
| | **With the aforementioned P1 stats scaling in ''Dynasty Warriors 3'', Archers have been at their most deadliest to both a Player 1 character with high defense + lacking bow defense, and especially allied units who are prone to such a trait. It is highly recommended to often have bow defense in tandem with base defense when trying to deal with such units. |
|
| |
|
| [[Image:Dynasty Warriors Unit - First Bow.png|150px|right]] | | [[Image:Dynasty Warriors Unit - First Bow.png|150px|right]] |
| *'''First Bow''' - Also known as First Crossbow in the case of crossbow wielders. They always attack in tandem with four archers under their command. These units have slightly higher stats and wear different clothes to distinguish themselves from regular archers. If these units are defeated first, then their respective archer subordinates within their unit will falter somewhat in two ways; one is where they might retreat and act rather unorganized at a distance, or if the player runs away from them to process them off-screen, they will disappear. Thus, targeting First Bows tends to be a priority in order to ease amount of enemy archers within the vicinity. In addition, these units often drop arrows when defeated. | | *'''First Bow''' - Also known as First Crossbow in the case of crossbow wielders. They always attack in tandem with four archers under their command. These units have slightly higher stats and wear different clothes to distinguish themselves from regular archers. Due to the rule of defeating leaders of a peon unit first to make their subordinates vanish off-screen instantly, targeting First Bows tends to be a priority in order to ease amount of enemy archers within the vicinity. In addition, these units often drop arrows when defeated. |
|
| |
|
| *'''Bannerman''' - Bannermen, who first appeared in ''Dynasty Warriors 6'', were heavily-armored soldiers holding nothing but a flag to display their army's insignia. They lead units of around twenty with the unit being known as "Roving Attack", but also raise their flags to raise morale. When a soldier including the player, is next to the Bannerman when he raises the flag, they gain a temporary power-up like Speed Up, or Attack Up. | | *'''Bannerman''' - Bannermen, who first appeared in ''Dynasty Warriors 6'', were heavily-armored soldiers holding nothing but a flag to display their army's insignia. They lead units of around twenty with the unit being known as "Roving Attack", but also raise their flags to raise morale. When a soldier including the player, is next to the Bannerman when he raises the flag, they gain a temporary power-up like Speed Up, or Attack Up. |
| Line 48: |
Line 57: |
|
| |
|
| [[Image:Dynasty Warriors Unit - Bombardier.png|100px|right]] | | [[Image:Dynasty Warriors Unit - Bombardier.png|100px|right]] |
| *'''Bombardier''' - Decked in armor and packed with explosives, Bombardiers are specialized units introduced in ''[[Dynasty Warriors 4]]''. They often appear in covert missions involving sabotage, traps, ambushes, etc. Though not exactly the fastest compared to other troops, these units more than make up for that with their ability to lob bombs from a distance with precise accuracy, which functions just the same as Huang Gai's C1 attack via the double {{T}} tap version (which inflicts a vertical spiraling launch hit effect with fire damage). If left unattended, their presence could spell disaster for any on the battlefield as the bombs are unblockable (but also damage both enemy and allied units alike). Beast Master units also make use of the Bombardier's move set to compliment their ability to tame tigers and elephants. | | *'''Bombardier''' - Decked in armor and packed with explosives, Bombardiers are specialized units introduced in ''[[Dynasty Warriors 4]]''. They often appear in covert missions involving sabotage, traps, ambushes, etc. Though not exactly the fastest compared to other troops, these units more than make up for that with their ability to lob bombs from a distance with precise accuracy, which functions just the same as Huang Gai's C1 attack via the double {{T}} tap version (which inflicts a vertical spiraling launch hit effect with minor fire damage). If left unattended, their presence could spell disaster for any on the battlefield as the bombs are unblockable (but also damage both enemy and allied units alike). Beast Master units also make use of the Bombardier's move set to compliment their ability to tame tigers and elephants. |
| **In the fourth installment, both Huang Gai and the bombardiers' bombs would bounce a bit forward when thrown, while in the fifth installment they would instantly explode upon contacting any surface. | | **In the fourth installment, both Huang Gai and the bombardiers' bombs would bounce a bit forward when thrown, while in the fifth installment they would instantly explode upon contacting any surface. |
|
| |
|
| Line 89: |
Line 98: |
| :*'''''Phantom Soldiers''''' - Magically created phantoms frequently summoned, but not exclusive to the Yellow Turbans. They are completely invincible and non-interactive as players' attacks go through them. They have appeared differently since their appearance in ''[[Dynasty Warriors 4]]''. The ''Dynasty Warriors 4'' version had them as a translucent regular soldier, but in ''[[Dynasty Warriors 5]]'' and ''[[Warriors Orochi]]'' they are a purple or blue silhouette of a soldier. In ''Dynasty Warriors 6'', Phantoms have been revamped to be a hovering collection of dust and sand. When hit, the troop explodes after a set amount of time. | | :*'''''Phantom Soldiers''''' - Magically created phantoms frequently summoned, but not exclusive to the Yellow Turbans. They are completely invincible and non-interactive as players' attacks go through them. They have appeared differently since their appearance in ''[[Dynasty Warriors 4]]''. The ''Dynasty Warriors 4'' version had them as a translucent regular soldier, but in ''[[Dynasty Warriors 5]]'' and ''[[Warriors Orochi]]'' they are a purple or blue silhouette of a soldier. In ''Dynasty Warriors 6'', Phantoms have been revamped to be a hovering collection of dust and sand. When hit, the troop explodes after a set amount of time. |
|
| |
|
| :*'''''Clay Soldiers''''' - Zhuge Liang's special troops in ''[[Dynasty Warriors 5: Xtreme Legends]]''. They are immovable and don't flinch. This is a blessing and a curse; on one hand normal attacks don't faze them, but hitting them with a horse or fire spray attacks, especially from Zhang Jiao and Zhu Rong, kills them very quickly as they cannot be pushed out of range, cannot be forced airborne, and thus suffer more frequent damage without any airborne damage reduction. They use spears and pikes. | | :*'''''Clay Soldiers''''' - Zhuge Liang's special troops in ''[[Dynasty Warriors 5: Xtreme Legends]]''. They are immovable and don't flinch via having active Hyper Armor. This is a blessing and a curse; on one hand normal attacks don't faze them, but hitting them with a horse or with fire-based attacks, especially from Zhang Jiao and Zhurong, kills them very quickly as they cannot be pushed out of range, cannot be forced airborne, and thus suffer more frequent damage without any airborne damage reduction (which also make juggling Musou Attacks deal heavier damage on-par with grounded-damage ones). They use spears and pikes. |
|
| |
|
| *'''Machines''' - Man-made contraptions made for sieges and attacking: | | *'''Machines''' - Man-made contraptions made for sieges and attacking: |
| *'''''[[Juggernaut]]''''' - ''See article.'' | | *'''''[[Juggernaut]]''''' - ''See article.'' |
| :*'''''Wooden Oxen''''' - An invention by [[Yueying]] in ''Dynasty Warriors 5'', but claimed to be made by Zhuge Liang in ''Dynasty Warriors 3'' and ''Dynasty Warriors 6''. They are armored supply carriers in common terms that were used during the battle at [[Wuzhang Plains]]. They look funnily enough like wooden oxen on wheels. They have high defense, moderate health and appear en mass, making them aggravating to destroy, but they all move very slowly just as fast as all other machines. On top of this every wooden ox that makes it to the back lines raises morale. Originally they acted as normal item boxes akin to jars and crates in ''Dynasty Warriors 3'', but eventually become actual machine units as of ''Dynasty Warriors 4''. Historically however, wheelbarrows were used to transport the supplies, though the concept art of the said oxen has them as ox-themed wheelbarrows instead of wheeled-tanks of sorts. | | :*'''''Wooden Oxen''''' - AKA the "Wood Ox Flowing Horse". An invention by [[Yueying]] in ''Dynasty Warriors 5'', but claimed to be made by Zhuge Liang in ''Dynasty Warriors 3'' and ''Dynasty Warriors 6''. They are armored supply carriers in common terms that were used during the battle at [[Wuzhang Plains]]. They look funnily enough like wooden oxen on wheels. They have high defense, moderate health and appear en masse, making them aggravating to destroy, but they all move very slowly just as fast as all other machines. On top of this every wooden ox that makes it to the back lines raises morale to the forces that own them. Originally they acted as normal item boxes akin to jars and crates in ''Dynasty Warriors 3'' located around above the southwest portion of the Wuzhang Plains map, but eventually become actual machine units as of ''Dynasty Warriors 4''. Historically however, wheelbarrows were used to transport the supplies, though the concept art of the said oxen has them as ox-themed wheelbarrows instead of wheeled-tanks of sorts, which unlike most wheelbarrows were built in a way to be used with ease. |
|
| |
|
| :*'''''Arbalest''''' - Big machines that crank out volleys of arrows. They shoot all across the line in their middle. Their attacks are timed by the wheel on the side; it cranks back to fire and lunges forward when it does so. They appear in ambushes, defense of the camp or castle, or as siege weapons. They have a huge life bar and high defense but are stationary. Arbalests usually appear consecutively behind each other. In ''Dynasty Warriors 6'', they only appear in challenge mode. They are stage gimmicks in ''Dynasty Warriors 7'' and serve as rapid fire turrets with infinite ammo. | | :*'''''Arbalest''''' - Big machines that crank out volleys of arrows. They shoot all across the line in their middle. Their attacks are timed by the wheel on the side; it cranks back to fire and lunges forward when it does so. They appear in ambushes, defense of the camp or castle, or as siege weapons. They have a huge life bar and high defense but are stationary. Arbalests usually appear consecutively behind each other. In ''Dynasty Warriors 6'', they only appear in challenge mode. They are stage gimmicks in ''Dynasty Warriors 7'' and serve as rapid fire turrets with infinite ammo. |
| Line 105: |
Line 114: |
| :*'''''Pyrocannon''''' - Introduced in ''Dynasty Warriors 7'', function similarly too that of the Juggernaut. While the Juggernaut is more commonly used by early period characters, the Pyrocannon is usually deployed by heroes from the later time periods, such as those from the Jin Kingdom. | | :*'''''Pyrocannon''''' - Introduced in ''Dynasty Warriors 7'', function similarly too that of the Juggernaut. While the Juggernaut is more commonly used by early period characters, the Pyrocannon is usually deployed by heroes from the later time periods, such as those from the Jin Kingdom. |
|
| |
|
| :*'''''Siege Tower''''' - Introduced in ''Dynasty Warriors 5'' (but have appeared in a non-interactive form in prior games), siege towers were used to bombard a castle's defenses with volleys of arrows from the archers inside until the defenses crumbled. In ''Dynasty Warriors 7'', they are built by engineers in front of large buildings, or great walls, and are used to attack the foot soldiers atop those walls to keep them from firing arrows down at enemy troops while they prepare Rams to break down the doors. ''Dynasty Warriors 9'' brings them back as a combination of both this and the Mechanical Ladder, but need to be built by Engineer Captains and then moved into position against a castle wall to deploy a ramp to allow troops to climb up onto the wall and engage the forces there, along with taking out the corner towers that provide reinforcements for the forces sealed within until the rams can open the gates. | | :*'''''Siege Tower''''' - Introduced as actual machine units in ''Dynasty Warriors 5'' (but have appeared in a non-interactive form in prior games), siege towers were used to bombard a castle's defenses with volleys of arrows from the archers inside until the defenses crumbled. In ''Dynasty Warriors 7'', they are built by engineers in front of large buildings, or great walls, and are used to attack the foot soldiers atop those walls to keep them from firing arrows down at enemy troops while they prepare rams to break down the doors. ''Dynasty Warriors 9'' brings them back as a combination of both this and the Mechanical Ladder, but need to be built by Engineer Captains and then moved into position against a castle wall to deploy a ramp to allow troops to climb up onto the wall and engage the forces there, along with taking out the corner towers that provide reinforcements for the forces sealed within until the rams can open the gates. |
|
| |
|
| :*'''''Mechanical Bridge''''' - Introduced in ''Dynasty Warriors 4'', and known then as Bridgelayers, they are used to gain access across big gaps where there are no bridges currently, or if one had been previously destroyed. Players must protect them while they move across the map to get to their destined location. | | :*'''''Mechanical Bridge''''' - Introduced in ''Dynasty Warriors 4'', and known then as Bridgelayers, they are used to gain access across big gaps where there are no bridges currently, or if one had been previously destroyed. Players that have bridgelayers for their own convenience must protect them while they move across the map to get to their destined location. |
|
| |
|
| :*'''''Mechanical Ladder''''' - AKA "Cloud Ladders" in the Asian scripts, and introduced in ''Dynasty Warriors 4'' where they were known then as Siege Ramps, they are used to grant characters the ability to climb castle walls, or mountain sides, where there are no ladders currently. Players must protect them while they move across the map to get to their destined location. ''Dynasty Warriors 9'' brings them back as a combination of both this and the Siege Tower, but need to be built by Engineer Captains and then moved into position against a castle wall to deploy a ramp to allow troops to climb up onto the wall and engage the forces there, along with taking out the corner towers that provide reinforcements for the forces sealed within until the rams can open the gates. | | :*'''''Mechanical Ladder''''' - AKA "Cloud Ladders" in the Asian scripts, and introduced in ''Dynasty Warriors 4'' where they were known then as Siege Ramps, they are used to grant characters the ability to climb castle walls, or mountain sides, where there are no ladders currently. Players must protect them while they move across the map to get to their destined location of they are built for their forces' use. ''Dynasty Warriors 9'' brings them back as a combination of both this and the Siege Tower, but need to be built by Engineer Captains and then moved into position against a castle wall to deploy a ramp to allow troops to climb up onto the wall and engage the forces there, along with taking out the corner towers that provide reinforcements for the forces sealed within until the rams can open the gates. |
|
| |
|
| <gallery spacing="small" widths="155" bordersize="none" bordercolor="transparent"> | | <gallery mode="nolines"> |
| Juggernaut_Concept_(DW7).png|Juggernaut concept | | Juggernaut_Concept_(DW7).png|Juggernaut concept |
| Wood_Ox_Concept_(DW8).png|Wood Ox concept | | Wood_Ox_Concept_(DW8).png|Wood Ox concept |
| Line 136: |
Line 145: |
| **'''''Cannon Tower''''' - A tower that attacks the player with cannonballs. Unlike catapults, their projectiles do not flinch the player. Sometimes comes in pairs during high-leveled stages. Despite the danger they pose, the towers have a dead zone that prevents them from targeting anything up close, leaving them vulnerable to melee attackers. | | **'''''Cannon Tower''''' - A tower that attacks the player with cannonballs. Unlike catapults, their projectiles do not flinch the player. Sometimes comes in pairs during high-leveled stages. Despite the danger they pose, the towers have a dead zone that prevents them from targeting anything up close, leaving them vulnerable to melee attackers. |
|
| |
|
| <gallery spacing="small" widths="155" bordersize="none" bordercolor="transparent"> | | <gallery mode="nolines"> |
| Blockade (DWB).png|Blockade | | Blockade (DWB).png|Blockade |
| Barricade (DWB).png|Barricade | | Barricade (DWB).png|Barricade |
| Line 147: |
Line 156: |
|
| |
|
| ===Dynasty Warriors: Unleashed=== | | ===Dynasty Warriors: Unleashed=== |
| <gallery spacing="small" widths="155" bordersize="none" bordercolor="transparent"> | | <gallery mode="nolines"> |
| Horse (DWU).png|Horse | | Horse (DWU).png|Horse |
| Normal Tiger (DWU).png|Tiger | | Normal Tiger (DWU).png|Tiger |
| Line 167: |
Line 176: |
|
| |
|
| ===Dynasty Warriors 9=== | | ===Dynasty Warriors 9=== |
| <gallery spacing="small" widths="155" bordersize="none" bordercolor="transparent"> | | <gallery mode="nolines"> |
| Juggernaut (DW9).png|Juggernaut | | Juggernaut (DW9).png|Juggernaut |
| Ballista (DW9).png|Ballista | | Ballista (DW9).png|Ballista |
| Line 187: |
Line 196: |
|
| |
|
| [[Image:Dynasty Warriors Unit - Large Warrior.png|80px|right]] | | [[Image:Dynasty Warriors Unit - Large Warrior.png|80px|right]] |
| *'''Large Warrior''' - These officers are as common as, but much burlier than the Warrior's model. They have a large muscle mass and as such only wear leather lamellar underneath a plate mail chest piece, shoulder guards, shin guards and wrist guards. They have their hair tied into a bun and have a light cloth wrap around their waist. Though in ''Dynasty Warriors 6'' they wore a plumed helmet and gained more armor. They wield only pikes, adapted from the [[Cloned Moveset#Polearm|polearm clone moveset]]. Examples are [[Hua Xiong]] and [[Wang Ping]]. In ''[[Dynasty Warriors: Strikeforce]]'', Large Warriors used large clubs and used the [[Cloned Moveset#Mace|club moveset]]. Enemy Siege Captains when protecting friendly castle gates from an enemy siege are armed with the polearm moveset as well. | | *'''Large Warrior''' - These officers are as common as, but much burlier than the Warrior's model. They have a large muscle mass and as such only wear leather lamellar underneath a plate mail chest piece, shoulder guards, shin guards and wrist guards. They have their hair tied into a bun and have a light cloth wrap around their waist. Though in ''Dynasty Warriors 6'' they wore a plumed helmet and gained more armor. They wield only pikes, adapted from the [[Cloned Moveset#Polearm|polearm clone moveset]]. Examples are [[Hua Xiong]], [[Song Xian]] and [[Wang Ping]]. In ''[[Dynasty Warriors: Strikeforce]]'', Large Warriors used large clubs and used the [[Cloned Moveset#Mace|club moveset]]. Enemy Siege Captains when protecting friendly castle gates from an enemy siege are armed with the polearm moveset as well. |
|
| |
|
| [[Image:Dynasty Warriors Unit - Hero.png|150px|right]] | | [[Image:Dynasty Warriors Unit - Hero.png|150px|right]] |
| *'''Hero''' - These officers are some of the best protected officers, having a full chainmail suit underneath a suit of plate mail. Shoulder, shin and wrist guards and a helmet with a small spike are also present. They were spear wielders in past installments. As they were given a thinner yet older appearance in ''Dynasty Warriors 5'', in the next installment, the Hero model was given a taller helmet, longer spaulders and tassets, and were given a [[Cloned Moveset#Dao|dao clone moveset]]. Examples of the more recent Hero are [[Liao Hua]] and [[Li Dian]]. For their appearance in ''[[Dynasty Warriors: Strikeforce]]'', they wield long bows to harass opponents from afar. Guard Captains in ''Dynasty Warriors 6'' are armed with the dao moveset. | | *'''Hero''' - These officers are some of the best protected in the series, having a full chainmail suit underneath plate armor. Shoulder, shin & wrist guards, and a helmet are also present. They are first introduced in Dynasty Warriors 2, wearing colored plumes in their helmets and a scarf that covers the top portion of the back of their torso armor. They appear mature and with facial hair, and then start to appear younger in the face as of Dynasty Warriors 3. However they return to their more mature facial designs in Dynasty Warriors 5, where they are also delegated to only use spears as their weapon. Notable Hero officers include: [[Meng Da]], [[Wang Lang]] (before DW6 Empires) and [[Xiahou En]]. |
|
| |
|
| [[Image:Dynasty Warriors Unit - Strategist.png|150px|right]] | | [[Image:Dynasty Warriors Unit - Strategist.png|150px|right]] |
| *'''Strategist''' - These are common among the ranks of the Yellow Turbans, and the back of other most armies. They wear a leather lamellar coat underneath a layered strategist robe and a kind of tall, stiff Hitelmacher-like hat on their head. As of ''Dynasty Warriors 6'', some of these models retain a younger look, with less decorative clothing and no facial hair, while others have the opposite. They wield only swords in all installments, but they vary via the "ruler sword" movelist (e.g. [[Liu Bei]], [[Sun Jian]]) or the "warrior sword" movelist (e.g. [[Huang Zhong]], [[Xiahou Yuan]]). Examples are [[Guo Jia]] and [[Ma Liang]]. In ''Dynasty Warriors 6'', Strategists adapt their moveset from the [[Cloned Moveset#Sword|sword clone moveset]]. | | *'''Strategist''' - These are common among the ranks of the Yellow Turbans, and the back of other most armies. They wear a leather lamellar coat underneath a layered strategist robe and a Liang Guan on their head. They are first introduced in Dynasty Warriors 2. As of ''Dynasty Warriors 6'', some of these models retain a younger look, with less decorative clothing and no facial hair, while others have the opposite. They wield only swords in all instalments, but they vary via the "ruler sword" movelist (e.g. [[Liu Bei]], [[Sun Jian]]) or the "warrior sword" movelist (e.g. [[Huang Zhong]], [[Xiahou Yuan]]). Examples are [[Cheng Yu]] and [[Ma Liang]]. In ''Dynasty Warriors 6'', Strategists adapt their moveset from the [[Cloned Moveset#Sword|sword clone moveset]]. |
|
| |
|
| :*'''''Sorcerer''''' - Using the Strategist model and introduced in ''Dynasty Warriors 6'', Sorcerer officers use staves. They attack with a [[Cloned Moveset#Staff|staff clone moveset]] and are similar to [[Zhang Jiao]]'s version of the style. Really the only officers who are this are [[Zhang Bao]] and [[Zhang Liang]]. They walk in a hunched manner similar to [[Pang Tong]] or [[Zhang Jiao]]. | | :*'''''Sorcerer''''' - Using the Strategist model and introduced in ''Dynasty Warriors 6'', Sorcerer officers use staves. They attack with a [[Cloned Moveset#Staff|staff clone moveset]] and are similar to [[Zhang Jiao]]'s version of the style. Really the only officers who are this are [[Zhang Bao]] and [[Zhang Liang]]. They walk in a hunched manner similar to [[Pang Tong]] or [[Zhang Jiao]]. |
|
| |
|
| [[Image:Dynasty Warriors Unit - Ruler.png|80px|right]] | | [[Image:Dynasty Warriors Unit - Ruler.png|80px|right]] |
| *'''Ruler''' - These are the most heavily armored of all generic officers, having a full chainmail suit underneath a suit of plate mail, then a leather lamellar chest piece and a regal overcoat, with shoulder pads, full forearm and leg protection. They have a decorative yet necessary helmet with a chain mail drape for neck protection and a long plume form to show authority. They are all sword wielders in battle. Examples are [[Gongsun Zan]], [[Yuan Shu]], and previously [[Liu Shan]]. This officer model was introduced in ''Dynasty Warriors 5''. In ''Dynasty Warriors 6'' and its spin-offs, Rulers in their debut adapt their moveset from the Sword [[Cloned Moveset|clone moveset]] used by [[Liu Bei]], [[Sun Jian]], [[Sun Quan]], [[Dong Zhuo]] and [[Yuan Shao]]. | | *'''Ruler''' - These are the most heavily armored of all generic officers, having a full chainmail suit underneath a suit of plate mail, then a leather lamellar chest piece and a regal overcoat, with shoulder pads, full forearm and leg protection. They have a decorative yet necessary helmet with a chain mail drape for neck protection and a long plume form to show authority. They are all sword wielders in battle. Examples are [[Gongsun Zan]], [[Yuan Shu]], [[Liu Biao]] and previously [[Liu Shan]]. This officer model was introduced in ''Dynasty Warriors 5''. In ''Dynasty Warriors 6'' and its spin-offs, Rulers in their debut adapt their moveset from the Sword [[Cloned Moveset|clone moveset]] used by [[Liu Bei]], [[Sun Jian]], [[Sun Quan]], [[Dong Zhuo]] and [[Yuan Shao]]. |
|
| |
|
| [[Image:Dynasty Warriors Unit - Barbarian.png|150px|right]] | | [[Image:Dynasty Warriors Unit - Barbarian.png|150px|right]] |
| Line 212: |
Line 221: |
| :''See also: [[Generic Officer Weapons]]'' | | :''See also: [[Generic Officer Weapons]]'' |
| ===Dynasty Warriors 3=== | | ===Dynasty Warriors 3=== |
| <gallery spacing="small" widths="155" bordersize="none" bordercolor="transparent"> | | <gallery mode="nolines"> |
| Long Sword (DW3).png|Long Sword | | Long Sword (DW3).png|Long Sword |
| Steel Sword (DW3).png|Steel Sword | | Steel Sword (DW3).png|Steel Sword |
| Line 220: |
Line 229: |
|
| |
|
| ===Dynasty Warriors 4=== | | ===Dynasty Warriors 4=== |
| <gallery spacing="small" widths="155" bordersize="none" bordercolor="transparent"> | | <gallery mode="nolines"> |
| High Sword (DW4).png|High Sword | | High Sword (DW4).png|High Sword |
| Force Spear (DW4).png|Force Spear | | Force Spear (DW4).png|Force Spear |
| Line 227: |
Line 236: |
|
| |
|
| ===Dynasty Warriors 4: Xtreme Legends=== | | ===Dynasty Warriors 4: Xtreme Legends=== |
| <gallery spacing="small" widths="155" bordersize="none" bordercolor="transparent"> | | <gallery mode="nolines"> |
| Phoenix Sword (DW4).png|Phoenix Sword ([[Yu Ji]]) | | Phoenix Sword (DW4).png|Phoenix Sword ([[Yu Ji]]) |
| </gallery> | | </gallery> |
|
| |
|
| ===Dynasty Warriors 5=== | | ===Dynasty Warriors 5=== |
| <gallery spacing="small" widths="155" bordersize="none" bordercolor="transparent"> | | <gallery mode="nolines"> |
| Phoenix Sword (DW5).png|Phoenix Sword | | Phoenix Sword (DW5).png|Phoenix Sword |
| Sonic Spear (DW5).png|Sonic Spear | | Sonic Spear (DW5).png|Sonic Spear |
| Line 239: |
Line 248: |
|
| |
|
| ===Dynasty Warriors Strikeforce=== | | ===Dynasty Warriors Strikeforce=== |
| <gallery spacing="small" widths="155" bordersize="none" bordercolor="transparent"> | | <gallery mode="nolines"> |
| DW_Strikeforce_-_Crossbow.png|Crossbow | | DW_Strikeforce_-_Crossbow.png|Crossbow |
| DW_Strikeforce_-_Shield.png|Shield | | DW_Strikeforce_-_Shield.png|Shield |
| Line 248: |
Line 257: |
|
| |
|
| ===Dynasty Warriors 7=== | | ===Dynasty Warriors 7=== |
| <gallery spacing="small" widths="155" bordersize="none" bordercolor="transparent"> | | <gallery mode="nolines"> |
| Sword_-_2nd_Weapon_(DW7).png|Wolf's Fang | | Sword_-_2nd_Weapon_(DW7).png|Wolf's Fang |
| Spear_-_2nd_Weapon_(DW7).png|Battle Spear | | Spear_-_2nd_Weapon_(DW7).png|Battle Spear |
| Line 256: |
Line 265: |
|
| |
|
| ===Dynasty Warriors 8=== | | ===Dynasty Warriors 8=== |
| Generics retain the same weapons from ''Dynasty Warriors 7'', with club and iron fan replaced by great sword and throwing knives. | | Generics retain the same weapons from ''Dynasty Warriors 7'', with club and iron fan replaced by great sword and throwing knives. Unnamed generics, such as Unit Commanders and Handmaidens, still use the club and iron fan, however. |
| <gallery spacing="small" widths="155" bordersize="none" bordercolor="transparent"> | | <gallery mode="nolines"> |
| Great Sword - 2nd Weapon (DW8).png|Stallion Cleaver | | Great Sword - 2nd Weapon (DW8).png|Stallion Cleaver |
| Throwing Knives - 2nd Weapon (DW8).png|Combat Blades | | Throwing Knives - 2nd Weapon (DW8).png|Combat Blades |
| Line 265: |
Line 274: |
| ===Dynasty Warriors 9=== | | ===Dynasty Warriors 9=== |
| With the open-world design of this game, most generic officers, such as Assault, Defense, or Support Captains, even various Bandit Chiefs and Bandit Head Chiefs, will be equipped with one of several generic weapons from past titles, including the Great Sword, Throwing Knives, Club, Iron Fan, Sword, Spear, Magic Staff, Chain and Sickle, Battle Ax, or Great Ax. Essentially the base weapons that most playable officers in this title share due to using the same weapon set between them. Boss-type enemies, such as the various Bandit Chiefs and Head Chiefs, will be equipped with the rare weapon of certain officers, such as Huang Gai, Dian Wei, Zhang Jiao, Jia Xu, Sima Zhao, Zhao Yun, Xu Huang, or Zhang He. | | With the open-world design of this game, most generic officers, such as Assault, Defense, or Support Captains, even various Bandit Chiefs and Bandit Head Chiefs, will be equipped with one of several generic weapons from past titles, including the Great Sword, Throwing Knives, Club, Iron Fan, Sword, Spear, Magic Staff, Chain and Sickle, Battle Ax, or Great Ax. Essentially the base weapons that most playable officers in this title share due to using the same weapon set between them. Boss-type enemies, such as the various Bandit Chiefs and Head Chiefs, will be equipped with the rare weapon of certain officers, such as Huang Gai, Dian Wei, Zhang Jiao, Jia Xu, Sima Zhao, Zhao Yun, Xu Huang, or Zhang He. |
| | |
| | However, most officers are sorted by armor, helmet, and weapon they appear with when facing them in battle: |
| | * Great Sword and Great Ax wielders wear light armor with a loose cloth draped over their left leg down to about halfway on their lower leg and matching shoulder guard. Great Ax wielders wear a metal semi-circular helmet with a cloth encircling their head except for their face, while Great Sword wielders wear the turban from the Warrior-type officer in previous titles. |
| | * Battle Ax and Club wielders wear a full set of grey or black armor. Club wielders wear a turban-styled helmet, while Battle Ax wielders wear a metal helmet with a plumage on top. Some Battle Ax wielders will wear only strategist robes while their facial features are more older in appearance with grey hair and a long or short beard. |
| | * Throwing Knives wielders wear robes decorated with clouds and a tall hat, or a full set of armor with a more decorative turban similar to the Ruler-type officers in previous titles, or a more-decorated helmet with a gold frame around the where the face looks out from under the helmet. |
| | * Sword wielders wear decorative robes with tassels on the sides hanging down from the belt, along with a helmet with a cloth underlayer. |
| | * Spear wielders wear a full-length robe and tall hat. |
| | * Iron Fan wielders wear strategist robes and a decorative hat designed around an open fan. |
|
| |
|
| ==Generic Movesets== | | ==Generic Movesets== |
| Line 272: |
Line 289: |
| *Daisuke Tōjō, Akira Kajiwara, Takahiro Suzuki, [[Keisuke Baba]] - Dynasty Warriors 3 (Japanese) | | *Daisuke Tōjō, Akira Kajiwara, Takahiro Suzuki, [[Keisuke Baba]] - Dynasty Warriors 3 (Japanese) |
| *Kai Taschner, Claus Brockmeyer, Jörg Stuttmann - Dynasty Warriors 3 (German-uncredited) | | *Kai Taschner, Claus Brockmeyer, Jörg Stuttmann - Dynasty Warriors 3 (German-uncredited) |
| *Eddie Frierson - Dynasty Warriors 4~6 (English) | | *S. Scott Bullock - Dynasty Warriors 4 (English) |
| *[[Michael Forest]] - Dynasty Warriors 4~5 (English) | | *[[Michael Forest]] - Dynasty Warriors 4~5 (English) |
| *[[Richard Epcar]] - Dynasty Warriors 4~5, 7~8 (English) | | *[[Richard Epcar]] - Dynasty Warriors 4~5, 7~8 (English) |
| *[[David Beron]] - Dynasty Warriors 4~5 (English) | | *[[David Beron]] - Dynasty Warriors 4~5 (English) |
| *[[Robert Martin Klein]] - Dynasty Warriors 4 (English) | | *[[Robert Martin Klein]] - Dynasty Warriors 4 (English) |
| *[[Tony Oliver]] - Dynasty Warriors 4~5, 7, Warriors Orochi series (English) | | *[[Tony Oliver]] - Dynasty Warriors 5, Warriors Orochi series (English) |
| *[[Peter Doyle]] - Dynasty Warriors 5: Xtreme Legends, 6, Warriors Orochi series (English) | | *Eddie Frierson - Dynasty Warriors 5 (English) |
| *Liam O'Brien, [[Wally Wingert]], [[Grant George]], [[Skip Stellrecht]], [[Alan Shearman]] - Dynasty Warriors 6 (English) | | *[[Crispin Freeman]] - Dynasty Warriors 5 (English) |
| *Matthew Mercer, Christopher Sabat, Steve Staley, Darrel Guilbeau, [[Michael Lindsay]] - Dynasty Warriors 7 (English) | | *[[Peter Doyle]] - Dynasty Warriors 5: Xtreme Legends, Warriors Orochi series (English) |
| *[[Nobunaga Shimazaki]] - Dynasty Warriors 7 (Japanese) | | *[[Liam O'Brien]], [[Wally Wingert]], [[Grant George]], [[Skip Stellrecht]], [[Alan Shearman]] - Dynasty Warriors 6 (English) |
| | *Kenji Nojima, Yoshiyuki Kono, Hisayoshi Suganuma, Tsuyoshi Takishita - Dynasty Warriors 6 (Japanese) |
| | *[[Matthew Mercer]], Christopher Sabat, Steve Staley, Darrel Guilbeau, [[Michael Lindsay]] - Dynasty Warriors 7-8 (English) |
| | *[[Nobunaga Shimazaki]], [[Tsuyoshi Takishita]], [[Hirofumi Tanaka]], [[Kenji Nojima]] - Dynasty Warriors 7 (Japanese) |
| *[[Dan Woren]] - Dynasty Warriors 8 (English) | | *[[Dan Woren]] - Dynasty Warriors 8 (English) |
| *[[Shunzo Miyasaka]], [[Hiromu Miyazaki]], [[Sota Arai]], [[Ryosuke Kanemoto]] - Dynasty Warriors 8 (Japanese) | | *[[Shunzo Miyasaka]], [[Hiromu Miyazaki]], [[Sota Arai]], [[Ryosuke Kanemoto]] - Dynasty Warriors 8 (Japanese) |
| Line 305: |
Line 325: |
|
| |
|
| ==Gallery== | | ==Gallery== |
| {|class="toccolours collapsible collapsed" width="100%" style="text-align:left; font-size:90%; font-family:arial" | | {{#tag:tabber| |
| ! style="background:#616970; background: -moz-linear-gradient(#616970, #1B1F23 120%); background: -ms-linear-gradient(#616970, #1B1F23 120%); background: -webkit-linear-gradient(#616970, #1B1F23 120%); background: -o-linear-gradient(#616970, #1B1F23 120%); -moz-border-radius:{{{rad|0.6em}}}; -webkit-border-radius:{{{rad|0.6em}}}; color:white; font-family:verdana" align="center"| <div style="margin-left:30px;"><font style="font-size:13.5px; font-family:tahoma;">Gallery</font></div>
| | Dynasty Warriors 2= |
| |- | | ;Common Troop |
| |<tabber> | | <gallery spacing="small" widths="150" columns="3" bordersize="none" bordercolor="transparent"> |
| DW2=
| | Common Troop Model - Green 1 (DW2).png|Green Common Troop 1 |
| <gallery spacing="small" widths="155" bordersize="none" bordercolor="transparent"> | | Common Troop Model - Green 2 (DW2).png|Green Common Troop 2 |
| Generic_Portrait_11_(DW2).png|Commander
| | Common Troop Model - Green 3 (DW2).png|Green Common Troop 3 |
| Generic_Portrait_10_(DW2).png|Hero
| | Common Troop Model - Blue 1 (DW2).png|Blue Common Troop 1 |
| Generic_Portrait_5_(DW2).png|Strategist
| | Common Troop Model - Blue 2 (DW2).png|Blue Common Troop 2 |
| Generic_Portrait_4_(DW2).png|General
| | Common Troop Model - Blue 3 (DW2).png|Blue Common Troop 3 |
| Generic_Portrait_8_(DW2).png|Warlord
| | Common Troop Model - Red 1 (DW2).png|Red Common Troop 1 |
| Generic_Portrait_9_(DW2).png|Guard
| | Common Troop Model - Red 2 (DW2).png|Red Common Troop 2 |
| Generic_Portrait_7_(DW2).png|Private
| | Common Troop Model - Red 3 (DW2).png|Red Common Troop 3 |
| Generic_Portrait_(DW2).png|Archer
| | Common Troop Model - Purple 1 (DW2).png|Purple Common Troop 1 |
| Generic_Portrait_6_(DW2).png|Lady Guard
| | Common Troop Model - Purple 2 (DW2).png|Purple Common Troop 2 |
| Generic_Portrait_2_(DW2).png|Yellow Turban Captain
| | Common Troop Model - Purple 3 (DW2).png|Purple Common Troop 3 |
| Generic_Portrait_3_(DW2).png|Yellow Turban Private
| | Common Troop Model - Yellow 1 (DW2).png|Yellow Common Troop 1 |
| | Common Troop Model - Yellow 2 (DW2).png|Yellow Common Troop 2 |
| | Common Troop Model - Yellow 3 (DW2).png|Yellow Common Troop 3 |
| | </gallery> |
| | |
| | ;Heavy Troop |
| | <gallery spacing="small" widths="150" columns="3" bordersize="none" bordercolor="transparent"> |
| | Heavy Troop Model - Green 1 (DW2).png|Green Heavy Troop 1 |
| | Heavy Troop Model - Green 2 (DW2).png|Green Heavy Troop 2 |
| | Heavy Troop Model - Green 3 (DW2).png|Green Heavy Troop 3 |
| | Heavy Troop Model - Blue 1 (DW2).png|Blue Heavy Troop 1 |
| | Heavy Troop Model - Blue 2 (DW2).png|Blue Heavy Troop 2 |
| | Heavy Troop Model - Blue 3 (DW2).png|Blue Heavy Troop 3 |
| | Heavy Troop Model - Red 1 (DW2).png|Red Heavy Troop 1 |
| | Heavy Troop Model - Red 2 (DW2).png|Red Heavy Troop 2 |
| | Heavy Troop Model - Red 3 (DW2).png|Red Heavy Troop 3 |
| | Heavy Troop Model - Purple 1 (DW2).png|Purple Heavy Troop 1 |
| | Heavy Troop Model - Purple 2 (DW2).png|Purple Heavy Troop 2 |
| | Heavy Troop Model - Purple 3 (DW2).png|Purple Heavy Troop 3 |
| | Heavy Troop Model - Yellow 1 (DW2).png|Yellow Heavy Troop 1 |
| | Heavy Troop Model - Yellow 2 (DW2).png|Yellow Heavy Troop 2 |
| | Heavy Troop Model - Yellow 3 (DW2).png|Yellow Heavy Troop 3 |
| | </gallery> |
| | |
| | ;Captain |
| | <gallery spacing="small" widths="150" columns="3" bordersize="none" bordercolor="transparent"> |
| | Captain Model - Green 1 (DW2).png|Green Captain 1 |
| | Captain Model - Green 2 (DW2).png|Green Captain 2 |
| | Captain Model - Green 3 (DW2).png|Green Captain 3 |
| | Captain Model - Blue 1 (DW2).png|Blue Captain 1 |
| | Captain Model - Blue 2 (DW2).png|Blue Captain 2 |
| | Captain Model - Blue 3 (DW2).png|Blue Captain 3 |
| | Captain Model - Red 1 (DW2).png|Red Captain 1 |
| | Captain Model - Red 2 (DW2).png|Red Captain 2 |
| | Captain Model - Red 3 (DW2).png|Red Captain 3 |
| | Captain Model - Purple 1 (DW2).png|Purple Captain 1 |
| | Captain Model - Purple 2 (DW2).png|Purple Captain 2 |
| | Captain Model - Purple 3 (DW2).png|Purple Captain 3 |
| | Captain Model - Yellow 1 (DW2).png|Yellow Captain 1 |
| | Captain Model - Yellow 2 (DW2).png|Yellow Captain 2 |
| | Captain Model - Yellow 3 (DW2).png|Yellow Captain 3 |
| | </gallery> |
| | |
| | ;Amazon |
| | <gallery spacing="small" widths="150" columns="3" bordersize="none" bordercolor="transparent"> |
| | Amazon Model 1 (DW2).png|Amazon 1 |
| | Amazon Model 2 (DW2).png|Amazon 2 |
| | Amazon Model 3 (DW2).png|Amazon 3 |
| | </gallery> |
| | |
| | ;Archer |
| | <gallery spacing="small" widths="150" columns="3" bordersize="none" bordercolor="transparent"> |
| | Archer Model - Green 1 (DW2).png|Green Archer 1 |
| | Archer Model - Green 2 (DW2).png|Green Archer 2 |
| | Archer Model - Green 3 (DW2).png|Green Archer 3 |
| | Archer Model - Blue 1 (DW2).png|Blue Archer 1 |
| | Archer Model - Blue 2 (DW2).png|Blue Archer 2 |
| | Archer Model - Blue 3 (DW2).png|Blue Archer 3 |
| | Archer Model - Red 1 (DW2).png|Red Archer 1 |
| | Archer Model - Red 2 (DW2).png|Red Archer 2 |
| | Archer Model - Red 3 (DW2).png|Red Archer 3 |
| | Archer Model - Purple 1 (DW2).png|Purple Archer 1 |
| | Archer Model - Purple 2 (DW2).png|Purple Archer 2 |
| | Archer Model - Purple 3 (DW2).png|Purple Archer 3 |
| | Archer Model - Yellow 1 (DW2).png|Yellow Archer 1 |
| | Archer Model - Yellow 2 (DW2).png|Yellow Archer 2 |
| | Archer Model - Yellow 3 (DW2).png|Yellow Archer 3 |
| | </gallery> |
| | |
| | ;Head Archer |
| | <gallery spacing="small" widths="150" columns="3" bordersize="none" bordercolor="transparent"> |
| | Head Archer Model - Green 1 (DW2).png|Green Head Archer 1 |
| | Head Archer Model - Green 2 (DW2).png|Green Head Archer 2 |
| | Head Archer Model - Green 3 (DW2).png|Green Head Archer 3 |
| | Head Archer Model - Blue 1 (DW2).png|Blue Head Archer 1 |
| | Head Archer Model - Blue 2 (DW2).png|Blue Head Archer 2 |
| | Head Archer Model - Blue 3 (DW2).png|Blue Head Archer 3 |
| | Head Archer Model - Red 1 (DW2).png|Red Head Archer 1 |
| | Head Archer Model - Red 2 (DW2).png|Red Head Archer 2 |
| | Head Archer Model - Red 3 (DW2).png|Red Head Archer 3 |
| | Head Archer Model - Purple 1 (DW2).png|Purple Head Archer 1 |
| | Head Archer Model - Purple 2 (DW2).png|Purple Head Archer 2 |
| | Head Archer Model - Purple 3 (DW2).png|Purple Head Archer 3 |
| | Head Archer Model - Yellow 1 (DW2).png|Yellow Head Archer 1 |
| | Head Archer Model - Yellow 2 (DW2).png|Yellow Head Archer 2 |
| | Head Archer Model - Yellow 3 (DW2).png|Yellow Head Archer 3 |
| | </gallery> |
| | |
| | ;Turban Infantry |
| | <gallery spacing="small" widths="150" columns="3" bordersize="none" bordercolor="transparent"> |
| | Turban Infantry Model 1 (DW2).png|Turban Infantry 1 |
| | Turban Infantry Model 2 (DW2).png|Turban Infantry 2 |
| | Turban Infantry Model 3 (DW2).png|Turban Infantry 3 |
| | </gallery> |
| | |
| | ;Turban Captain |
| | <gallery spacing="small" widths="150" columns="3" bordersize="none" bordercolor="transparent"> |
| | Turban Captain Model 1 (DW2).png|Turban Captain 1 |
| | Turban Captain Model 2 (DW2).png|Turban Captain 2 |
| | Turban Captain Model 3 (DW2).png|Turban Captain 3 |
| | </gallery> |
| | |
| | ;Hero |
| | <gallery spacing="small" widths="150" columns="3" bordersize="none" bordercolor="transparent"> |
| | Hero Model - Green 1 (DW2).png|Green Hero 1 |
| | Hero Model - Green 2 (DW2).png|Green Hero 2 |
| | Hero Model - Green 3 (DW2).png|Green Hero 3 |
| | Hero Model - Blue 1 (DW2).png|Blue Hero 1 |
| | Hero Model - Blue 2 (DW2).png|Blue Hero 2 |
| | Hero Model - Blue 3 (DW2).png|Blue Hero 3 |
| | Hero Model - Red 1 (DW2).png|Red Hero 1 |
| | Hero Model - Red 2 (DW2).png|Red Hero 2 |
| | Hero Model - Red 3 (DW2).png|Red Hero 3 |
| | Hero Model - Purple 1 (DW2).png|Purple Hero 1 |
| | Hero Model - Purple 2 (DW2).png|Purple Hero 2 |
| | Hero Model - Purple 3 (DW2).png|Purple Hero 3 |
| | Hero Model - Yellow 1 (DW2).png|Yellow Hero 1 |
| | Hero Model - Yellow 2 (DW2).png|Yellow Hero 2 |
| | Hero Model - Yellow 3 (DW2).png|Yellow Hero 3 |
| | </gallery> |
| | |
| | ;Warrior |
| | <gallery spacing="small" widths="150" columns="3" bordersize="none" bordercolor="transparent"> |
| | Warrior Model - Green 1 (DW2).png|Green Warrior 1 |
| | Warrior Model - Green 2 (DW2).png|Green Warrior 2 |
| | Warrior Model - Green 3 (DW2).png|Green Warrior 3 |
| | Warrior Model - Blue 1 (DW2).png|Blue Warrior 1 |
| | Warrior Model - Blue 2 (DW2).png|Blue Warrior 2 |
| | Warrior Model - Blue 3 (DW2).png|Blue Warrior 3 |
| | Warrior Model - Red 1 (DW2).png|Red Warrior 1 |
| | Warrior Model - Red 2 (DW2).png|Red Warrior 2 |
| | Warrior Model - Red 3 (DW2).png|Red Warrior 3 |
| | Warrior Model - Purple 1 (DW2).png|Purple Warrior 1 |
| | Warrior Model - Purple 2 (DW2).png|Purple Warrior 2 |
| | Warrior Model - Purple 3 (DW2).png|Purple Warrior 3 |
| | Warrior Model - Yellow 1 (DW2).png|Yellow Warrior 1 |
| | Warrior Model - Yellow 2 (DW2).png|Yellow Warrior 2 |
| | Warrior Model - Yellow 3 (DW2).png|Yellow Warrior 3 |
| </gallery> | | </gallery> |
| |-|DW3=
| | |
| <gallery spacing="small" widths="155" bordersize="none" bordercolor="transparent"> | | ;Strategist |
| Warrior Concept (DW3).png|Warrior
| | <gallery spacing="small" widths="150" columns="3" bordersize="none" bordercolor="transparent"> |
| Hero Concept (DW3).png|Hero
| | Strategist Model - Green 1 (DW2).png|Green Strategist 1 |
| Strategist Concept (DW3).png|Strategist | | Strategist Model - Green 2 (DW2).png|Green Strategist 2 |
| Nanman Officer Concept (DW3).png|Nanman Officer
| | Strategist Model - Green 3 (DW2).png|Green Strategist 3 |
| | Strategist Model - Blue 1 (DW2).png|Blue Strategist 1 |
| | Strategist Model - Blue 2 (DW2).png|Blue Strategist 2 |
| | Strategist Model - Blue 3 (DW2).png|Blue Strategist 3 |
| | Strategist Model - Red 1 (DW2).png|Red Strategist 1 |
| | Strategist Model - Red 2 (DW2).png|Red Strategist 2 |
| | Strategist Model - Red 3 (DW2).png|Red Strategist 3 |
| | Strategist Model - Purple 1 (DW2).png|Purple Strategist 1 |
| | Strategist Model - Purple 2 (DW2).png|Purple Strategist 2 |
| | Strategist Model - Purple 3 (DW2).png|Purple Strategist 3 |
| | Strategist Model - Yellow 1 (DW2).png|Yellow Strategist 1 |
| | Strategist Model - Yellow 2 (DW2).png|Yellow Strategist 2 |
| | Strategist Model - Yellow 3 (DW2).png|Yellow Strategist 3 |
| | </gallery> |
| | {{!}}-{{!}} |
| | Dynasty Warriors 3= |
| | <tabber>Concept Artworks= |
| | ;Troops |
| | <gallery spacing="small" widths="150" columns="4" bordersize="none" bordercolor="transparent"> |
| Common Troop Concept (DW3).png|Common Troop | | Common Troop Concept (DW3).png|Common Troop |
| Heavy Troop Concept (DW3).png|Heavy Troop | | Heavy Troop Concept (DW3).png|Heavy Troop |
| Lady Guard Concept (DW3).png|Lady Guard
| |
| Archer Concept (DW3).png|Archer | | Archer Concept (DW3).png|Archer |
| Turban Infantry Concept (DW3).png|Turban Infantry | | Turban Infantry Concept (DW3).png|Turban Infantry |
| Turban Captain Concept (DW3).png|Turban Captain | | Turban Captain Concept (DW3).png|Turban Captain |
| | Lady Guard Concept (DW3).png|Amazon |
| Nanman Infantry Concept (DW3).png|Nanman Infantry | | Nanman Infantry Concept (DW3).png|Nanman Infantry |
| | Nanman Captain Concept (DW3).png|Nanman Captain |
| | Amazon Concept (DW3).png|Nanman Amazon |
| Armor Troop Concept (DW3).png|Armor Troop | | Armor Troop Concept (DW3).png|Armor Troop |
| Amazon Concept (DW3).png|Amazon
| |
| Nanman Captain Concept (DW3).png|Nanman Captain
| |
| </gallery> | | </gallery> |
| |-|DW4= | | |
| <gallery spacing="small" widths="155" bordersize="none" bordercolor="transparent"> | | ;Officers |
| Warrior_Model_(DW4).png|Warrior
| | <gallery spacing="small" widths="150" columns="4" bordersize="none" bordercolor="transparent"> |
| Hero_Model_(DW4).png|Hero
| | Hero Concept (DW3).png|Hero |
| Strategist_Model_(DW4).png|Strategist
| | Warrior Concept (DW3).png|Warrior |
| Nanman_Officer_Model_(DW4).png|Nanman Officer
| | Strategist Concept (DW3).png|Strategist |
| Common_Troop_Model_(DW4).png|Common Troop
| | Nanman Officer Concept (DW3).png|Nanman Officer |
| Heavy_Troop_Model_(DW4).png|Heavy Troop
| | </gallery> |
| Amazon_Model_(DW4).png|Amazon
| | |-|Models= |
| Captain_Model_(DW4).png|Captain
| | ;Common Troop |
| Archer_(DW4).png|Archer
| | <gallery spacing="small" widths="150" columns="4" bordersize="none" bordercolor="transparent"> |
| Head_Archer_(DW4).png|Head Archer
| | Common Troop Model - Green 1 (DW3).png|Green Common Troop 1 |
| Turban_Infantry_Model_(DW4).png|Turban Infantry
| | Common Troop Model - Green 2 (DW3).png|Green Common Troop 2 |
| Turban_Captain_Model_(DW4).png|Turban Captain
| | Common Troop Model - Blue 1 (DW3).png|Blue Common Troop 1 |
| Nanman_Infantry_Model_(DW4).png|Nanman Infantry
| | Common Troop Model - Blue 2 (DW3).png|Blue Common Troop 2 |
| Armor_Troop_Model_(DW4).png|Armor Troop
| | Common Troop Model - Red 1 (DW3).png|Red Common Troop 1 |
| Nanman_Amazon_Model_(DW4).png|Nanman Amazon
| | Common Troop Model - Red 2 (DW3).png|Red Common Troop 2 |
| Nanman_Captain_Model_(DW4).png|Nanman Captain
| | Common Troop Model - Purple 1 (DW3).png|Purple Common Troop 1 |
| Bombardier_(DW4).png|Bombardier
| | Common Troop Model - Purple 2 (DW3).png|Purple Common Troop 2 |
| | Common Troop Model - Yellow 1 (DW3).png|Yellow Common Troop 1 |
| | Common Troop Model - Yellow 2 (DW3).png|Yellow Common Troop 2 |
| | Common Troop Model - White (DW3XL).png|White Common Troop |
| | Common Troop Model - Black (DW3XL).png|Black Common Troop |
| | Common Troop Model - Peach (DW3XL).png|Peach Common Troop |
| | </gallery> |
| | |
| | ;Heavy Troop |
| | <gallery spacing="small" widths="150" columns="4" bordersize="none" bordercolor="transparent"> |
| | Heavy Troop Model - Green 1 (DW3).png|Green Heavy Troop 1 |
| | Heavy Troop Model - Green 2 (DW3).png|Green Heavy Troop 2 |
| | Heavy Troop Model - Blue 1 (DW3).png|Blue Heavy Troop 1 |
| | Heavy Troop Model - Blue 2 (DW3).png|Blue Heavy Troop 2 |
| | Heavy Troop Model - Red 1 (DW3).png|Red Heavy Troop 1 |
| | Heavy Troop Model - Red 2 (DW3).png|Red Heavy Troop 2 |
| | Heavy Troop Model - Purple 1 (DW3).png|Purple Heavy Troop 1 |
| | Heavy Troop Model - Purple 2 (DW3).png|Purple Heavy Troop 2 |
| | Heavy Troop Model - Yellow 1 (DW3).png|Yellow Heavy Troop 1 |
| | Heavy Troop Model - Yellow 2 (DW3).png|Yellow Heavy Troop 2 |
| | Heavy Troop Model - White (DW3XL).png|White Heavy Troop |
| | Heavy Troop Model - Black (DW3XL).png|Black Heavy Troop |
| | Heavy Troop Model - Peach (DW3XL).png|Peach Heavy Troop |
| | </gallery> |
| | |
| | ;Captain |
| | <gallery spacing="small" widths="150" columns="4" bordersize="none" bordercolor="transparent"> |
| | Captain Model - Green 1 (DW3).png|Green Captain 1 |
| | Captain Model - Green 2 (DW3).png|Green Captain 2 |
| | Captain Model - Blue 1 (DW3).png|Blue Captain 1 |
| | Captain Model - Blue 2 (DW3).png|Blue Captain 2 |
| | Captain Model - Red 1 (DW3).png|Red Captain 1 |
| | Captain Model - Red 2 (DW3).png|Red Captain 2 |
| | Captain Model - Purple 1 (DW3).png|Purple Captain 1 |
| | Captain Model - Purple 2 (DW3).png|Purple Captain 2 |
| | Captain Model - Yellow 1 (DW3).png|Yellow Captain 1 |
| | Captain Model - Yellow 2 (DW3).png|Yellow Captain 2 |
| | Captain Model - White (DW3XL).png|White Captain |
| | Captain Model - Black (DW3XL).png|Black Captain |
| | Captain Model - Peach (DW3XL).png|Peach Captain |
| | </gallery> |
| | |
| | ;Amazon |
| | <gallery spacing="small" widths="150" columns="4" bordersize="none" bordercolor="transparent"> |
| | Amazon Model - Green 1 (DW3XL).png|Green Amazon 1 |
| | Amazon Model - Green 2 (DW3XL).png|Green Amazon 2 |
| | Amazon Model - Blue 1 (DW3XL).png|Blue Amazon 1 |
| | Amazon Model - Blue 2 (DW3XL).png|Blue Amazon 2 |
| | Amazon Model - Red 1 (DW3XL).png|Red Amazon 1 |
| | Amazon Model - Red 2 (DW3XL).png|Red Amazon 2 |
| | Amazon Model - Purple 1 (DW3XL).png|Purple Amazon 1 |
| | Amazon Model - Purple 2 (DW3XL).png|Purple Amazon 2 |
| | Amazon Model - Yellow 1 (DW3XL).png|Yellow Amazon 1 |
| | Amazon Model - Yellow 2 (DW3XL).png|Yellow Amazon 2 |
| | Amazon Model - White 1 (DW3XL).png|White Amazon 1 |
| | Amazon Model - White 2 (DW3XL).png|White Amazon 2 |
| | Amazon Model - Black 1 (DW3XL).png|Black Amazon 1 |
| | Amazon Model - Black 2 (DW3XL).png|Black Amazon 2 |
| | Amazon Model - Peach 1 (DW3XL).png|Peach Amazon 1 |
| | Amazon Model - Peach 2 (DW3XL).png|Peach Amazon 2 |
| | </gallery> |
| | |
| | ;Archer |
| | <gallery spacing="small" widths="150" columns="4" bordersize="none" bordercolor="transparent"> |
| | Archer Model - Green 1 (DW3).png|Green Archer 1 |
| | Archer Model - Green 2 (DW3).png|Green Archer 2 |
| | Archer Model - Blue 1 (DW3).png|Blue Archer 1 |
| | Archer Model - Blue 2 (DW3).png|Blue Archer 2 |
| | Archer Model - Red 1 (DW3).png|Red Archer 1 |
| | Archer Model - Red 2 (DW3).png|Red Archer 2 |
| | Archer Model - Purple 1 (DW3).png|Purple Archer 1 |
| | Archer Model - Purple 2 (DW3).png|Purple Archer 2 |
| | Archer Model - Yellow 1 (DW3).png|Yellow Archer 1 |
| | Archer Model - Yellow 2 (DW3).png|Yellow Archer 2 |
| | </gallery> |
| | |
| | ;Head Archer |
| | <gallery spacing="small" widths="150" columns="4" bordersize="none" bordercolor="transparent"> |
| | Head Archer Model - Green 1 (DW3).png|Green Head Archer 1 |
| | Head Archer Model - Green 2 (DW3).png|Green Head Archer 2 |
| | Head Archer Model - Blue 1 (DW3).png|Blue Head Archer 1 |
| | Head Archer Model - Blue 2 (DW3).png|Blue Head Archer 2 |
| | Head Archer Model - Red 1 (DW3).png|Red Head Archer 1 |
| | Head Archer Model - Red 2 (DW3).png|Red Head Archer 2 |
| | Head Archer Model - Purple 1 (DW3).png|Purple Head Archer 1 |
| | Head Archer Model - Purple 2 (DW3).png|Purple Head Archer 2 |
| | Head Archer Model - Yellow 1 (DW3).png|Yellow Head Archer 1 |
| | Head Archer Model - Yellow 2 (DW3).png|Yellow Head Archer 2 |
| | </gallery> |
| | |
| | ;Turban Infantry |
| | <gallery spacing="small" widths="150" columns="4" bordersize="none" bordercolor="transparent"> |
| | Turban Infantry Model 1 (DW3).png|Turban Infantry 1 |
| | Turban Infantry Model 2 (DW3).png|Turban Infantry 2 |
| | </gallery> |
| | |
| | ;Turban Captain |
| | <gallery spacing="small" widths="150" columns="4" bordersize="none" bordercolor="transparent"> |
| | Turban Captain Model 1 (DW3).png|Turban Captain 1 |
| | Turban Captain Model 2 (DW3).png|Turban Captain 2 |
| | </gallery> |
| | |
| | ;Nanman Infantry |
| | <gallery spacing="small" widths="150" columns="4" bordersize="none" bordercolor="transparent"> |
| | Nanman Infantry Model - Purple 1 (DW3).png|Default Purple Nanman Infantry 1 |
| | Nanman Infantry Model - Purple 2 (DW3).png|Default Purple Nanman Infantry 2 |
| | Nanman Infantry Model - Green (DW3XL).png|Green Nanman Infantry |
| | Nanman Infantry Model - Blue (DW3XL).png|Blue Nanman Infantry |
| | Nanman Infantry Model - Red (DW3XL).png|Red Nanman Infantry |
| | Nanman Infantry Model - Yellow (DW3XL).png|Yellow Nanman Infantry |
| | Nanman Infantry Model - White (DW3XL).png|White Nanman Infantry |
| | Nanman Infantry Model - Black (DW3XL).png|Black Nanman Infantry |
| | Nanman Infantry Model - Peach (DW3XL).png|Peach Nanman Infantry |
| | </gallery> |
| | |
| | ;Nanman Captain |
| | <gallery spacing="small" widths="150" columns="4" bordersize="none" bordercolor="transparent"> |
| | Nanman Captain Model - Purple 1 (DW3).png|Default Purple Nanman Captain 1 |
| | Nanman Captain Model - Purple 2 (DW3).png|Default Purple Nanman Captain 2 |
| | Nanman Captain Model - Green (DW3XL).png|Green Nanman Captain |
| | Nanman Captain Model - Blue (DW3XL).png|Blue Nanman Captain |
| | Nanman Captain Model - Red (DW3XL).png|Red Nanman Captain |
| | Nanman Captain Model - Yellow (DW3XL).png|Yellow Nanman Captain |
| | Nanman Captain Model - White (DW3XL).png|White Nanman Captain |
| | Nanman Captain Model - Black (DW3XL).png|Black Nanman Captain |
| | Nanman Captain Model - Peach (DW3XL).png|Peach Nanman Captain |
| | </gallery> |
| | |
| | ;Nanman Amazon |
| | <gallery spacing="small" widths="150" columns="4" bordersize="none" bordercolor="transparent"> |
| | Nanman Amazon Model - Purple 1 (DW3).png|Default Purple Nanman Amazon 1 |
| | Nanman Amazon Model - Purple 2 (DW3).png|Default Purple Nanman Amazon 2 |
| | Nanman Amazon Model - Green 1 (DW3XL).png|Green Nanman Amazon 1 |
| | Nanman Amazon Model - Green 2 (DW3XL).png|Green Nanman Amazon 2 |
| | Nanman Amazon Model - Blue 1 (DW3XL).png|Blue Nanman Amazon 1 |
| | Nanman Amazon Model - Blue 2 (DW3XL).png|Blue Nanman Amazon 2 |
| | Nanman Amazon Model - Red 1 (DW3XL).png|Red Nanman Amazon 1 |
| | Nanman Amazon Model - Red 2 (DW3XL).png|Red Nanman Amazon 2 |
| | Nanman Amazon Model - Yellow 1 (DW3XL).png|Yellow Nanman Amazon 1 |
| | Nanman Amazon Model - Yellow 2 (DW3XL).png|Yellow Nanman Amazon 2 |
| | Nanman Amazon Model - White 1 (DW3XL).png|White Nanman Amazon 1 |
| | Nanman Amazon Model - White 2 (DW3XL).png|White Nanman Amazon 2 |
| | Nanman Amazon Model - Black 1 (DW3XL).png|Black Nanman Amazon 1 |
| | Nanman Amazon Model - Black 2 (DW3XL).png|Black Nanman Amazon 2 |
| | Nanman Amazon Model - Peach 1 (DW3XL).png|Peach Nanman Amazon 1 |
| | Nanman Amazon Model - Peach 2 (DW3XL).png|Peach Nanman Amazon 2 |
| | </gallery> |
| | |
| | ;Armor Troop |
| | <gallery spacing="small" widths="150" columns="4" bordersize="none" bordercolor="transparent"> |
| | Armor Troop Model - Purple 1 (DW3).png|Default Purple Armor Troop 1 |
| | Armor Troop Model - Purple 2 (DW3).png|Default Purple Armor Troop 2 |
| | Armor Troop Model - Green (DW3XL).png|Green Armor Troop |
| | Armor Troop Model - Blue (DW3XL).png|Blue Armor Troop |
| | Armor Troop Model - Red (DW3XL).png|Red Armor Troop |
| | Armor Troop Model - Yellow (DW3XL).png|Yellow Armor Troop |
| | Armor Troop Model - White (DW3XL).png|White Armor Troop |
| | Armor Troop Model - Black (DW3XL).png|Black Armor Troop |
| | Armor Troop Model - Peach (DW3XL).png|Peach Armor Troop |
| | </gallery> |
| | |
| | ;Hero |
| | <gallery spacing="small" widths="150" columns="4" bordersize="none" bordercolor="transparent"> |
| | Hero Model - Green 1 (DW3).png|Green Hero 1 |
| | Hero Model - Green 2 (DW3).png|Green Hero 2 |
| | Hero Model - Blue 1 (DW3).png|Blue Hero 1 |
| | Hero Model - Blue 2 (DW3).png|Blue Hero 2 |
| | Hero Model - Red 1 (DW3).png|Red Hero 1 |
| | Hero Model - Red 2 (DW3).png|Red Hero 2 |
| | Hero Model - Purple 1 (DW3).png|Purple Hero 1 |
| | Hero Model - Purple 2 (DW3).png|Purple Hero 2 |
| | Hero Model - Yellow 1 (DW3).png|Yellow Hero 1 |
| | Hero Model - Yellow 2 (DW3).png|Yellow Hero 2 |
| | Hero Model - White (DW3XL).png|White Hero |
| | Hero Model - Black (DW3XL).png|Black Hero |
| | Hero Model - Peach (DW3XL).png|Peach Hero |
| | </gallery> |
| | |
| | ;Warrior |
| | <gallery spacing="small" widths="150" columns="4" bordersize="none" bordercolor="transparent"> |
| | Warrior Model - Green 1 (DW3).png|Green Warrior 1 |
| | Warrior Model - Green 2 (DW3).png|Green Warrior 2 |
| | Warrior Model - Blue 1 (DW3).png|Blue Warrior 1 |
| | Warrior Model - Blue 2 (DW3).png|Blue Warrior 2 |
| | Warrior Model - Red 1 (DW3).png|Red Warrior 1 |
| | Warrior Model - Red 2 (DW3).png|Red Warrior 2 |
| | Warrior Model - Purple 1 (DW3).png|Purple Warrior 1 |
| | Warrior Model - Purple 2 (DW3).png|Purple Warrior 2 |
| | Warrior Model - Yellow 1 (DW3).png|Yellow Warrior 1 |
| | Warrior Model - Yellow 2 (DW3).png|Yellow Warrior 2 |
| | </gallery> |
| | |
| | ;Strategist |
| | <gallery spacing="small" widths="150" columns="4" bordersize="none" bordercolor="transparent"> |
| | Strategist Model - Green 1 (DW3).png|Green Strategist 1 |
| | Strategist Model - Green 2 (DW3).png|Green Strategist 2 |
| | Strategist Model - Blue 1 (DW3).png|Blue Strategist 1 |
| | Strategist Model - Blue 2 (DW3).png|Blue Strategist 2 |
| | Strategist Model - Red 1 (DW3).png|Red Strategist 1 |
| | Strategist Model - Red 2 (DW3).png|Red Strategist 2 |
| | Strategist Model - Purple 1 (DW3).png|Purple Strategist 1 |
| | Strategist Model - Purple 2 (DW3).png|Purple Strategist 2 |
| | Strategist Model - Yellow 1 (DW3).png|Yellow Strategist 1 |
| | Strategist Model - Yellow 2 (DW3).png|Yellow Strategist 2 |
| | </gallery> |
| | |
| | ;Barbarian |
| | <gallery spacing="small" widths="150" columns="4" bordersize="none" bordercolor="transparent"> |
| | Barbarian Model 1 (DW3).png|Barbarian 1 |
| | Barbarian Model 2 (DW3).png|Barbarian 2 |
| | </gallery> |
| | </tabber> |
| | {{!}}-{{!}} |
| | Dynasty Warriors 4= |
| | ;Common Troop |
| | <gallery spacing="small" widths="150" columns="6" bordersize="none" bordercolor="transparent"> |
| | Common Troop Model - Blue (DW4).png|Blue Common Troop |
| | Common Troop Model - Red (DW4).png|Red Common Troop |
| | Common Troop Model - Green (DW4).png|Green Common Troop |
| | Common Troop Model - Yellow (DW4).png|Yellow Common Troop |
| | Common Troop Model - Purple (DW4).png|Purple Common Troop |
| | Common Troop Model - White (DW4).png|White Common Troop |
| | </gallery> |
| | |
| | ;Heavy Troop |
| | <gallery spacing="small" widths="150" columns="6" bordersize="none" bordercolor="transparent"> |
| | Heavy Troop Model - Blue (DW4).png|Blue Heavy Troop |
| | Heavy Troop Model - Red (DW4).png|Red Heavy Troop |
| | Heavy Troop Model - Green (DW4).png|Green Heavy Troop |
| | Heavy Troop Model - Yellow (DW4).png|Yellow Heavy Troop |
| | Heavy Troop Model - Purple (DW4).png|Purple Heavy Troop |
| | Heavy Troop Model - White (DW4).png|White Heavy Troop |
| | </gallery> |
| | |
| | ;Captain |
| | <gallery spacing="small" widths="150" columns="6" bordersize="none" bordercolor="transparent"> |
| | Captain Model - Blue (DW4).png|Blue Captain |
| | Captain Model - Red (DW4).png|Red Captain |
| | Captain Model - Green (DW4).png|Green Captain |
| | Captain Model - Yellow (DW4).png|Yellow Captain |
| | Captain Model - Purple (DW4).png|Purple Captain |
| | Captain Model - White (DW4).png|White Captain |
| | </gallery> |
| | |
| | ;Amazon |
| | <gallery spacing="small" widths="150" columns="6" bordersize="none" bordercolor="transparent"> |
| | Amazon Model - Blue (DW4).png|Blue Amazon |
| | Amazon Model - Red (DW4).png|Red Amazon |
| | Amazon Model - Green (DW4).png|Green Amazon |
| | Amazon Model - Yellow (DW4).png|Yellow Amazon |
| | Amazon Model - Purple (DW4).png|Purple Amazon |
| | Amazon Model - White (DW4).png|White Amazon |
| | </gallery> |
| | |
| | ;Archer |
| | <gallery spacing="small" widths="150" columns="6" bordersize="none" bordercolor="transparent"> |
| | Archer Model - Blue (DW4).png|Blue Archer |
| | Archer Model - Red (DW4).png|Red Archer |
| | Archer Model - Green (DW4).png|Green Archer |
| | Archer Model - Yellow (DW4).png|Yellow Archer |
| | Archer Model - Purple (DW4).png|Purple Archer |
| | Archer Model - White (DW4).png|White Archer |
| | </gallery> |
| | |
| | ;Head Archer |
| | <gallery spacing="small" widths="150" columns="6" bordersize="none" bordercolor="transparent"> |
| | Head Archer Model - Blue (DW4).png|Blue Head Archer |
| | Head Archer Model - Red (DW4).png|Red Head Archer |
| | Head Archer Model - Green (DW4).png|Green Head Archer |
| | Head Archer Model - Yellow (DW4).png|Yellow Head Archer |
| | Head Archer Model - Purple (DW4).png|Purple Head Archer |
| | Head Archer Model - White (DW4).png|White Head Archer |
| | </gallery> |
| | |
| | ;Bombardier |
| | <gallery spacing="small" widths="150" columns="6" bordersize="none" bordercolor="transparent"> |
| | Bombardier Model - Blue (DW4).png|Blue Bombardier |
| | Bombardier Model - Red (DW4).png|Red Bombardier |
| | Bombardier Model - Green (DW4).png|Green Bombardier |
| | Bombardier Model - Yellow (DW4).png|Yellow Bombardier |
| | Bombardier Model - Purple (DW4).png|Purple Bombardier |
| | Bombardier Model - White (DW4).png|White Bombardier |
| | </gallery> |
| | |
| | ;Turban Infantry |
| | <gallery spacing="small" widths="150" columns="6" bordersize="none" bordercolor="transparent"> |
| | Turban Infantry Model - Blue (DW4).png|Blue Turban Infantry |
| | Turban Infantry Model - Red (DW4).png|Red Turban Infantry |
| | Turban Infantry Model - Green (DW4).png|Green Turban Infantry |
| | Turban Infantry Model - Yellow (DW4).png|Yellow Turban Infantry |
| | Turban Infantry Model - Purple (DW4).png|Purple Turban Infantry |
| | Turban Infantry Model - White (DW4).png|White Turban Infantry |
| | </gallery> |
| | |
| | ;Turban Captain |
| | <gallery spacing="small" widths="150" columns="6" bordersize="none" bordercolor="transparent"> |
| | Turban Captain Model - Blue (DW4).png|Blue Turban Captain |
| | Turban Captain Model - Red (DW4).png|Red Turban Captain |
| | Turban Captain Model - Green (DW4).png|Green Turban Captain |
| | Turban Captain Model - Yellow (DW4).png|Yellow Turban Captain |
| | Turban Captain Model - Purple (DW4).png|Purple Turban Captain |
| | Turban Captain Model - White (DW4).png|White Turban Captain |
| | </gallery> |
| | |
| | ;Nanman Infantry |
| | <gallery spacing="small" widths="150" columns="6" bordersize="none" bordercolor="transparent"> |
| | Nanman Infantry Model - Blue (DW4).png|Blue Nanman Infantry |
| | Nanman Infantry Model - Red (DW4).png|Red Nanman Infantry |
| | Nanman Infantry Model - Green (DW4).png|Green Nanman Infantry |
| | Nanman Infantry Model - Yellow (DW4).png|Yellow Nanman Infantry |
| | Nanman Infantry Model - Purple (DW4).png|Purple Nanman Infantry |
| | Nanman Infantry Model - White (DW4).png|White Nanman Infantry |
| | </gallery> |
| | |
| | ;Nanman Captain |
| | <gallery spacing="small" widths="150" columns="6" bordersize="none" bordercolor="transparent"> |
| | Nanman Captain Model - Blue (DW4).png|Blue Nanman Captain |
| | Nanman Captain Model - Red (DW4).png|Red Nanman Captain |
| | Nanman Captain Model - Green (DW4).png|Green Nanman Captain |
| | Nanman Captain Model - Yellow (DW4).png|Yellow Nanman Captain |
| | Nanman Captain Model - Purple (DW4).png|Purple Nanman Captain |
| | Nanman Captain Model - White (DW4).png|White Nanman Captain |
| | </gallery> |
| | |
| | ;Nanman Amazon |
| | <gallery spacing="small" widths="150" columns="6" bordersize="none" bordercolor="transparent"> |
| | Nanman Amazon Model - Blue (DW4).png|Blue Nanman Amazon |
| | Nanman Amazon Model - Red (DW4).png|Red Nanman Amazon |
| | Nanman Amazon Model - Green (DW4).png|Green Nanman Amazon |
| | Nanman Amazon Model - Yellow (DW4).png|Yellow Nanman Amazon |
| | Nanman Amazon Model - Purple (DW4).png|Purple Nanman Amazon |
| | Nanman Amazon Model - White (DW4).png|White Nanman Amazon |
| | </gallery> |
| | |
| | ;Armor Troop |
| | <gallery spacing="small" widths="150" columns="6" bordersize="none" bordercolor="transparent"> |
| | Armor Troop Model - Blue (DW4).png|Blue Armor Troop |
| | Armor Troop Model - Red (DW4).png|Red Armor Troop |
| | Armor Troop Model - Green (DW4).png|Green Armor Troop |
| | Armor Troop Model - Yellow (DW4).png|Yellow Armor Troop |
| | Armor Troop Model - Purple (DW4).png|Purple Armor Troop |
| | Armor Troop Model - White (DW4).png|White Armor Troop |
| | </gallery> |
| | |
| | ;Hero |
| | <gallery spacing="small" widths="150" columns="6" bordersize="none" bordercolor="transparent"> |
| | Hero Model - Blue (DW4).png|Blue Hero |
| | Hero Model - Red (DW4).png|Red Hero |
| | Hero Model - Green (DW4).png|Green Hero |
| | Hero Model - Yellow (DW4).png|Yellow Hero |
| | Hero Model - Purple (DW4).png|Purple Hero |
| | Hero Model - White (DW4).png|White Hero |
| | </gallery> |
| | |
| | ;Warrior |
| | <gallery spacing="small" widths="150" columns="6" bordersize="none" bordercolor="transparent"> |
| | Warrior Model - Blue (DW4).png|Blue Warrior |
| | Warrior Model - Red (DW4).png|Red Warrior |
| | Warrior Model - Green (DW4).png|Green Warrior |
| | Warrior Model - Yellow (DW4).png|Yellow Warrior |
| | Warrior Model - Purple (DW4).png|Purple Warrior |
| | Warrior Model - White (DW4).png|White Warrior |
| | </gallery> |
| | |
| | ;Strategist |
| | <gallery spacing="small" widths="150" columns="6" bordersize="none" bordercolor="transparent"> |
| | Strategist Model - Blue (DW4).png|Blue Strategist |
| | Strategist Model - Red (DW4).png|Red Strategist |
| | Strategist Model - Green (DW4).png|Green Strategist |
| | Strategist Model - Yellow (DW4).png|Yellow Strategist |
| | Strategist Model - Purple (DW4).png|Purple Strategist |
| | Strategist Model - White (DW4).png|White Strategist |
| | </gallery> |
| | |
| | ;Nanman Officer |
| | <gallery spacing="small" widths="150" bordersize="none" bordercolor="transparent"> |
| | Nanman Officer Model (DW4).png|Nanman Officer |
| | </gallery> |
| | {{!}}-{{!}} |
| | Dynasty Warriors Advance= |
| | <gallery spacing="small" widths="150" columns="5" bordersize="none" bordercolor="transparent"> |
| | Officer (DWA).png|Officer |
| | Swordsman (DWA).png|Swordsman |
| | Spearman (DWA).png|Spearman |
| | Archer (DWA).png|Archer |
| | Supply Unit (DWA).png|Supply Unit |
| | </gallery> |
| | {{!}}-{{!}} |
| | Dynasty Warriors 5= |
| | ;Common Troop |
| | <gallery spacing="small" widths="150" columns="6" bordersize="none" bordercolor="transparent"> |
| | Common Troop Model - Blue (DW5).png|Blue Common Troop |
| | Common Troop Model - Red (DW5).png|Red Common Troop |
| | Common Troop Model - Green (DW5).png|Green Common Troop |
| | Common Troop Model - Yellow (DW5).png|Yellow Common Troop |
| | Common Troop Model - Purple (DW5).png|Purple Common Troop |
| | Common Troop Model - White (DW5).png|White Common Troop |
| | </gallery> |
| | |
| | ;Heavy Troop |
| | <gallery spacing="small" widths="150" columns="6" bordersize="none" bordercolor="transparent"> |
| | Heavy Troop Model - Blue (DW5).png|Blue Heavy Troop |
| | Heavy Troop Model - Red (DW5).png|Red Heavy Troop |
| | Heavy Troop Model - Green (DW5).png|Green Heavy Troop |
| | Heavy Troop Model - Yellow (DW5).png|Yellow Heavy Troop |
| | Heavy Troop Model - Purple (DW5).png|Purple Heavy Troop |
| | Heavy Troop Model - White (DW5).png|White Heavy Troop |
| | </gallery> |
| | |
| | ;Captain |
| | <gallery spacing="small" widths="150" columns="6" bordersize="none" bordercolor="transparent"> |
| | Captain Model - Blue (DW5).png|Blue Captain |
| | Captain Model - Red (DW5).png|Red Captain |
| | Captain Model - Green (DW5).png|Green Captain |
| | Captain Model - Yellow (DW5).png|Yellow Captain |
| | Captain Model - Purple (DW5).png|Purple Captain |
| | Captain Model - White (DW5).png|White Captain |
| | </gallery> |
| | |
| | ;Attack Captain |
| | <gallery spacing="small" widths="150" columns="6" bordersize="none" bordercolor="transparent"> |
| | Attack Captain Model - Blue (DW5).png|Blue Attack Captain |
| | Attack Captain Model - Red (DW5).png|Red Attack Captain |
| | Attack Captain Model - Green (DW5).png|Green Attack Captain |
| | Attack Captain Model - Yellow (DW5).png|Yellow Attack Captain |
| | Attack Captain Model - Purple (DW5).png|Purple Attack Captain |
| | Attack Captain Model - White (DW5).png|White Attack Captain |
| | </gallery> |
| | |
| | ;Defense Captain |
| | <gallery spacing="small" widths="150" columns="6" bordersize="none" bordercolor="transparent"> |
| | Defense Captain Model - Blue (DW5).png|Blue Defense Captain |
| | Defense Captain Model - Red (DW5).png|Red Defense Captain |
| | Defense Captain Model - Green (DW5).png|Green Defense Captain |
| | Defense Captain Model - Yellow (DW5).png|Yellow Defense Captain |
| | Defense Captain Model - Purple (DW5).png|Purple Defense Captain |
| | Defense Captain Model - White (DW5).png|White Defense Captain |
| | </gallery> |
| | |
| | ;Amazon |
| | <gallery spacing="small" widths="150" columns="6" bordersize="none" bordercolor="transparent"> |
| | Amazon Model - Blue (DW5).png|Blue Amazon |
| | Amazon Model - Red (DW5).png|Red Amazon |
| | Amazon Model - Green (DW5).png|Green Amazon |
| | Amazon Model - Yellow (DW5).png|Yellow Amazon |
| | Amazon Model - Purple (DW5).png|Purple Amazon |
| | Amazon Model - White (DW5).png|White Amazon |
| | </gallery> |
| | |
| | ;Archer |
| | <gallery spacing="small" widths="150" columns="6" bordersize="none" bordercolor="transparent"> |
| | Archer Model - Blue (DW5).png|Blue Archer |
| | Archer Model - Red (DW5).png|Red Archer |
| | Archer Model - Green (DW5).png|Green Archer |
| | Archer Model - Yellow (DW5).png|Yellow Archer |
| | Archer Model - Purple (DW5).png|Purple Archer |
| | Archer Model - White (DW5).png|White Archer |
| | </gallery> |
| | |
| | ;Head Archer |
| | <gallery spacing="small" widths="150" columns="6" bordersize="none" bordercolor="transparent"> |
| | Head Archer Model - Blue (DW5).png|Blue Head Archer |
| | Head Archer Model - Red (DW5).png|Red Head Archer |
| | Head Archer Model - Green (DW5).png|Green Head Archer |
| | Head Archer Model - Yellow (DW5).png|Yellow Head Archer |
| | Head Archer Model - Purple (DW5).png|Purple Head Archer |
| | Head Archer Model - White (DW5).png|White Head Archer |
| | </gallery> |
| | |
| | ;Bombardier |
| | <gallery spacing="small" widths="150" columns="6" bordersize="none" bordercolor="transparent"> |
| | Bombardier Model - Blue (DW5).png|Blue Bombardier |
| | Bombardier Model - Red (DW5).png|Red Bombardier |
| | Bombardier Model - Green (DW5).png|Green Bombardier |
| | Bombardier Model - Yellow (DW5).png|Yellow Bombardier |
| | Bombardier Model - Purple (DW5).png|Purple Bombardier |
| | Bombardier Model - White (DW5).png|White Bombardier |
| | </gallery> |
| | |
| | ;Sorcerer |
| | <gallery spacing="small" widths="150" columns="6" bordersize="none" bordercolor="transparent"> |
| | Sorcerer Model - Blue (DW5).png|Blue Sorcerer |
| | Sorcerer Model - Red (DW5).png|Red Sorcerer |
| | Sorcerer Model - Green (DW5).png|Green Sorcerer |
| | Sorcerer Model - Yellow (DW5).png|Yellow Sorcerer |
| | Sorcerer Model - Purple (DW5).png|Purple Sorcerer |
| | Sorcerer Model - White (DW5).png|White Sorcerer |
| | </gallery> |
| | |
| | ;Turban Troop |
| | <gallery spacing="small" widths="150" columns="6" bordersize="none" bordercolor="transparent"> |
| | Turban Infantry Model (DW5).png|Turban Infantry |
| | Turban Captain Model (DW5).png|Turban Captain |
| | </gallery> |
| | |
| | ;Nanman Troop |
| | <gallery spacing="small" widths="150" columns="6" bordersize="none" bordercolor="transparent"> |
| | Nanman Infantry Model (DW5).png|Nanman Infantry |
| | Nanman Captain Model (DW5).png|Nanman Captain |
| | Nanman Amazon Model (DW5).png|Nanman Amazon |
| | Armor Troop Model (DW5).png|Armor Troop |
| | Nanman Officer Model (DW5).png|Nanman Officer |
| | Barbarian Model (DW5).png|Barbarian |
| | </gallery> |
| | |
| | ;Hero |
| | <gallery spacing="small" widths="150" columns="6" bordersize="none" bordercolor="transparent"> |
| | Hero Model - Blue (DW5).png|Blue Hero |
| | Hero Model - Red (DW5).png|Red Hero |
| | Hero Model - Green (DW5).png|Green Hero |
| | Hero Model - Yellow (DW5).png|Yellow Hero |
| | Hero Model - Purple (DW5).png|Purple Hero |
| | Hero Model - White (DW5).png|White Hero |
| | </gallery> |
| | |
| | ;Warrior |
| | <gallery spacing="small" widths="150" columns="6" bordersize="none" bordercolor="transparent"> |
| | Warrior Model - Blue (DW5).png|Blue Warrior |
| | Warrior Model - Red (DW5).png|Red Warrior |
| | Warrior Model - Green (DW5).png|Green Warrior |
| | Warrior Model - Yellow (DW5).png|Yellow Warrior |
| | Warrior Model - Purple (DW5).png|Purple Warrior |
| | Warrior Model - White (DW5).png|White Warrior |
| | </gallery> |
| | |
| | ;Large Warrior |
| | <gallery spacing="small" widths="150" columns="6" bordersize="none" bordercolor="transparent"> |
| | Large Warrior Model - Blue (DW5).png|Blue Large Warrior |
| | Large Warrior Model - Red (DW5).png|Red Large Warrior |
| | Large Warrior Model - Green (DW5).png|Green Large Warrior |
| | Large Warrior Model - Yellow (DW5).png|Yellow Large Warrior |
| | Large Warrior Model - Purple (DW5).png|Purple Large Warrior |
| | Large Warrior Model - White (DW5).png|White Large Warrior |
| | </gallery> |
| | |
| | ;Strategist |
| | <gallery spacing="small" widths="150" columns="6" bordersize="none" bordercolor="transparent"> |
| | Strategist Model - Blue (DW5).png|Blue Strategist |
| | Strategist Model - Red (DW5).png|Red Strategist |
| | Strategist Model - Green (DW5).png|Green Strategist |
| | Strategist Model - Yellow (DW5).png|Yellow Strategist |
| | Strategist Model - Purple (DW5).png|Purple Strategist |
| | Strategist Model - White (DW5).png|White Strategist |
| | </gallery> |
| | |
| | ;Ruler |
| | <gallery spacing="small" widths="150" columns="6" bordersize="none" bordercolor="transparent"> |
| | Ruler Model - Blue (DW5).png|Blue Ruler |
| | Ruler Model - Red (DW5).png|Red Ruler |
| | Ruler Model - Green (DW5).png|Green Ruler |
| | Ruler Model - Yellow (DW5).png|Yellow Ruler |
| | Ruler Model - Purple (DW5).png|Purple Ruler |
| | Ruler Model - White (DW5).png|White Ruler |
| | </gallery> |
| | {{!}}-{{!}} |
| | Dynasty Warriors DS: Fighter's Battle= |
| | <gallery spacing="small" widths="150" bordersize="none" bordercolor="transparent"> |
| | DWFB Generic Officer 2.png|Hero |
| | DWFB Generic Officer.png|Warrior |
| | DWFB Generic Officer 3.png|Strategist |
| | </gallery> |
| | {{!}}-{{!}} |
| | Dynasty Warriors 6= |
| | ;Troop |
| | <gallery spacing="small" widths="150" columns="6" bordersize="none" bordercolor="transparent"> |
| | Wei Troop Model (DW6).png|Wei Troop |
| | Wu Troop Model (DW6).png|Wu Troop |
| | Shu Troop Model (DW6).png|Shu Troop |
| | Turban Troop Model (DW6).png|Turban Troop |
| | Villager Model (DW6).png|Villager |
| | </gallery> |
| | |
| | ;Corporal |
| | <gallery spacing="small" widths="150" bordersize="none" bordercolor="transparent"> |
| | Wei Corporal Model (DW6).png|Wei Corporal |
| | Wu Corporal Model (DW6).png|Wu Corporal |
| | Shu Corporal Model (DW6).png|Shu Corporal |
| | </gallery> |
| | |
| | ;Archer |
| | <gallery spacing="small" widths="150" columns="6" bordersize="none" bordercolor="transparent"> |
| | Archer Model - Blue (DW6).png|Blue Archer |
| | Archer Model - Red (DW6).png|Red Archer |
| | Archer Model - Green (DW6).png|Green Archer |
| | Archer Model - Yellow (DW6).png|Yellow Archer |
| | Archer Model - Purple (DW6).png|Purple Archer |
| | Archer Model - Black (DW6).png|Black Archer |
| | </gallery> |
| | |
| | ;Bannerman |
| | <gallery spacing="small" widths="150" columns="6" bordersize="none" bordercolor="transparent"> |
| | Bannerman Model - Blue (DW6).png|Blue Bannerman |
| | Bannerman Model - Red (DW6).png|Red Bannerman |
| | Bannerman Model - Green (DW6).png|Green Bannerman |
| | Bannerman Model - Yellow (DW6).png|Yellow Bannerman |
| | Bannerman Model - Purple (DW6).png|Purple Bannerman |
| | Bannerman Model - Black (DW6).png|Black Bannerman |
| | </gallery> |
| | |
| | ;Ladderman |
| | <gallery spacing="small" widths="150" columns="6" bordersize="none" bordercolor="transparent"> |
| | Ladderman Model - Blue (DW6).png|Blue Ladderman |
| | Ladderman Model - Red (DW6).png|Red Ladderman |
| | Ladderman Model - Green (DW6).png|Green Ladderman |
| | Ladderman Model - Yellow (DW6).png|Yellow Ladderman |
| | Ladderman Model - Purple (DW6).png|Purple Ladderman |
| | Ladderman Model - Black (DW6).png|Black Ladderman |
| | </gallery> |
| | |
| | ;Catapulter |
| | <gallery spacing="small" widths="150" columns="6" bordersize="none" bordercolor="transparent"> |
| | Catapulter Model - Blue (DW6).png|Blue Catapulter |
| | Catapulter Model - Red (DW6).png|Red Catapulter |
| | Catapulter Model - Green (DW6).png|Green Catapulter |
| | Catapulter Model - Yellow (DW6).png|Yellow Catapulter |
| | Catapulter Model - Purple (DW6).png|Purple Catapulter |
| | Catapulter Model - Black (DW6).png|Black Catapulter |
| | </gallery> |
| | |
| | ;Bombardier |
| | <gallery spacing="small" widths="150" columns="6" bordersize="none" bordercolor="transparent"> |
| | Bombardier Model - Blue (DW6).png|Blue Bombardier |
| | Bombardier Model - Red (DW6).png|Red Bombardier |
| | Bombardier Model - Green (DW6).png|Green Bombardier |
| | Bombardier Model - Yellow (DW6).png|Yellow Bombardier |
| | Bombardier Model - Purple (DW6).png|Purple Bombardier |
| | Bombardier Model - Black (DW6).png|Black Bombardier |
| | </gallery> |
| | |
| | ;Nanman Troop |
| | <gallery spacing="small" widths="150" bordersize="none" bordercolor="transparent"> |
| | Nanman Troop Model (DW6E).png|Nanman Troop |
| | Nanman Officer Model (DW6E).png|Nanman Officer |
| | </gallery> |
| | |
| | ;Light Officer |
| | <gallery spacing="small" widths="150" columns="6" bordersize="none" bordercolor="transparent"> |
| | Light Officer Model - Blue (DW6).png|Blue Light Officer |
| | Light Officer Model - Red (DW6).png|Red Light Officer |
| | Light Officer Model - Green (DW6).png|Green Light Officer |
| | Light Officer Model - Yellow (DW6).png|Yellow Light Officer |
| | Light Officer Model - Purple (DW6).png|Purple Light Officer |
| | Light Officer Model - Black (DW6).png|Black Light Officer |
| | </gallery> |
| | |
| | ;Heavy Officer |
| | <gallery spacing="small" widths="150" columns="6" bordersize="none" bordercolor="transparent"> |
| | Heavy Officer Model - Blue (DW6).png|Blue Heavy Officer |
| | Heavy Officer Model - Red (DW6).png|Red Heavy Officer |
| | Heavy Officer Model - Green (DW6).png|Green Heavy Officer |
| | Heavy Officer Model - Yellow (DW6).png|Yellow Heavy Officer |
| | Heavy Officer Model - Purple (DW6).png|Purple Heavy Officer |
| | Heavy Officer Model - Black (DW6).png|Black Heavy Officer |
| | </gallery> |
| | |
| | ;Giant Officer |
| | <gallery spacing="small" widths="150" columns="6" bordersize="none" bordercolor="transparent"> |
| | Giant Officer Model - Blue (DW6).png|Blue Giant Officer |
| | Giant Officer Model - Red (DW6).png|Red Giant Officer |
| | Giant Officer Model - Green (DW6).png|Green Giant Officer |
| | Giant Officer Model - Yellow (DW6).png|Yellow Giant Officer |
| | Giant Officer Model - Purple (DW6).png|Purple Giant Officer |
| | Giant Officer Model - Black (DW6).png|Black Giant Officer |
| | </gallery> |
| | |
| | ;Battle Strategist |
| | <gallery spacing="small" widths="150" columns="6" bordersize="none" bordercolor="transparent"> |
| | Battle Strategist Model - Blue (DW6).png|Blue Battle Strategist |
| | Battle Strategist Model - Red (DW6).png|Red Battle Strategist |
| | Battle Strategist Model - Green (DW6).png|Green Battle Strategist |
| | Battle Strategist Model - Yellow (DW6).png|Yellow Battle Strategist |
| | Battle Strategist Model - Purple (DW6).png|Purple Battle Strategist |
| | Battle Strategist Model - Black (DW6).png|Black Battle Strategist |
| | </gallery> |
| | |
| | ;Resourceful Strategist |
| | <gallery spacing="small" widths="150" columns="6" bordersize="none" bordercolor="transparent"> |
| | Resourceful Strategist Model - Blue (DW6).png|Blue Resourceful Strategist |
| | Resourceful Strategist Model - Red (DW6).png|Red Resourceful Strategist |
| | Resourceful Strategist Model - Green (DW6).png|Green Resourceful Strategist |
| | Resourceful Strategist Model - Yellow (DW6).png|Yellow Resourceful Strategist |
| | Resourceful Strategist Model - Purple (DW6).png|Purple Resourceful Strategist |
| | Resourceful Strategist Model - Black (DW6).png|Black Resourceful Strategist |
| | </gallery> |
| | |
| | ;Ruler |
| | <gallery spacing="small" widths="150" columns="6" bordersize="none" bordercolor="transparent"> |
| | Ruler Model - Blue (DW6).png|Blue Ruler |
| | Ruler Model - Red (DW6).png|Red Ruler |
| | Ruler Model - Green (DW6).png|Green Ruler |
| | Ruler Model - Yellow (DW6).png|Yellow Ruler |
| | Ruler Model - Purple (DW6).png|Purple Ruler |
| | Ruler Model - Black (DW6).png|Black Ruler |
| | </gallery> |
| | {{!}}-{{!}} |
| | Dynasty Warriors: Strikeforce= |
| | ;Bandit |
| | <gallery spacing="small" widths="150" bordersize="none" bordercolor="transparent"> |
| | DWSF Bandit.png|Bandit |
| | </gallery> |
| | |
| | ;Amazon |
| | <gallery spacing="small" widths="150" columns="5" bordersize="none" bordercolor="transparent"> |
| | Amazon Model - Blue (DWSF).png|Blue Amazon |
| | Amazon Model - Red (DWSF).png|Red Amazon |
| | Amazon Model - Green (DWSF).png|Green Amazon |
| | Amazon Model - Yellow (DWSF).png|Yellow Amazon |
| | Amazon Model - Purple (DWSF).png|Purple Amazon |
| | </gallery> |
| | |
| | ;Lady Captain |
| | <gallery spacing="small" widths="150" columns="5" bordersize="none" bordercolor="transparent"> |
| | Lady Captain Model - Blue (DWSF).png|Blue Lady Captain |
| | Lady Captain Model - Red (DWSF).png|Red Lady Captain |
| | Lady Captain Model - Green (DWSF).png|Green Lady Captain |
| | Lady Captain Model - Yellow (DWSF).png|Yellow Lady Captain |
| | Lady Captain Model - Purple (DWSF).png|Purple Lady Captain |
| | </gallery> |
| | |
| | ;Sorcerer |
| | <gallery spacing="small" widths="150" columns="5" bordersize="none" bordercolor="transparent"> |
| | Sorcerer Model - Blue (DWSF).png|Blue Sorcerer |
| | Sorcerer Model - Red (DWSF).png|Red Sorcerer |
| | Sorcerer Model - Green (DWSF).png|Green Sorcerer |
| | Sorcerer Model - Yellow (DWSF).png|Yellow Sorcerer |
| | Sorcerer Model - Purple (DWSF).png|Purple Sorcerer |
| | </gallery> |
| | |
| | ;Light Officer (Fury Form) |
| | <gallery spacing="small" widths="150" columns="5" bordersize="none" bordercolor="transparent"> |
| | Light Officer Fury Form Model - Blue (DWSF).png|Blue Light Officer |
| | Light Officer Fury Form Model - Red (DWSF).png|Red Light Officer |
| | Light Officer Fury Form Model - Green (DWSF).png|Green Light Officer |
| | Light Officer Fury Form Model - Yellow (DWSF).png|Yellow Light Officer |
| | Light Officer Fury Form Model - Purple (DWSF).png|Purple Light Officer |
| | </gallery> |
| | |
| | ;Heavy Officer (Fury Form) |
| | <gallery spacing="small" widths="150" columns="5" bordersize="none" bordercolor="transparent"> |
| | Heavy Officer Fury Form Model - Blue (DWSF).png|Blue Heavy Officer |
| | Heavy Officer Fury Form Model - Red (DWSF).png|Red Heavy Officer |
| | Heavy Officer Fury Form Model - Green (DWSF).png|Green Heavy Officer |
| | Heavy Officer Fury Form Model - Yellow (DWSF).png|Yellow Heavy Officer |
| | Heavy Officer Fury Form Model - Purple (DWSF).png|Purple Heavy Officer |
| | </gallery> |
| | |
| | ;Giant Officer (Fury Form) |
| | <gallery spacing="small" widths="150" columns="5" bordersize="none" bordercolor="transparent"> |
| | Giant Officer Fury Form Model - Blue (DWSF).png|Blue Giant Officer |
| | Giant Officer Fury Form Model - Red (DWSF).png|Red Giant Officer |
| | Giant Officer Fury Form Model - Green (DWSF).png|Green Giant Officer |
| | Giant Officer Fury Form Model - Yellow (DWSF).png|Yellow Giant Officer |
| | Giant Officer Fury Form Model - Purple (DWSF).png|Purple Giant Officer |
| | </gallery> |
| | |
| | ;Battle Strategist (Fury Form) |
| | <gallery spacing="small" widths="150" columns="6" bordersize="none" bordercolor="transparent"> |
| | Battle Strategist Fury Form Model - Blue (DWSF).png|Blue Battle Strategist |
| | Battle Strategist Fury Form Model - Red (DWSF).png|Red Battle Strategist |
| | Battle Strategist Fury Form Model - Green (DWSF).png|Green Battle Strategist |
| | Battle Strategist Fury Form Model - Yellow (DWSF).png|Yellow Battle Strategist |
| | Battle Strategist Fury Form Model - Purple (DWSF).png|Purple Battle Strategist |
| | Battle Strategist Fury Form Model - Black (DWSF).png|Black Battle Strategist |
| | </gallery> |
| | |
| | ;Resourceful Strategist (Fury Form) |
| | <gallery spacing="small" widths="150" columns="6" bordersize="none" bordercolor="transparent"> |
| | Resourceful Strategist Fury Form Model - Blue (DWSF).png|Blue Resourceful Strategist |
| | Resourceful Strategist Fury Form Model - Red (DWSF).png|Red Resourceful Strategist |
| | Resourceful Strategist Fury Form Model - Green (DWSF).png|Green Resourceful Strategist |
| | Resourceful Strategist Fury Form Model - Yellow (DWSF).png|Yellow Resourceful Strategist |
| | Resourceful Strategist Fury Form Model - Purple (DWSF).png|Purple Resourceful Strategist |
| | Resourceful Strategist Fury Form Model - Black (DWSF).png|Black Resourceful Strategist |
| | </gallery> |
| | |
| | ;Ruler (Fury Form) |
| | <gallery spacing="small" widths="150" columns="5" bordersize="none" bordercolor="transparent"> |
| | Ruler Fury Form Model - Blue (DWSF).png|Blue Ruler Fury |
| | Ruler Fury Form Model - Red (DWSF).png|Red Ruler Fury |
| | Ruler Fury Form Model - Green (DWSF).png|Green Ruler Fury |
| | Ruler Fury Form Model - Yellow (DWSF).png|Yellow Ruler Fury |
| | Ruler Fury Form Model - Purple (DWSF).png|Purple Ruler Fury |
| | </gallery> |
| | |
| | ;Nanman Officer (Fury Form) |
| | <gallery spacing="small" widths="150" bordersize="none" bordercolor="transparent"> |
| | Nanman Officer Fury Form Model (DWSF).png|Nanman Officer |
| | </gallery> |
| | {{!}}-{{!}} |
| | Shin Sangoku Musou Multi Raid 2= |
| | ;Terracotta Troop |
| | <gallery spacing="small" widths="150" columns="6" bordersize="none" bordercolor="transparent"> |
| | Stone Troop Model - Black (DWSF2).png|Terracotta Troop |
| | Stone Troop Model - Blue (DWSF2).png|Water Terracotta Troop |
| | Stone Troop Model - Red (DWSF2).png|Fire Terracotta Troop |
| | Stone Troop Model - Green (DWSF2).png|Wood Terracotta Troop |
| | Stone Troop Model - Yellow (DWSF2).png|Metal Terracotta Troop |
| | Stone Troop Model - Purple (DWSF2).png|Earth Terracotta Troop |
| | </gallery> |
| | |
| | ;Terracotta Heavy Troop |
| | <gallery spacing="small" widths="150" columns="6" bordersize="none" bordercolor="transparent"> |
| | Stone Heavy Troop Model - Black (DWSF2).png|Terracotta Heavy Troop |
| | Stone Heavy Troop Model - Blue (DWSF2).png|Water Terracotta Heavy Troop |
| | Stone Heavy Troop Model - Red (DWSF2).png|Fire Terracotta Heavy Troop |
| | Stone Heavy Troop Model - Green (DWSF2).png|Wood Terracotta Heavy Troop |
| | Stone Heavy Troop Model - Yellow (DWSF2).png|Metal Terracotta Heavy Troop |
| | Stone Heavy Troop Model - Purple (DWSF2).png|Earth Terracotta Heavy Troop |
| | </gallery> |
| | |
| | ;Terracotta Archer |
| | <gallery spacing="small" widths="150" columns="6" bordersize="none" bordercolor="transparent"> |
| | Stone Archer Model - Black (DWSF2).png|Terracotta Archer |
| | Stone Archer Model - Blue (DWSF2).png|Water Terracotta Archer |
| | Stone Archer Model - Red (DWSF2).png|Fire Terracotta Archer |
| | Stone Archer Model - Green (DWSF2).png|Wood Terracotta Archer |
| | Stone Archer Model - Yellow (DWSF2).png|Metal Terracotta Archer |
| | Stone Archer Model - Purple (DWSF2).png|Earth Terracotta Archer |
| | </gallery> |
| | |
| | ;Terracotta Sorcerer |
| | <gallery spacing="small" widths="150" columns="6" bordersize="none" bordercolor="transparent"> |
| | Stone Sorcerer Model - Black (DWSF2).png|Terracotta Sorcerer |
| | Stone Sorcerer Model - Blue (DWSF2).png|Water Terracotta Sorcerer |
| | Stone Sorcerer Model - Red (DWSF2).png|Fire Terracotta Sorcerer |
| | Stone Sorcerer Model - Green (DWSF2).png|Wood Terracotta Sorcerer |
| | Stone Sorcerer Model - Yellow (DWSF2).png|Metal Terracotta Sorcerer |
| | Stone Sorcerer Model - Purple (DWSF2).png|Earth Terracotta Sorcerer |
| | </gallery> |
| | |
| | ;Qin Light Officer |
| | <gallery spacing="small" widths="150" bordersize="none" bordercolor="transparent"> |
| | Qin Light Officer Fury Form Model - Yellow (DWSF2).png|Yellow Qin Light Officer |
| | Qin Light Officer Fury Form Model - Red (DWSF2).png|Red Qin Light Officer |
| | Qin Light Officer Fury Form Model - Purple (DWSF2).png|Purple Qin Light Officer |
| | </gallery> |
| | |
| | ;Qin Heavy Officer |
| | <gallery spacing="small" widths="150" bordersize="none" bordercolor="transparent"> |
| | Qin Heavy Officer Fury Form Model - Yellow (DWSF2).png|Yellow Qin Heavy Officer |
| | Qin Heavy Officer Fury Form Model - Red (DWSF2).png|Red Qin Heavy Officer |
| | Qin Heavy Officer Fury Form Model - Purple (DWSF2).png|Purple Qin Heavy Officer |
| | </gallery> |
| | |
| | ;Qin Giant Officer |
| | <gallery spacing="small" widths="150" bordersize="none" bordercolor="transparent"> |
| | Qin Giant Officer Fury Form Model - Yellow (DWSF2).png|Yellow Qin Giant Officer |
| | Qin Giant Officer Fury Form Model - Red (DWSF2).png|Red Qin Giant Officer |
| | Qin Giant Officer Fury Form Model - Purple (DWSF2).png|Purple Qin Giant Officer |
| | </gallery> |
| | |
| | ;Qin Battle Strategist |
| | <gallery spacing="small" widths="150" bordersize="none" bordercolor="transparent"> |
| | Qin Battle Strategist Fury Form Model - Yellow (DWSF2).png|Yellow Qin Battle Strategist |
| | Qin Battle Strategist Fury Form Model - Red (DWSF2).png|Red Qin Battle Strategist |
| | Qin Battle Strategist Fury Form Model - Purple (DWSF2).png|Purple Qin Battle Strategist |
| | </gallery> |
| | |
| | ;Qin Resourceful Strategist |
| | <gallery spacing="small" widths="150" bordersize="none" bordercolor="transparent"> |
| | Qin Resourceful Strategist Fury Form Model - Yellow (DWSF2).png|Yellow Qin Resourceful Strategist |
| | Qin Resourceful Strategist Fury Form Model - Red (DWSF2).png|Red Qin Resourceful Strategist |
| | Qin Resourceful Strategist Fury Form Model - Purple (DWSF2).png|Purple Qin Resourceful Strategist |
| | </gallery> |
| | |
| | ;Qin Ruler |
| | <gallery spacing="small" widths="150" bordersize="none" bordercolor="transparent"> |
| | Qin Ruler Fury Form Model (DWSF2).png|Qin Ruler |
| | </gallery> |
| | {{!}}-{{!}} |
| | Dynasty Warriors 7= |
| | <tabber>Concept Artworks= |
| | ;Troop |
| | <gallery spacing="small" widths="150" columns="5" bordersize="none" bordercolor="transparent"> |
| | Soldier Concept 1 (DW7).png|Soldier concept 1 |
| | Soldier Concept 2 (DW7).png|Soldier concept 2 |
| | Soldier Concept 3 (DW7).png|Soldier concept 3 |
| | Soldier Concept 4 (DW7).png|Soldier concept 4 |
| | Soldier Concept 5 (DW7).png|Soldier concept 5 |
| | </gallery> |
| | |
| | ;Peasant |
| | <gallery spacing="small" widths="150" columns="5" bordersize="none" bordercolor="transparent"> |
| | Rebel Concept 1 (DW7).png|Turban Rebel concept |
| | Rebel Concept 2 (DW7).png|Peasant concept 1 |
| | Rebel Concept 3 (DW7).png|Peasant concept 2 |
| | Rebel Concept 4 (DW7).png|Peasant concept 3 |
| | Rebel Concept 5 (DW7).png|Peasant concept 4 |
| | </gallery> |
| | |
| | ;General |
| | <gallery spacing="small" widths="150" columns="5" bordersize="none" bordercolor="transparent"> |
| | General Concept 1 (DW7).png|General concept 1 |
| | General Concept 2 (DW7).png|General concept 2 |
| | General Concept 3 (DW7).png|General concept 3 |
| | General Concept 4 (DW7).png|General concept 4 |
| | General Concept 5 (DW7).png|General concept 5 |
| | </gallery> |
| | |
| | ;Strategist |
| | <gallery spacing="small" widths="150" columns=63" bordersize="none" bordercolor="transparent"> |
| | Strategist Concept 1 (DW7).png|Strategist concept 1 |
| | Strategist Concept 2 (DW7).png|Strategist concept 2 |
| | Strategist Concept 3 (DW7).png|Strategist concept 3 |
| | Strategist Concept 4 (DW7).png|Strategist concept 4 |
| | Strategist Concept 5 (DW7).png|Strategist concept 5 |
| </gallery> | | </gallery> |
| |-|DWA= | | |-|Models= |
| <gallery spacing="small" widths="155" bordersize="none" bordercolor="transparent"> | | ;Troops |
| Officer_(DWA).png|Officer
| | <gallery spacing="small" widths="150" bordersize="none" bordercolor="transparent"> |
| Swordsman_(DWA).png|Swordsman
| | Soldier - Headgear (DW7).png|Generic soldier head set |
| Spearman_(DWA).png|Spearman
| | Soldier - Face & Clothes (DW7).png|Generic soldier face & wardrobe set |
| Archer_(DWA).png|Archer
| | Unique Soldier (DW7).png|[[Huche'er|Huche'er's]] ambush soldier |
| Supply_Unit_(DWA).png|Supply Unit
| |
| </gallery> | | </gallery> |
| |-|DW5=
| | |
| <gallery spacing="small" widths="155" bordersize="none" bordercolor="transparent"> | | ;Officers |
| Warrior_Model_(DW5).png|Warrior
| | <gallery spacing="small" widths="150" bordersize="none" bordercolor="transparent"> |
| Hero_Model_(DW5).png|Hero
| | General - Headgear (DW7).png|Generic officer head set |
| Strategist_Model_(DW5).png|Strategist
| | General - Face & Clothes (DW7).png|Generic officer face & wardrobe set |
| Nanman_Officer_Model_(DW5).png|Nanman Officer
| |
| Ruler_Model_(DW5).png|Ruler
| |
| Large_Warrior_Model_(DW5).png|Large Warrior
| |
| Barbarian_Model_(DW5).png|Barbarian
| |
| Common_Troop_Model_(DW5).png|Common Troop
| |
| Heavy_Troop_Model_(DW5).png|Heavy Troop
| |
| Amazon_Model_(DW5).png|Amazon
| |
| Captain_Model_(DW5).png|Captain
| |
| Archer_Model_(DW5).png|Archer
| |
| Head_Archer_Model_(DW5).png|Head Archer
| |
| Turban_Infantry_Model_(DW5).png|Turban Infantry
| |
| Turban_Captain_Model_(DW5).png|Turban Captain
| |
| Nanman_Infantry_Model_(DW5).png|Nanman Infantry
| |
| Armor_Troop_Model_(DW5).png|Armor Troop
| |
| Nanman_Amazon_Model_(DW5).png|Nanman Amazon
| |
| Nanman_Captain_Model_(DW5).png|Nanman Captain
| |
| Bombardier_Model_(DW5).png|Bombardier
| |
| Sorcerer_Model_(DW5).png|Sorcerer
| |
| Attack_Captain_Model_(DW5).png|Attack Captain
| |
| Defense_Captain_Model_(DW5).png|Defense Captain
| |
| </gallery> | | </gallery> |
| |-|DWDS=
| | </tabber> |
| <gallery spacing="small" widths="155" bordersize="none" bordercolor="transparent"> | | {{!}}-{{!}} |
| DWFB_Generic_Officer.png|General
| | Dynasty Warriors: Dominate= |
| DWFB_Generic_Officer_2.png|Commander
| | ;Generic Troop |
| DWFB_Generic_Officer_3.png|Strategist
| | <gallery spacing="small" widths="150" columns="4" bordersize="none" bordercolor="transparent"> |
| | Generic Officer 1 (DWD).png|Generic Officer 1 |
| | Generic Officer 2 (DWD).png|Generic Officer 2 |
| | Generic Officer 3 (DWD).png|Generic Officer 3 |
| | Generic Officer 4 (DWD).png|Generic Officer 4 |
| | Generic Officer 5 (DWD).png|Generic Officer 5 |
| | Generic Officer 6 (DWD).png|Generic Officer 6 |
| | Generic Officer 7 (DWD).png|Generic Officer 7 |
| | Generic Officer 8 (DWD).png|Generic Officer 8 |
| | Generic Officer 9 (DWD).png|Generic Officer 9 |
| | Generic Officer 10 (DWD).png|Generic Officer 10 |
| | Generic Officer 11 (DWD).png|Generic Officer 11 |
| | Generic Officer 12 (DWD).png|Generic Officer 12 |
| | Generic Officer 13 (DWD).png|Generic Officer 13 |
| | Generic Officer 14 (DWD).png|Generic Officer 14 |
| | Generic Officer 15 (DWD).png|Generic Officer 15 |
| | Generic Officer 16 (DWD).png|Generic Officer 16 |
| | Generic Officer 17 (DWD).png|Generic Officer 17 |
| | Generic Officer 18 (DWD).png|Generic Officer 18 |
| | Generic Officer 19 (DWD).png|Generic Officer 19 |
| | Generic Officer 20 (DWD).png|Generic Officer 20 |
| | Generic Officer 21 (DWD).png|Generic Officer 21 |
| | Generic Officer 22 (DWD).png|Generic Officer 22 |
| | Generic Officer 23 (DWD).png|Generic Officer 23 |
| | Generic Officer 24 (DWD).png|Generic Officer 24 |
| | Generic Officer 25 (DWD).png|Generic Officer 25 |
| | Generic Officer 26 (DWD).png|Generic Officer 26 |
| | Generic Officer 27 (DWD).png|Generic Officer 27 |
| | Generic Officer 28 (DWD).png|Generic Officer 28 |
| </gallery> | | </gallery> |
| |-|DW6=
| | |
| <gallery spacing="small" widths="155" bordersize="none" bordercolor="transparent"> | | ;Regional Guard |
| DW6E_Wei_Soldier.png|Wei Private
| | <gallery spacing="small" widths="150" columns="4" bordersize="none" bordercolor="transparent"> |
| DW6E_Wei_Major.png|Wei Major
| | Guard 1 (DWD).png|Regional Guard 1 |
| DW6E_Wu_Soldier.png|Wu Private
| | Guard 2 (DWD).png|Regional Guard 2 |
| DW6E_Wu_Major.png|Wu Major
| | Guard 3 (DWD).png|Regional Guard 3 |
| DW6E_Shu_Soldier.png|Shu Private
| | Guard 4 (DWD).png|Regional Guard 4 |
| DW6E_Shu_Major.png|Shu Major
| | Guard 5 (DWD).png|Regional Guard 5 |
| DW6E_Yellow_Turban_Soldier.png|Yellow Turban Private
| | Guard 6 (DWD).png|Regional Guard 6 |
| DW6E_Nanman_Soldier.png|Nanman Soldier
| | Guard 7 (DWD).png|Regional Guard 7 |
| DW6E_Bowman.png|Bowman
| |
| DW6E_Bombardier.png|Bombardier
| |
| DW6E_Bannerman.png|Bannerman
| |
| DW6E_Peasant.png|Peasant
| |
| DWSF_Engineer.png|Engineer
| |
| DWSF_Large_Engineer.png|Large Engineer
| |
| Generic_Ruler_(DW6).png|Ruler
| |
| Generic_Advisor_(DW6).png|Advisor
| |
| Generic_Tactician_(DW6).png|Strategist
| |
| Generic_Hero_(DW6).png|Hero
| |
| Generic_Warrior_(DW6).png|Warrior
| |
| Generic_Large Warrior_(DW6).png|Large Warrior
| |
| </gallery> | | </gallery> |
| |-|DWSF=
| | |
| <gallery spacing="small" widths="155" bordersize="none" bordercolor="transparent"> | | ;Citizen |
| DWSF_Bandit.png|Bandit
| | <gallery spacing="small" widths="150" columns="4" bordersize="none" bordercolor="transparent"> |
| DWSF_Lady_Guard.png|Lady Guard
| | Man (DWD).png|Man |
| DWSF_Lady_Captain.png|Lady Captain
| | Blacksmith (DWD).png|Blacksmith |
| DWSF_Sorcerer.png|Sorcerer
| | Ironworker 1 (DWD).png|Ironworker 1 |
| DWSF_Awakened_Ruler.png|Ruler
| | Ironworker 2 (DWD).png|Ironworker 2 |
| DWSF_Awakened_Advisor.png|Advisor
| | Fisherman 1 (DWD).png|Fisherman 1 |
| DWSF_Awakened_Strategist.png|Strategist
| | Fisherman 2 (DWD).png|Fisherman 2 |
| DWSF_Awakened_Hero.png|Hero
| | Peasant 1 (DWD).png|Peasant 1 |
| DWSF_Awakened_Warrior.png|Warrior
| | Peasant 2 (DWD).png|Peasant 2 |
| DWSF_Awakened_Large_Warrior.png|Large Warrior
| | Peddler 1 (DWD).png|Peddler 1 |
| DWSF_Awakened_Nanman_Warrior.png|Nanman Warrior
| | Peddler 2 (DWD).png|Peddler 2 |
| | Scholar 1 (DWD).png|Scholar 1 |
| | Scholar 2 (DWD).png|Scholar 2 |
| | Servant (DWD).png|Servant |
| | Qin Shi (DWD).png|Imperial Envoy |
| </gallery> | | </gallery> |
| |-|DWSF2=
| | |
| <gallery spacing="small" widths="155" bordersize="none" bordercolor="transparent"> | | ;Handmaiden |
| DWSF2_Qin_Ruler.png|Ruler
| | <gallery spacing="small" widths="150" bordersize="none" bordercolor="transparent"> |
| DWSF2_Qin_Advisor.png|Advisor
| | Handmaiden 1 (DWD).png|Handmaiden 1 |
| DWSF2_Qin_Strategist.png|Strategist
| | Handmaiden 2 (DWD).png|Handmaiden 2 |
| DWSF2_Qin_Hero.png|Hero
| | Handmaiden 3 (DWD).png|Handmaiden 3 |
| DWSF2_Qin_Warrior.png|Warrior
| | Handmaiden 4 (DWD).png|Handmaiden 4 |
| DWSF2_Qin_Large_Warrior.png|Large Warrior
| |
| </gallery> | | </gallery> |
| |-|DW7=
| | |
| <gallery spacing="small" widths="155" bordersize="none" bordercolor="transparent"> | | ;Young Girl |
| General_-_Headgear_(DW7).png|Generic officer head set
| | <gallery spacing="small" widths="150" bordersize="none" bordercolor="transparent"> |
| General_-_Face_&_Clothes_(DW7).png|Generic officer face & wardrobe set
| | Young Girl 1 (DWD).png|Young Girl 1 |
| Soldier_-_Headgear_(DW7).png|Generic soldier head set
| | Young Girl 2 (DWD).png|Young Girl 2 |
| Soldier_-_Face_&_Clothes_(DW7).png|Generic soldier face & wardrobe set
| | Young Girl 3 (DWD).png|Young Girl 3 |
| Unique_Soldier_(DW7).png|[[Huche'er|Huche'er's]] ambush soldier
| |
| General_Concept_1_(DW7).png|General concept
| |
| General_Concept_2_(DW7).png|General concept 2
| |
| General_Concept_3_(DW7).png|General concept 3
| |
| General_Concept_4_(DW7).png|General concept 4
| |
| General_Concept_5_(DW7).png|General concept 5
| |
| Strategist_Concept_1_(DW7).png|Strategist concept
| |
| Strategist_Concept_2_(DW7).png|Strategist concept 2
| |
| Strategist_Concept_3_(DW7).png|Strategist concept 3
| |
| Strategist_Concept_4_(DW7).png|Strategist concept 4
| |
| Strategist_Concept_5_(DW7).png|Strategist concept 5
| |
| Soldier_Concept_1_(DW7).png|Soldier concept
| |
| Soldier_Concept_2_(DW7).png|Soldier concept 2
| |
| Soldier_Concept_3_(DW7).png|Soldier concept 3
| |
| Soldier_Concept_4_(DW7).png|Soldier concept 4
| |
| Soldier_Concept_5_(DW7).png|Soldier concept 5
| |
| Rebel_Concept_1_(DW7).png|Yellow Turban Rebel concept
| |
| Rebel_Concept_2_(DW7).png|Peasant concept
| |
| Rebel_Concept_3_(DW7).png|Peasant concept 2
| |
| Rebel_Concept_4_(DW7).png|Peasant concept 3
| |
| Rebel_Concept_5_(DW7).png|Peasant concept 4
| |
| </gallery> | | </gallery> |
| |-|DW8= | | |
| <gallery spacing="small" widths="155" bordersize="none" bordercolor="transparent"> | | ;Waiter |
| | <gallery spacing="small" widths="150" bordersize="none" bordercolor="transparent"> |
| | Waiter 1 (DWD).png|Waiter 1 |
| | Waiter 2 (DWD).png|Waiter 2 |
| | Waiter 3 (DWD).png|Waiter 3 |
| | </gallery> |
| | |
| | ;Merchant |
| | <gallery spacing="small" widths="150" bordersize="none" bordercolor="transparent"> |
| | Merchant 1 (DWD).png|Merchant 1 |
| | Merchant 2 (DWD).png|Merchant 2 |
| | Merchant 3 (DWD).png|Merchant 3 |
| | </gallery> |
| | |
| | ;Minister |
| | <gallery spacing="small" widths="150" bordersize="none" bordercolor="transparent"> |
| | Minister 1 (DWD).png|Minister 1 |
| | Minister 2 (DWD).png|Minister 2 |
| | Minister 3 (DWD).png|Minister 3 |
| | </gallery> |
| | |
| | ;Noble |
| | <gallery spacing="small" widths="150" bordersize="none" bordercolor="transparent"> |
| | Noble 1 (DWD).png|Noble 1 |
| | Noble 2 (DWD).png|Noble 2 |
| | Noble 3 (DWD).png|Noble 3 |
| | </gallery> |
| | |
| | ;Old Man |
| | <gallery spacing="small" widths="150" columns="3" bordersize="none" bordercolor="transparent"> |
| | Old Man 1 (DWD).png|Old Man 1 |
| | Old Man 2 (DWD).png|Old Man 2 |
| | Old Man 3 (DWD).png|Old Man 3 |
| | Old Man 4 (DWD).png|Old Man 4 |
| | Old Man 5 (DWD).png|Old Man 5 |
| | Old Man 6 (DWD).png|Old Man 6 |
| | </gallery> |
| | |
| | ;Old Woman |
| | <gallery spacing="small" widths="150" bordersize="none" bordercolor="transparent"> |
| | Old Woman 1 (DWD).png|Old Woman 1 |
| | Old Woman 2 (DWD).png|Old Woman 2 |
| | Old Woman 3 (DWD).png|Old Woman 3 |
| | </gallery> |
| | {{!}}-{{!}} |
| | Dynasty Warriors 8= |
| | ;Nanman Troop |
| | <gallery spacing="small" widths="150" bordersize="none" bordercolor="transparent"> |
| | Nanman Soldier Portraits (DW8).png|Nanman soldier set |
| Nanman Officer Portraits (DW8).png|Nanman officer set | | Nanman Officer Portraits (DW8).png|Nanman officer set |
| Nanman Soldier Portraits (DW8).png|Nanman soldier set
| |
| </gallery> | | </gallery> |
| |-|DWB= | | |
| <gallery spacing="small" widths="155" bordersize="none" bordercolor="transparent"> | | ;DLC Troop |
| | <gallery spacing="small" widths="150" columns="5" bordersize="none" bordercolor="transparent"> |
| | Troop Costume 01.png|School uniform troops |
| | Troop Costume 02.png|[[Unit Types (Bladestorm)|Bladestorm]] troops |
| | Troop Costume 03.png|[[Unit Types (Warriors Orochi)|Orochi]] troops |
| | Troop Costume 04.png|Sentai uniform troops |
| | Troop Costume 05.png|Modern uniform troops |
| | </gallery> |
| | {{!}}-{{!}} |
| | Shin Sangoku Musou Blast= |
| | <gallery spacing="small" widths="150" columns="5" bordersize="none" bordercolor="transparent"> |
| Warrior (DWB).png|Warrior | | Warrior (DWB).png|Warrior |
| Strategist (DWB).png|Strategist | | Strategist (DWB).png|Strategist |
| Line 487: |
Line 1,601: |
| Young Girl (DWB).png|Young Girl | | Young Girl (DWB).png|Young Girl |
| </gallery> | | </gallery> |
| |-|DWU=
| | {{!}}-{{!}} |
| <gallery spacing="small" widths="155" bordersize="none" bordercolor="transparent"> | | Dynasty Warriors: Unleashed= |
| NPC 1 (DWU).png|Private | | ;Soldiers |
| | <gallery spacing="small" widths="150" bordersize="none" bordercolor="transparent"> |
| | NPC 1 (DWU).png|Private 1 |
| NPC 16 (DWU).png|Private 2 | | NPC 16 (DWU).png|Private 2 |
| NPC 2 (DWU).png|Sergeant | | NPC 2 (DWU).png|Sergeant 1 |
| NPC 12 (DWU).png|Sergeant 2 | | NPC 12 (DWU).png|Sergeant 2 |
| NPC 3 (DWU).png|General | | </gallery> |
| | ;Generals |
| | <gallery spacing="small" widths="150" bordersize="none" bordercolor="transparent"> |
| | NPC 3 (DWU).png|General 1 |
| NPC 10 (DWU).png|General 2 | | NPC 10 (DWU).png|General 2 |
| NPC 11 (DWU).png|General 3 | | NPC 11 (DWU).png|General 3 |
| NPC 4 (DWU).png|Tactician | | </gallery> |
| | ;Tacticians |
| | <gallery spacing="small" widths="150" bordersize="none" bordercolor="transparent"> |
| | NPC 4 (DWU).png|Tactician 1 |
| NPC 13 (DWU).png|Tactician 2 | | NPC 13 (DWU).png|Tactician 2 |
| NPC 14 (DWU).png|Tactician 3 | | NPC 14 (DWU).png|Tactician 3 |
| NPC 20 (DWU).png|Tactician 4 | | NPC 20 (DWU).png|Tactician 4 |
| | </gallery> |
| | ;Leaders |
| | <gallery spacing="small" widths="150" bordersize="none" bordercolor="transparent"> |
| NPC 5 (DWU).png|Veteran | | NPC 5 (DWU).png|Veteran |
| NPC 6 (DWU).png|Commander | | NPC 6 (DWU).png|Commander |
| NPC 7 (DWU).png|Barbarian | | NPC 7 (DWU).png|Barbarian |
| NPC 8 (DWU).png|Chieftain | | NPC 8 (DWU).png|Chieftain |
| NPC 15 (DWU).png|Peasant | | </gallery> |
| | ;Citizens |
| | <gallery spacing="small" widths="150" columns="3" bordersize="none" bordercolor="transparent"> |
| | NPC 15 (DWU).png|Peasant 1 |
| NPC 17 (DWU).png|Peasant 2 | | NPC 17 (DWU).png|Peasant 2 |
| NPC 18 (DWU).png|Peasant 3 | | NPC 18 (DWU).png|Peasant 3 |
| Line 511: |
Line 1,639: |
| NPC 21 (DWU).png|Young Child | | NPC 21 (DWU).png|Young Child |
| </gallery> | | </gallery> |
| |-|DW9=
| | {{!}}-{{!}} |
| <gallery spacing="small" widths="155" bordersize="none" bordercolor="transparent"> | | Dynasty Warriors 9= |
| | <gallery spacing="small" widths="150" columns="4" bordersize="none" bordercolor="transparent"> |
| General (DW9).png|General concept | | General (DW9).png|General concept |
| Strategist (DW9).png|Strategist concept | | Strategist (DW9).png|Strategist concept |
| Yellow Turban (DW9).png|Yellow Turban Rebel concept | | Yellow Turban (DW9).png|Turban Rebel concept |
| Northerner (DW9).png|Northern Raider concept | | Northerner (DW9).png|Northern Raider concept |
| Various Generic Officers (DW9).png|Generic officer concepts | | Various Generic Officers (DW9).png|Officer concepts |
| Male Citizen (DW9).png|Male citizen concept | | Male Citizen (DW9).png|Male citizen concept |
| Female Citizen (DW9).png|Female citizen concept | | Female Citizen (DW9).png|Female citizen concept |
| </gallery> | | </gallery> |
| </tabber>
| | }} |
| |-
| |
| |}
| |
|
| |
|
| ==See Also== | | ==See Also== |
| Line 529: |
Line 1,656: |
|
| |
|
| {{Units}} | | {{Units}} |
| __NOWYSIWYG__
| |
| [[Category:Unit Types]] | | [[Category:Unit Types]] |


.png)
.png)
.png)
.png)
.png)
.png)
.png)
.png)
.png)
.png)
.png)
.png)
.png)
.png)
.png)
.png)
.png)
.png)
.png)
.png)
.png)
.png)
.png)
.png)
.png)
.png)
.png)
.png)
.png)
.png)
.png)
.png)
.png)
.png)
.png)
.png)
.png)
.png)
.png)
.png)
.png)
.png)
.png)
.png)


.png)
.png)
.png)
.png)
.png)
.png)
.png)
.png)
.png)
.png)
.png)


.png)
.png)
.png)
.png)
.png)
.png)
.png)

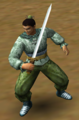
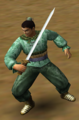
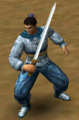
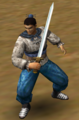
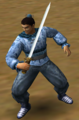
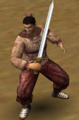
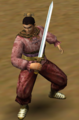
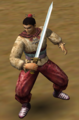
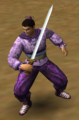
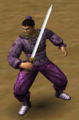
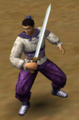

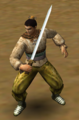
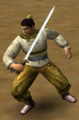
.png)
.png)
.png)
.png)
.png)
.png)
.png)
.png)
.png)
.png)
.png)
.png)
.png)
.png)
.png)
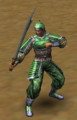
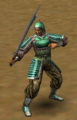
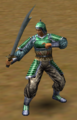
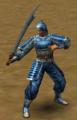
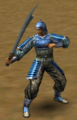

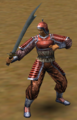
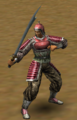
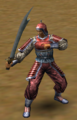
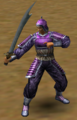
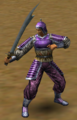
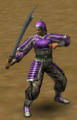
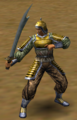

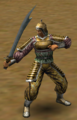
.png)
.png)
.png)
.png)
.png)
.png)
.png)
.png)
.png)
.png)
.png)
.png)
.png)
.png)
.png)
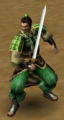
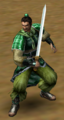
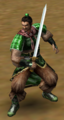
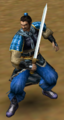
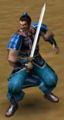
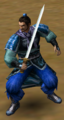
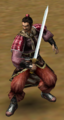
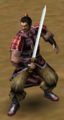
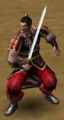
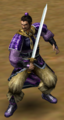
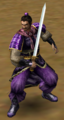
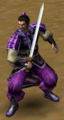
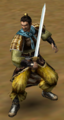
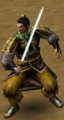
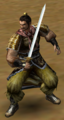
.png)
.png)
.png)
.png)
.png)
.png)
.png)
.png)
.png)
.png)
.png)
.png)
.png)
.png)
.png)
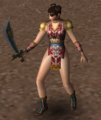

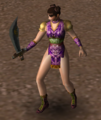
.png)
.png)
.png)
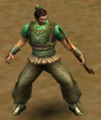
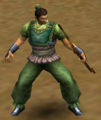
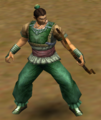
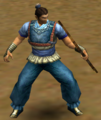
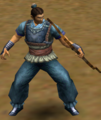

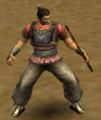
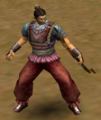
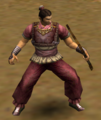
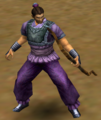
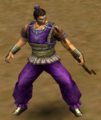
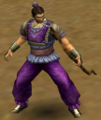
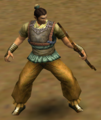
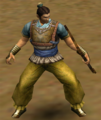
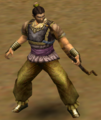
.png)
.png)
.png)
.png)
.png)
.png)
.png)
.png)
.png)
.png)
.png)
.png)
.png)
.png)
.png)
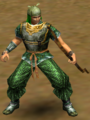
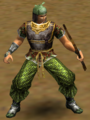
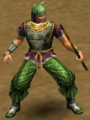
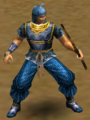

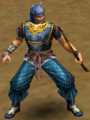
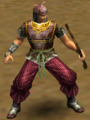
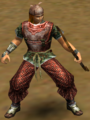
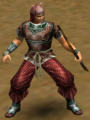
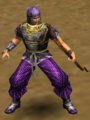
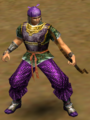
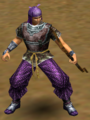
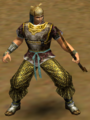
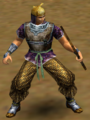
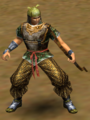
.png)
.png)
.png)
.png)
.png)
.png)
.png)
.png)
.png)
.png)
.png)
.png)
.png)
.png)
.png)
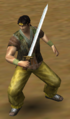
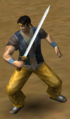
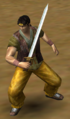
.png)
.png)
.png)
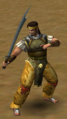
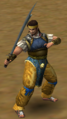
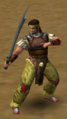
.png)
.png)
.png)
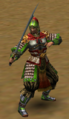
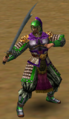
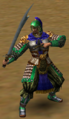
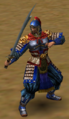
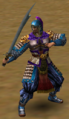
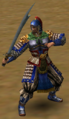
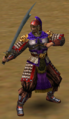
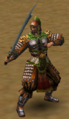

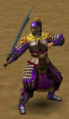

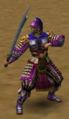
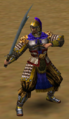
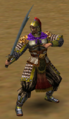
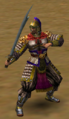
.png)
.png)
.png)
.png)
.png)
.png)
.png)
.png)
.png)
.png)
.png)
.png)
.png)
.png)
.png)
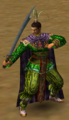
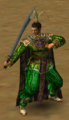
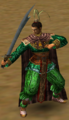
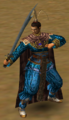
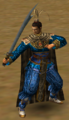
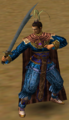
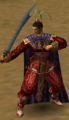
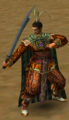
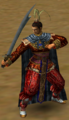
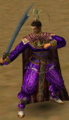
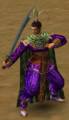
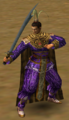

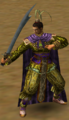
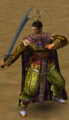
.png)
.png)
.png)
.png)
.png)
.png)
.png)
.png)
.png)
.png)
.png)
.png)
.png)
.png)
.png)
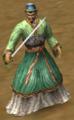
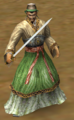
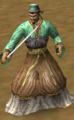
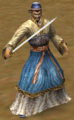
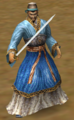
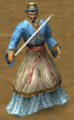
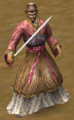
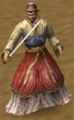
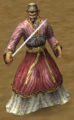
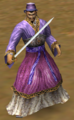
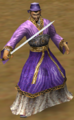
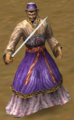
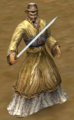
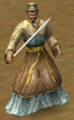
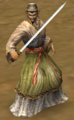
.png)
.png)
.png)
.png)
.png)
.png)
.png)
.png)
.png)
.png)
.png)
.png)
.png)
.png)
.png)
.png)
.png)
.png)
.png)
.png)
.png)
.png)
.png)
.png)
.png)
.png)
.png)
.png)
.png)
.png)
.png)
.png)
.png)
.png)
.png)
.png)
.png)
.png)
.png)
.png)
.png)
.png)
.png)
.png)
.png)
.png)
.png)
.png)
.png)
.png)
.png)
.png)
.png)
.png)
.png)
.png)
.png)
.png)
.png)
.png)
.png)
.png)
.png)
.png)
.png)
.png)
.png)
.png)
.png)
.png)
.png)
.png)
.png)
.png)
.png)
.png)
.png)
.png)
.png)
.png)
.png)
.png)
.png)
.png)
.png)
.png)
.png)
.png)
.png)
.png)
.png)
.png)
.png)
.png)
.png)
.png)
.png)
.png)
.png)
.png)
.png)
.png)
.png)
.png)
.png)
.png)
.png)
.png)
.png)
.png)
.png)
.png)
.png)
.png)
.png)
.png)
.png)
.png)
.png)
.png)
.png)
.png)
.png)
.png)
.png)
.png)
.png)
.png)
.png)
.png)
.png)
.png)
.png)
.png)
.png)
.png)
.png)
.png)
.png)
.png)
.png)
.png)
.png)
.png)
.png)
.png)
.png)
.png)
.png)
.png)
.png)
.png)
.png)
.png)
.png)
.png)
.png)
.png)
.png)
.png)
.png)
.png)
.png)
.png)
.png)
.png)
.png)
.png)
.png)
.png)
.png)
.png)
.png)
.png)
.png)
.png)
.png)
.png)
.png)
.png)
.png)
.png)
.png)
.png)
.png)
.png)
.png)
.png)
.png)
.png)
.png)
.png)
.png)
.png)
.png)
.png)
.png)
.png)
.png)
.png)
.png)
.png)
.png)
.png)
.png)
.png)
.png)
.png)
.png)
.png)
.png)
.png)
.png)
.png)
.png)
.png)
.png)
.png)
.png)
.png)
.png)
.png)
.png)
.png)
.png)
.png)
.png)
.png)
.png)
.png)
.png)
.png)
.png)
.png)
.png)
.png)
.png)
.png)
.png)
.png)
.png)
.png)
.png)
.png)
.png)
.png)
.png)
.png)
.png)
.png)
.png)
.png)
.png)
.png)
.png)
.png)
.png)
.png)
.png)
.png)
.png)
.png)
.png)
.png)
.png)
.png)
.png)
.png)
.png)
.png)
.png)
.png)
.png)
.png)
.png)
.png)
.png)
.png)
.png)
.png)
.png)
.png)
.png)
.png)
.png)
.png)
.png)
.png)
.png)
.png)
.png)
.png)
.png)
.png)
.png)
.png)
.png)
.png)
.png)
.png)
.png)
.png)
.png)
.png)
.png)
.png)
.png)
.png)
.png)
.png)
.png)
.png)
.png)
.png)
.png)
.png)
.png)
.png)
.png)
.png)
.png)
.png)
.png)
.png)
.png)
.png)
.png)
.png)
.png)
.png)
.png)
.png)
.png)
.png)
.png)
.png)
.png)
.png)
.png)
.png)
.png)
.png)
.png)
.png)
.png)
.png)
.png)
.png)
.png)
.png)
.png)
.png)
.png)
.png)
.png)
.png)
.png)
.png)
.png)
.png)
.png)
.png)
.png)
.png)
.png)
.png)
.png)
.png)
.png)
.png)
.png)
.png)
.png)
.png)
.png)
.png)
.png)
.png)
.png)
.png)
.png)
.png)
.png)
.png)
.png)
.png)


.png)
.png)
.png)
.png)
.png)
.png)
.png)
.png)
.png)
.png)
.png)
.png)
.png)
.png)
.png)
.png)
.png)
.png)
.png)
.png)
.png)
.png)
.png)
.png)
.png)
.png)
.png)
.png)
.png)
.png)
.png)
.png)
.png)
.png)
.png)
.png)
.png)
.png)
.png)
.png)
.png)
.png)
.png)
.png)
.png)
.png)
.png)
.png)
.png)
.png)
.png)
.png)
.png)
.png)
.png)
.png)
.png)
.png)
.png)
.png)
.png)
.png)
.png)
.png)
.png)
.png)
.png)
.png)
.png)
.png)
.png)
.png)
.png)
.png)
.png)
.png)

.png)
.png)
.png)
.png)
.png)
.png)
.png)
.png)
.png)
.png)
.png)
.png)
.png)
.png)
.png)
.png)
.png)
.png)
.png)
.png)
.png)
.png)
.png)
.png)
.png)
.png)
.png)
.png)
.png)
.png)
.png)
.png)
.png)
.png)
.png)
.png)
.png)
.png)
.png)
.png)
.png)
.png)
.png)
.png)
.png)
.png)
.png)
.png)
.png)
.png)
.png)
.png)
.png)
.png)
.png)
.png)
.png)
.png)
.png)
.png)
.png)
.png)
.png)
.png)
.png)
.png)
.png)
.png)
.png)
.png)
.png)
.png)
.png)
.png)
.png)
.png)
.png)
.png)
.png)
.png)
.png)
.png)
.png)
.png)
.png)
.png)
.png)
.png)
.png)
.png)
.png)
.png)
.png)
.png)
.png)
.png)
.png)
.png)
.png)
.png)
.png)
.png)
.png)
.png)
.png)
.png)
.png)
.png)
.png)
.png)
.png)
.png)
.png)
.png)
.png)
.png)
.png)
.png)
.png)
.png)
.png)
.png)
.png)
.png)
.png)
.png)
.png)
.png)
.png)
.png)
.png)
.png)
.png)
.png)
.png)
.png)
.png)
.png)
.png)
.png)
.png)
.png)
.png)
.png)
.png)
.png)
.png)
.png)
.png)
.png)
.png)
.png)
.png)
.png)
.png)
.png)
.png)
.png)
.png)
.png)
.png)
.png)
.png)
.png)
.png)
.png)
.png)
.png)
.png)
.png)
.png)
.png)
.png)
.png)
.png)
.png)
.png)
.png)
.png)
.png)
.png)
.png)
.png)
.png)
.png)
.png)
.png)


.png)
.png)
.png)
.png)
.png)
.png)
.png)
.png)
.png)
.png)
.png)
.png)
.png)
.png)
.png)
.png)
.png)
.png)
.png)
.png)
.png)
.png)
.png)
.png)
.png)
.png)
.png)
.png)
.png)
.png)
.png)