The Battle of Kizugawaguchi (木津川口の戦い) refers to two naval battles fought by the Mōri family and other factions against Nobunaga during the latter years of the conqueror's reign of power. Historically, the conflict did not have the main powers of each respective clan directly partake in the battle. Each game takes their own liberties on the battle's events.
Role in Games
Samurai Warriors
Samurai Warriors 2 introduces the stage as Ōsaka Bay (大坂湾, Ōsaka Wan). This battle primarily acts as a struggle between the Ikko and Saika Renegades against the Oda. Nobunaga, stationed on the north-western part of the map, tells his army to defend until the Oda fleet arrives to assist them. In the meantime, the rebels attack relentlessly with Magoichi's instructions and succeed in significantly lowering the morale of the Oda army. Once the boats arrive, however, the tides of the battle turn and the Ikko rebels begin to lose their momentum. Their lowered guard makes them easy prey for the Oda troops.
During Magoichi and Gracia's version of the stage, the rebels are already demoralized and complain about hunger. Magoichi assures them that the Mōri's supplies will arrive in due time. Once their allies arrive, Terumoto appears to deliver the food to the rebels. Ensuring his safety greatly boosts morale and gives the rebels the morale they need to charge. However, the Oda boats arrive and bombard the docks with their cannons. Players are given the option to stop them by defeating the generals responsible for the boats' operation. Without their trump card, the Oda army will be overwhelmed by the vigor of the rebels. Nobunaga allows them this victory and later gets his revenge by attacking the Saika homeland.
For Kotarō's version, he spots Mitsuhide trying to call for a cease-fire with the rebels. If the cease-fire talks succeeds, it will still be a double cross by Nobunaga.
It is also the stage for the "Pirate Hunt" battle scattered throughout various characters' stages. Players have to save villagers from pirate ambushes and boat raids. Kojirō's story begins here as he cuts down countless pirates, which Kojirō refers as "poor souls" because of their way of living. Musashi arrives to assist him and the two meet here the first time. After defeating all pirates and Ina, Kojirō decides to test Musashi's strength by fighting him one on one.
Samurai Warriors 3 revamps the map to make the boats larger and calls the stage under its historical name. This is the only battle in the game to not take place on land. Motonari replaces Terumoto as the representative for his clan and the rebels act as secondary players in the conflict. The situation is somewhat different since the Mōri are more tactical than in the previous title. Nobunaga, Mitsuhide, Motochika, Hanbei, and Kanbei gets the Oda side as part of their story, while only Motonari gets the Mōri side.
In the Moushouden expansion, Okuni gets the Mōri side as part of her story while Ranmaru, Nō, and Gracia receive the Oda's version of the battle.
Having been replaced by a spiritual successor called the siege of Aka in the original game, this battle fully returns as the start of the Hearts and Minds story in Samurai Warriors 4-II. Implied as the second encounter, due to the narration stating of previous encounters between the Mōri, unlike in the third title, this land is mostly land based with the boats only being a small part of the map in the west. Played on the Mōri army only, Takakage Kobayakawa and his father send aid to Magoichi and the Ikko-Ikki rebels who are stranded and are up against Toshiie Maeda under Hanbei Takenaka's command. Once the Mōri navy rendezvous with the land troops, the peasants are assigned to withdraw from the field, with Magoichi aiding the Mōri by defending the central garrison to do so.
Similar to Ise in the first title, Ranmaru Mori appears to block the escape point and must be defeated to allow the peasants to escape successfully. Soon Kanbei Kuroda will arrive with the warships, and other Oda-battle hardened warriors sinking some of the Mori ships on impact, but this prompts the Murakami navy to launch an ambush in return, opening up a counterattack on the boats and allowing both Kanbei and Hanbei to be beaten to end the stage.
In Samurai Warriors: Spirit of Sanada, this battle appears as part of Hisahide Matsunaga's rebellion and is implied to be the first battle of Kizugawa, with a larger importance on the Matsunaga forces and Saika rebels, with the Mōri being pushed to the background and naval support, Nobunaga also appears in the warships in this battle as opposed to just Hideyoshi, and despite his defeat, Hisahide soon gets executed by his former lord, thus rendering the whole operation of Magoichi and Takakage pointless, leading to their immediate retreat.
Warriors Orochi
During Wu's Gaiden stages in Warriors Orochi, Keiji sends a letter of challenge to Sun Ce. Determined to see the warrior within their ranks, Lu Meng's army faces him in this area. Bored with half-hearted efforts, the wild man wants to see if the coalition can band together completely to stop him and challenges them to impress him. Masanobu Honda volunteers to defend the main camp so that the entire army can safely arrive on the field. Lu Meng asks the players to sound the drums in the main camp once he hears that reinforcements are near. In the meantime, players are asked to defeat the Orochi generals, who appear at Keiji's signal to attack the main camp. If players successfully lead all ally generals to the enemy main camp (Lu Meng, Zhu Zhi, Ieyasu, Hanzō, Ina, and Zhou Tai), Keiji will be satisfied and joins the coalition after his defeat. Taking too long (about 20 minutes) in the task disappoints him and he faces the Wu army half-heartedly.
In Warriors Orochi 2, it serves as the setting for Diao Chan, Zhang He, and Motochika's dream stage. The three aesthetics were enjoying the beautiful view until Da Ji and her army invade the area. To punish the rudeness to their senses, they assist Yuan Shao by clearing the area of enemies. The player can gain more of an edge by making the warships appear and subduing Lu Bu to make him defect.
Kessen
While Nobunaga is defending his position against several factions in Kessen III, Kizugawaguchi appears as a battle during Chapter 8. Rather than concentrating on defeating on a single commander, victory is only achieved if all enemy generals are eliminated. The Oda forces lose if the enemy makes it past a checkpoint.
Game Nihonshi Kakumeiji
Kizugawaguchi is unique in that the player must engage Narihide Kodama's fleet in naval combat using warships. The ships have a distant circular range, requiring coordination with other units to effectively damage the opposing forces.
Historical Information
First Battle
In 1576, Oda army had secured a crushing blow over the Ishigami-Honganji resistance and made plans to continue their subjugation. To weaken their foes further, Nobunaga ordered his vassal, Kuki Yoshitaka, to attack the rebel's supply line. Yoshitaka was said to have sent at least 300 ships to attack the soldiers who were responsible for the rebels' provisions. The Mōri and their respective allies, who allied with the Ishigami-Honganji, were stationed along the Kizu River. 700~900 ships were recorded to have been present for the Mōri's navy.
As Yoshitaka was heading towards his destination, Nomi Munekatsu led the Mōri, Kobayakawa and Murakami navies to block his path. While the Mōri excelled at naval warfare, it was the Murakami's inventive cannon that destroyed Yoshitaka's fleet. Another story states that it was actually the Saika-shu's cannons and artillery from the shoreline that severely devastated the Oda forces. In either case, the Oda army was ultimately forced to withdraw from the area when the navy was almost destroyed in the attack. While there was likely losses suffered within both armies, the Mōri's admirals and commanders were physically unharmed.
The particular weapon that was used on Yoshitaka's fleet was the hōrokuhiya (焙烙火矢), a multi-firing mechanism that was said to use a type of hōroku, commonly known as a flat cooking appliance that uses low heat to cook, as its ammo. It (or something matching its structural integrity) was used to create a tiny cannonball and it was loaded into the multiple barrels of the hōrokuhiya with black powder. Since the Japanese version of naval cannons were much narrower than the European kind, the pressure built from their unlikely weapon was supposedly akin to launching a rocket.
Second Battle
As the Oda troops were still at war with the Honganji rebels, Nobunaga redoubled his effort to defeat the Mōri supply line two years later. With Yoshitaka resuming his duties as the naval fleet's commander, Nobunaga assigned his vassal heavier firearms for the men. To counter the hōrokuhiya and the Mōri troops from invading the admirals' ships, Nobunaga ordered six tekkōsen (heavily armored military boat with a fabled European influence) to be built in Ise Province. Yoshitaka's fleet consisted six tekkōsen, one atakebune, and a handful of other smaller boats. With the tekkōsen armed with a total of 18 cannons and the Oda navy's artillery blasting away, the Mōri fleet stood little to no chance against the onslaught. Since Murakami Takeyoshi could not have his men ready their cannons in time, it's popularly written that the 600 ships were sunken without being able to put up a fight.
While the popular belief has the Mōri severely crippled as a result, recent research of the battle draws some doubt. One crucial flaw with accepting the common opinion is that the Mōri records give no distinct details of the encounter and they were still present in the sea near the western shores of Awaji Island. Nobunaga's troops only succeeded in loosening the Mōri's grasp on the area four years later. Indeed, while it's accepted that the Oda may have won a naval victory, it's possible that the Mōri were not damaged by this particular encounter to the extent stressed in tales.
People who were affected were the Honganji resistance since their main food supply was cut. Although the Mōri continued to supply them with food in the following year, the drop caused by the naval battle dealt a severe blow to the rebels' morale. It's popularly accepted that the second battle of Kizugawaguchi was one of the driving causes for Kennyo's eventual surrender to Nobunaga two years later.
Gallery
-
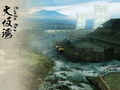
Samurai Warriors 2 stage image
-
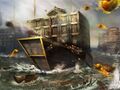
Samurai Warriors 3 stage image
-
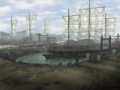
Warriors Orochi stage image
-
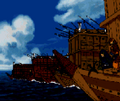
Game Nihonshi Kakumeiji ~Oda Nobunaga~ screenshot
-
Kessen III screenshot
.png)

.png)
.png)

| This battle article is a stub. You can help the wiki by expanding it. |