|
|
| (12 intermediate revisions by 3 users not shown) |
| Line 1: |
Line 1: |
| {{Infobox Toukiden | | {{Infobox Toukiden |
| |name = Shikimi | | |name = Shikimi |
| |image = Shikimi-toukiden.jpg | | |image = Shikimi-tkdkartwork.jpg |
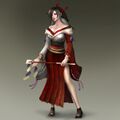
| | |caption = Toukiden Kiwami Treasure Box artwork |
| | |age = 19 |
| | |height = 160 cm (5'3") |
| |job = Priestess | | |job = Priestess |
| |v.actors = Hiroko Ushida (jp) | | |v.actors = [[Hiroko Ushida]] (jp) |
| | |appeared = [[Toukiden: The Age of Demons]] |
| |footnotes = Name roughly translates as "star anise". Means "sweet temptation" or "deadly venom" in the flower language. | | |footnotes = Name roughly translates as "star anise". Means "sweet temptation" or "deadly venom" in the flower language. |
| }} | | }} |
| '''Shikimi''' (樒) is a secondary character in ''[[Toukiden: The Age of Demons]]'' who resides in Utakata Village. The player can find her temple outside the front entrance of the main headquarters. | | '''Shikimi''' (樒) is a secondary character who resides in Utakata Village. The player can find her temple outside the front entrance of the main headquarters. |
|
| |
|
| She runs the ritual temple in Utakata Village, and is the only person who can draw out a [[Toukiden: The Age of Demons/Mitama|Mitama]]'s true potential. Calm and aloof, Shikimi moves at her own pace. She seems invested in helping Slayers and listening to souls, but no one claims to truly understand her. Not even [[Protagonist (Toukiden)|the protagonist]] knows anything about her during the events of the main story. Since they are both priestesses, [[Kikka]] tries to get along with her. | | ==Role in Games== |
| | She runs the ritual temple in Utakata Village and is the only person who can draw out a [[Toukiden: The Age of Demons/Mitama|Mitama]]'s true potential. She continues her business through any conflict. |
| | |
| | When [[Izuchikanata]] draws near the village in ''[[Kiwami]]'', Shikimi is the only one besides [[Horō]] to be completely unaffected by its miasma. She uses her priestess powers to keep portions of the residents' souls grounded in their reality. She entrusts [[Protagonist (Toukiden)|the protagonist]] and Horō to bring everyone back to the mortal realm. |
| | |
| | ==Personality== |
| | Calm and aloof, Shikimi moves at her own pace. She seems invested in helping Slayers and listening to souls, but no one claims to truly understand her. Not even the protagonist knows anything about her during the events of the main story. Since they are both priestesses, [[Kikka]] tries to get along with her. |
|
| |
|
| ==Requests== | | ==Requests== |
| Line 42: |
Line 52: |
|
| |
|
| ==Function== | | ==Function== |
| Pay her a minimal sum of haku to lower or raise a Mitama's level. The minimal cost for increasing experience is .01% of the sum until the next level, but price raises on how many points the player prefers to gain. She can initially level up any starting Mitama up to Level 3. By chapter 3, her limit is changed to Level 5. At the end of chapter 4, she can go to Level 8. After the main story is cleared, she can raise a Mitama to Level 10 (max). | | Pay her a minimal sum of haku to lower or raise a Mitama's level. The minimal cost for increasing experience is .01% of the sum until the next level, but price raises on how many points the player prefers to gain. She can initially level up any starting Mitama up to Level 3. By chapter 3, her limit is changed to Level 5. At the end of chapter 4, she can go to Level 8. After the main story is cleared, she can raise a Mitama to Level 10 (max). She is also capable of performing [[Toukiden: The Age of Demons/Weapons#Fusions|weapon fusions]] once the main story is complete. |
| | |
| ==Fusions==
| |
| After the main story is completed, Shikimi unlocks this feature at her shrine. Players are given thirty-six recipes to create powerful weaponry with very specific ingredients. They generally require a Level 9 weapon, a Level 10 soul, and hundred thousands of haku. Once these ingredients are fused together, the player loses the weapon and Mitama. Used Mitama can be recovered again randomly during quests.
| |
| | |
| The names of the weaponry are often homages to the Mitama's previous life, time era, or personal weapon.
| |
| | |
| <tabber>Long Swords=
| |
| ::''See also: [[Toukiden/Weapon Movesets#Long Sword|Long Sword Moveset]] [[Image:Long Sword Icon (TKD).png|right|border]]
| |
| {|border="1" align="left" cellspacing="2"
| |
| |-style="text-align:center" bgcolor="#BCC6CE"
| |
| |width="160"|'''Image'''
| |
| |width="180"|'''Recipe'''
| |
| |width="320"|'''Weapon Information'''
| |
| |-bgcolor="#EEEEEE"
| |
| |colspan="2" bgcolor="#D5DADE"|<div style="text-align: center">'''(三池典太)'''</div>
| |
| |rowspan="2" bgcolor="#EEEEEE"|<div style="column-count:2;-moz-column-count:2;-webkit-column-count:2">
| |
| *'''Attack:''' 563 (623)
| |
| *'''Critical:''' 29
| |
| *'''Attribute:''' None
| |
| *'''Slots:''' 3 (+2 & +5)
| |
| *'''Rank:''' 6
| |
| </div>
| |
| |-
| |
| |rowspan="2" style="text-align:center" bgcolor="#EEEEEE"|[[Image:Long Sword 63 (TKD).png|175px|]]
| |
| |rowspan="2" bgcolor="#EEEEEE"|
| |
| :[[Kanetsugu Naoe#Character Symbolism|浄刀・神直毘]]
| |
| :Yagyū Jūbei
| |
| |-
| |
| |bgcolor="#EEEEEE"|
| |
| *'''Weapon Line:''' 浄刀・祓
| |
| *'''Cost:''' 260,000
| |
| |-
| |
| |colspan="3" bgcolor="#EEEEEE"|'''In-Game Description:'''
| |
| |-bgcolor="#EEEEEE"
| |
| |colspan="2" bgcolor="#D5DADE"|<div style="text-align: center">'''(虎徹)'''</div>
| |
| |rowspan="2" bgcolor="#EEEEEE"|<div style="column-count:2;-moz-column-count:2;-webkit-column-count:2">
| |
| *'''Attack:''' 496 (556)
| |
| *'''Critical:''' 0
| |
| *'''Attribute:''' Poison 248
| |
| *'''Slots:''' 3 (+2 & +5)
| |
| *'''Rank:''' 9
| |
| </div>
| |
| |-
| |
| |rowspan="2" style="text-align:center" bgcolor="#EEEEEE"|[[Image:Long Sword 64 (TKD).png|175px|]]
| |
| |rowspan="2" bgcolor="#EEEEEE"|
| |
| :三池典太
| |
| :Kondō Isami
| |
| |-
| |
| |bgcolor="#EEEEEE"|
| |
| *'''Weapon Line:''' 浄刀・祓
| |
| *'''Cost:''' 480,000
| |
| |-
| |
| |colspan="3" bgcolor="#EEEEEE"|'''In-Game Description:'''
| |
| |-bgcolor="#EEEEEE"
| |
| |colspan="2" bgcolor="#D5DADE"|<div style="text-align: center">'''(将門刀)'''</div>
| |
| |rowspan="2" bgcolor="#EEEEEE"|<div style="column-count:2;-moz-column-count:2;-webkit-column-count:2">
| |
| *'''Attack:''' 452
| |
| *'''Critical:''' 0
| |
| *'''Attribute:''' Stun 226 (306)
| |
| *'''Slots:''' 3 (+2 & +5)
| |
| *'''Rank:''' 6
| |
| </div>
| |
| |-
| |
| |rowspan="2" style="text-align:center" bgcolor="#EEEEEE"|[[Image:Long Sword 65 (TKD).png|175px|]]
| |
| |rowspan="2" bgcolor="#EEEEEE"|
| |
| :霊剣・平国
| |
| :Taira no Masakado
| |
| |-
| |
| |bgcolor="#EEEEEE"|
| |
| *'''Weapon Line:''' 夜刀・上古拵え
| |
| *'''Cost:''' 260,000
| |
| |-
| |
| |colspan="3" bgcolor="#EEEEEE"|'''In-Game Description:'''
| |
| |-bgcolor="#EEEEEE"
| |
| |colspan="2" bgcolor="#D5DADE"|<div style="text-align: center">'''(坂上宝剣)'''</div>
| |
| |rowspan="2" bgcolor="#EEEEEE"|<div style="column-count:2;-moz-column-count:2;-webkit-column-count:2">
| |
| *'''Attack:''' 623 (683)
| |
| *'''Critical:''' 0 (60)
| |
| *'''Attribute:''' Earth 124
| |
| *'''Slots:''' 3 (+2 & +4)
| |
| *'''Rank:''' 9
| |
| </div>
| |
| |-
| |
| |rowspan="2" style="text-align:center" bgcolor="#EEEEEE"|[[Image:Long Sword 66 (TKD).png|175px|]]
| |
| |rowspan="2" bgcolor="#EEEEEE"|
| |
| :将門刀
| |
| :Sakanoue no Tamuramaro
| |
| |-
| |
| |bgcolor="#EEEEEE"|
| |
| *'''Weapon Line:''' 夜刀・上古拵え
| |
| *'''Cost:''' 480,000
| |
| |-
| |
| |colspan="3" bgcolor="#EEEEEE"|'''In-Game Description:'''
| |
| |-bgcolor="#EEEEEE"
| |
| |colspan="2" bgcolor="#D5DADE"|<div style="text-align: center">'''[[Cao Cao#Character Symbolism|(七星剣)]]'''</div>
| |
| |rowspan="2" bgcolor="#EEEEEE"|<div style="column-count:2;-moz-column-count:2;-webkit-column-count:2">
| |
| *'''Attack:''' 568 (628)
| |
| *'''Critical:''' 0
| |
| *'''Attribute:''' Heaven 85 (145)
| |
| *'''Slots:''' 3 (+2 & +4)
| |
| *'''Rank:''' 6
| |
| </div>
| |
| |-
| |
| |rowspan="2" style="text-align:center" bgcolor="#EEEEEE"|[[Image:Long Sword 67 (TKD).png|175px|]]
| |
| |rowspan="2" bgcolor="#EEEEEE"|
| |
| :[[Futsuhiko#Development|皇刀・布都御魂]]
| |
| :Prince Shotoku
| |
| |-
| |
| |bgcolor="#EEEEEE"|
| |
| *'''Weapon Line:''' 王刀・天之羽々斬
| |
| *'''Cost:''' 260,000
| |
| |-
| |
| |colspan="3" bgcolor="#EEEEEE"|'''In-Game Description:'''
| |
| |-bgcolor="#EEEEEE"
| |
| |colspan="2" bgcolor="#D5DADE"|<div style="text-align: center">'''[[Susano'o#Character Symbolism|(草薙剣)]]'''</div>
| |
| |rowspan="2" bgcolor="#EEEEEE"|<div style="column-count:2;-moz-column-count:2;-webkit-column-count:2">
| |
| *'''Attack:''' 563 (623)
| |
| *'''Critical:''' 0
| |
| *'''Attribute:''' Heaven 187
| |
| *'''Slots:''' 3 (+2 & +5)
| |
| *'''Rank:''' 9
| |
| </div>
| |
| |-
| |
| |rowspan="2" style="text-align:center" bgcolor="#EEEEEE"|[[Image:Long Sword 68 (TKD).png|175px|]]
| |
| |rowspan="2" bgcolor="#EEEEEE"|
| |
| :七星剣
| |
| :Yamatotakeru
| |
| |-
| |
| |bgcolor="#EEEEEE"|
| |
| *'''Weapon Line:''' 王刀・天之羽々斬
| |
| *'''Cost:''' 480,000
| |
| |-
| |
| |colspan="3" bgcolor="#EEEEEE"|'''In-Game Description:'''
| |
| |}
| |
| {{BR}}
| |
| |-|Twin Blades=
| |
| ::''See also: [[Toukiden/Weapon Movesets#Twin Blades|Twin Blades Moveset]] [[Image:Twin Blades Icon (TKD).png|right|border]]
| |
| {|border="1" align="left" cellspacing="2"
| |
| |-style="text-align:center" bgcolor="#BCC6CE"
| |
| |width="160"|'''Image'''
| |
| |width="180"|'''Recipe'''
| |
| |width="320"|'''Weapon Information'''
| |
| |-bgcolor="#EEEEEE"
| |
| |colspan="2" bgcolor="#D5DADE"|<div style="text-align: center">'''(影丸)'''</div>
| |
| |rowspan="2" bgcolor="#EEEEEE"|<div style="column-count:2;-moz-column-count:2;-webkit-column-count:2">
| |
| *'''Attack:''' 324
| |
| *'''Critical:''' 0
| |
| *'''Attribute:''' Stun 108 (168)
| |
| *'''Slots:''' 3 (+2 & +5)
| |
| *'''Rank:''' 6
| |
| </div>
| |
| |-
| |
| |rowspan="2" style="text-align:center" bgcolor="#EEEEEE"|[[Image:Twin Blades 63 (TKD).png|175px|]]
| |
| |rowspan="2" bgcolor="#EEEEEE"|
| |
| :秘剣・神威
| |
| :[[Hattori Hanzō]]
| |
| |-
| |
| |bgcolor="#EEEEEE"|
| |
| *'''Weapon Line:''' 秘剣・葉隠
| |
| *'''Cost:''' 260,000
| |
| |-
| |
| |colspan="3" bgcolor="#EEEEEE"|'''In-Game Description:'''
| |
| |-bgcolor="#EEEEEE"
| |
| |colspan="2" bgcolor="#D5DADE"|<div style="text-align: center">'''(二天一刀)'''</div>
| |
| |rowspan="2" bgcolor="#EEEEEE"|<div style="column-count:2;-moz-column-count:2;-webkit-column-count:2">
| |
| *'''Attack:''' 397 (437)
| |
| *'''Critical:''' 20 (60)
| |
| *'''Attribute:''' None
| |
| *'''Slots:''' 3 (+2 & +4)
| |
| *'''Rank:''' 9
| |
| </div>
| |
| |-
| |
| |rowspan="2" style="text-align:center" bgcolor="#EEEEEE"|[[Image:Twin Blades 64 (TKD).png|175px|]]
| |
| |rowspan="2" bgcolor="#EEEEEE"|
| |
| :影丸
| |
| :[[Miyamoto Musashi]]
| |
| |-
| |
| |bgcolor="#EEEEEE"|
| |
| *'''Weapon Line:''' 秘剣・葉隠
| |
| *'''Cost:''' 480,000
| |
| |-
| |
| |colspan="3" bgcolor="#EEEEEE"|'''In-Game Description:'''
| |
| |-bgcolor="#EEEEEE"
| |
| |colspan="2" bgcolor="#D5DADE"|<div style="text-align: center">'''(陰陽秘刀)'''</div>
| |
| |rowspan="2" bgcolor="#EEEEEE"|<div style="column-count:2;-moz-column-count:2;-webkit-column-count:2">
| |
| *'''Attack:''' 362
| |
| *'''Critical:''' 0
| |
| *'''Attribute:''' Water 54 (114)
| |
| *'''Slots:''' 3 (+2 & +5)
| |
| *'''Rank:''' 6
| |
| </div>
| |
| |-
| |
| |rowspan="2" style="text-align:center" bgcolor="#EEEEEE"|[[Image:Twin Blades 65 (TKD).png|175px|]]
| |
| |rowspan="2" bgcolor="#EEEEEE"|
| |
| :八握ノ双剣
| |
| :[[Abe no Seimei]]
| |
| |-
| |
| |bgcolor="#EEEEEE"|
| |
| *'''Weapon Line:''' 夜刀・双つ拵え
| |
| *'''Cost:''' 260,000
| |
| |-
| |
| |colspan="3" bgcolor="#EEEEEE"|'''In-Game Description:'''
| |
| |-bgcolor="#EEEEEE"
| |
| |colspan="2" bgcolor="#D5DADE"|<div style="text-align: center">'''(月天)'''</div>
| |
| |rowspan="2" bgcolor="#EEEEEE"|<div style="column-count:2;-moz-column-count:2;-webkit-column-count:2">
| |
| *'''Attack:''' 399 (439)
| |
| *'''Critical:''' 0
| |
| *'''Attribute:''' Water 79
| |
| *'''Slots:''' 3 (+2 & +5)
| |
| *'''Rank:''' 9
| |
| </div>
| |
| |-
| |
| |rowspan="2" style="text-align:center" bgcolor="#EEEEEE"|[[Image:Twin Blades 66 (TKD).png|175px|]]
| |
| |rowspan="2" bgcolor="#EEEEEE"|
| |
| :陰陽秘刀
| |
| :[[Tsuchigumo#Mythological Information|Tsukuyomi]]
| |
| |-
| |
| |bgcolor="#EEEEEE"|
| |
| *'''Weapon Line:''' 夜刀・双つ拵え
| |
| *'''Cost:''' 480,000
| |
| |-
| |
| |colspan="3" bgcolor="#EEEEEE"|'''In-Game Description:'''
| |
| |-bgcolor="#EEEEEE"
| |
| |colspan="2" bgcolor="#D5DADE"|<div style="text-align: center">'''[[Nobunaga Oda#Character Symbolism|(小烏丸)]]'''</div>
| |
| |rowspan="2" bgcolor="#EEEEEE"|<div style="column-count:2;-moz-column-count:2;-webkit-column-count:2">
| |
| *'''Attack:''' 363
| |
| *'''Critical:''' 0 (40)
| |
| *'''Attribute:''' Heaven 54 (94)
| |
| *'''Slots:''' 3 (+2 & +4)
| |
| *'''Rank:''' 6
| |
| </div>
| |
| |-
| |
| |rowspan="2" style="text-align:center" bgcolor="#EEEEEE"|[[Image:Twin Blades 67 (TKD).png|175px|]]
| |
| |rowspan="2" bgcolor="#EEEEEE"|
| |
| :皇双刀・経津主
| |
| :[[Taira no Kiyomori]]
| |
| |-
| |
| |bgcolor="#EEEEEE"|
| |
| *'''Weapon Line:''' 王双刀・天之尾羽張
| |
| *'''Cost:''' 260,000
| |
| |-
| |
| |colspan="3" bgcolor="#EEEEEE"|'''In-Game Description:'''
| |
| |-bgcolor="#EEEEEE"
| |
| |colspan="2" bgcolor="#D5DADE"|<div style="text-align: center">'''(大通連・小通連)'''</div>
| |
| |rowspan="2" bgcolor="#EEEEEE"|<div style="column-count:2;-moz-column-count:2;-webkit-column-count:2">
| |
| *'''Attack:''' 400
| |
| *'''Critical:''' Heaven 80
| |
| *'''Attribute:''' 0 (60)
| |
| *'''Slots:''' 3 (+2 & +4)
| |
| *'''Rank:''' 9
| |
| </div>
| |
| |-
| |
| |rowspan="2" style="text-align:center" bgcolor="#EEEEEE"|[[Image:Twin Blades 68 (TKD).png|175px|]]
| |
| |rowspan="2" bgcolor="#EEEEEE"|
| |
| :小烏丸
| |
| :Suzuka Gozen
| |
| |-
| |
| |bgcolor="#EEEEEE"|
| |
| *'''Weapon Line:''' 王双刀・天之尾羽張
| |
| *'''Cost:''' 480,000
| |
| |-
| |
| |colspan="3" bgcolor="#EEEEEE"|'''In-Game Description:'''
| |
| |}
| |
| {{BR}}
| |
| |-|Spears=
| |
| ::''See also: [[Toukiden/Weapon Movesets#Spear|Spear Moveset]] [[Image:Spear Icon (TKD).png|right|border]]
| |
| {|border="1" align="left" cellspacing="2"
| |
| |-style="text-align:center" bgcolor="#BCC6CE"
| |
| |width="160"|'''Image'''
| |
| |width="180"|'''Recipe'''
| |
| |width="320"|'''Weapon Information'''
| |
| |-bgcolor="#EEEEEE"
| |
| |colspan="2" bgcolor="#D5DADE"|<div style="text-align: center">'''(岩融)'''</div>
| |
| |rowspan="2" bgcolor="#EEEEEE"|<div style="column-count:2;-moz-column-count:2;-webkit-column-count:2">
| |
| *'''Attack:''' 680 (760)
| |
| *'''Critical:''' 0
| |
| *'''Attribute:''' Fire 64
| |
| *'''Slots:''' 3 (+2 & +4)
| |
| *'''Rank:''' 6
| |
| </div>
| |
| |-
| |
| |rowspan="2" style="text-align:center" bgcolor="#EEEEEE"|[[Image:Spear 63 (TKD).png|175px|]]
| |
| |rowspan="2" bgcolor="#EEEEEE"|
| |
| :[[Kaguya#Character Symbolism|霊槍・五百津真賢]]
| |
| :[[Benkei]]
| |
| |-
| |
| |bgcolor="#EEEEEE"|
| |
| *'''Weapon Line:''' 霊槍・阿良々岐
| |
| *'''Cost:''' 260,000
| |
| |-
| |
| |colspan="3" bgcolor="#EEEEEE"|'''In-Game Description:'''
| |
| |-bgcolor="#EEEEEE"
| |
| |colspan="2" bgcolor="#D5DADE"|<div style="text-align: center">'''(池中之月)'''</div>
| |
| |rowspan="2" bgcolor="#EEEEEE"|<div style="column-count:2;-moz-column-count:2;-webkit-column-count:2">
| |
| *'''Attack:''' 642
| |
| *'''Critical:''' 0
| |
| *'''Attribute:''' Stun 214 (334)
| |
| *'''Slots:''' 3 (+2 & +4)
| |
| *'''Rank:''' 9
| |
| </div>
| |
| |-
| |
| |rowspan="2" style="text-align:center" bgcolor="#EEEEEE"|[[Image:Spear 64 (TKD).png|175px|]]
| |
| |rowspan="2" bgcolor="#EEEEEE"|
| |
| :岩融
| |
| :Hōzōin In'ei
| |
| |-
| |
| |bgcolor="#EEEEEE"|
| |
| *'''Weapon Line:''' 霊槍・阿良々岐
| |
| *'''Cost:''' 480,000
| |
| |-
| |
| |colspan="3" bgcolor="#EEEEEE"|'''In-Game Description:'''
| |
| |-bgcolor="#EEEEEE"
| |
| |colspan="2" bgcolor="#D5DADE"|<div style="text-align: center">'''(護国貫徹)'''</div>
| |
| |rowspan="2" bgcolor="#EEEEEE"|<div style="column-count:2;-moz-column-count:2;-webkit-column-count:2">
| |
| *'''Attack:''' 650
| |
| *'''Critical:''' 0 (40)
| |
| *'''Attribute:''' Earth 97 (137)
| |
| *'''Slots:''' 3 (+2 & +5)
| |
| *'''Rank:''' 6
| |
| </div>
| |
| |-
| |
| |rowspan="2" style="text-align:center" bgcolor="#EEEEEE"|[[Image:Spear 65 (TKD).png|175px|]]
| |
| |rowspan="2" bgcolor="#EEEEEE"|
| |
| :御手杵・翠
| |
| :Hijikata Toshizō
| |
| |-
| |
| |bgcolor="#EEEEEE"|
| |
| *'''Weapon Line:''' 夜刀・槍拵え
| |
| *'''Cost:''' 260,000
| |
| |-
| |
| |colspan="3" bgcolor="#EEEEEE"|'''In-Game Description:'''
| |
| |-bgcolor="#EEEEEE"
| |
| |colspan="2" bgcolor="#D5DADE"|<div style="text-align: center">'''[[Keiji Maeda#Character Symbolism|(天沼矛)]]'''</div>
| |
| |rowspan="2" bgcolor="#EEEEEE"|<div style="column-count:2;-moz-column-count:2;-webkit-column-count:2">
| |
| *'''Attack:''' 717
| |
| *'''Critical:''' 0
| |
| *'''Attribute:''' Heaven 143 (243)
| |
| *'''Slots:''' 3 (+2 & +6)
| |
| *'''Rank:''' 9
| |
| </div>
| |
| |-
| |
| |rowspan="2" style="text-align:center" bgcolor="#EEEEEE"|[[Image:Spear 66 (TKD).png|175px|]]
| |
| |rowspan="2" bgcolor="#EEEEEE"|
| |
| :護国貫徹
| |
| :[[Protagonist (Chronicles)#Character Symbolism|Izanagi]]
| |
| |-
| |
| |bgcolor="#EEEEEE"|
| |
| *'''Weapon Line:''' 夜刀・槍拵え
| |
| *'''Cost:''' 480,000
| |
| |-
| |
| |colspan="3" bgcolor="#EEEEEE"|'''In-Game Description:'''
| |
| |-bgcolor="#EEEEEE"
| |
| |colspan="2" bgcolor="#D5DADE"|<div style="text-align: center">'''[[Katsuie_Shibata#Character_Symbolism|(日本号)]]'''</div>
| |
| |rowspan="2" bgcolor="#EEEEEE"|<div style="column-count:2;-moz-column-count:2;-webkit-column-count:2">
| |
| *'''Attack:''' 653 (693)
| |
| *'''Critical:''' 0
| |
| *'''Attribute:''' Wind 97 (137)
| |
| *'''Slots:''' 3 (+2 & +5)
| |
| *'''Rank:''' 6
| |
| </div>
| |
| |-
| |
| |rowspan="2" style="text-align:center" bgcolor="#EEEEEE"|[[Image:Spear 67 (TKD).png|175px|]]
| |
| |rowspan="2" bgcolor="#EEEEEE"|
| |
| :皇槍・天之御柱
| |
| :Gotō Matabei
| |
| |-
| |
| |bgcolor="#EEEEEE"|
| |
| *'''Weapon Line:''' 王槍・天之逆鉾
| |
| *'''Cost:''' 260,000
| |
| |-
| |
| |colspan="3" bgcolor="#EEEEEE"|'''In-Game Description:'''
| |
| |-bgcolor="#EEEEEE"
| |
| |colspan="2" bgcolor="#D5DADE"|<div style="text-align: center">'''[[Tadakatsu Honda#Character Symbolism|(蜻蛉切)]]'''</div>
| |
| |rowspan="2" bgcolor="#EEEEEE"|<div style="column-count:2;-moz-column-count:2;-webkit-column-count:2">
| |
| *'''Attack:''' 718 (758)
| |
| *'''Critical:''' 0 (40)
| |
| *'''Attribute:''' Wind 143
| |
| *'''Slots:''' 3 (+2 & +6)
| |
| *'''Rank:''' 9
| |
| </div>
| |
| |-
| |
| |rowspan="2" style="text-align:center" bgcolor="#EEEEEE"|[[Image:Spear 68 (TKD).png|175px|]]
| |
| |rowspan="2" bgcolor="#EEEEEE"|
| |
| :日本号
| |
| :[[Honda Tadakatsu]]
| |
| |-
| |
| |bgcolor="#EEEEEE"|
| |
| *'''Weapon Line:''' 王槍・天之逆鉾
| |
| *'''Cost:''' 480,000
| |
| |-
| |
| |colspan="3" bgcolor="#EEEEEE"|'''In-Game Description:'''
| |
| |}
| |
| {{BR}}
| |
| |-|Gauntlets=
| |
| ::''See also: [[Toukiden/Weapon Movesets#Gauntlets|Gauntlets Moveset]] [[Image:Gauntlets Icon (TKD).png|right|border]]
| |
| {|border="1" align="left" cellspacing="2"
| |
| |-style="text-align:center" bgcolor="#BCC6CE"
| |
| |width="160"|'''Image'''
| |
| |width="180"|'''Recipe'''
| |
| |width="320"|'''Weapon Information'''
| |
| |-bgcolor="#EEEEEE"
| |
| |colspan="2" bgcolor="#D5DADE"|<div style="text-align: center">'''(古今無双)'''</div>
| |
| |rowspan="2" bgcolor="#EEEEEE"|<div style="column-count:2;-moz-column-count:2;-webkit-column-count:2">
| |
| *'''Attack:''' 689
| |
| *'''Critical:''' 0
| |
| *'''Attribute:''' Stun 284 (424)
| |
| *'''Slots:''' 3 (+2 & +4)
| |
| *'''Rank:''' 6
| |
| </div>
| |
| |-
| |
| |rowspan="2" style="text-align:center" bgcolor="#EEEEEE"|[[Image:Gauntlets 63 (TKD).png|175px|]]
| |
| |rowspan="2" bgcolor="#EEEEEE"|
| |
| :天拳・観音手
| |
| :Raiden Tameemon
| |
| |-
| |
| |bgcolor="#EEEEEE"|
| |
| *'''Weapon Line:''' 天拳・慈恩
| |
| *'''Cost:''' 260,000
| |
| |-
| |
| |colspan="3" bgcolor="#EEEEEE"|'''In-Game Description:'''
| |
| |-bgcolor="#EEEEEE"
| |
| |colspan="2" bgcolor="#D5DADE"|<div style="text-align: center">'''(角力神)'''</div>
| |
| |rowspan="2" bgcolor="#EEEEEE"|<div style="column-count:2;-moz-column-count:2;-webkit-column-count:2">
| |
| *'''Attack:''' 919 (999)
| |
| *'''Critical:''' 18
| |
| *'''Attribute:''' None
| |
| *'''Slots:''' 3 (+2 & +5)
| |
| *'''Rank:''' 9
| |
| </div>
| |
| |-
| |
| |rowspan="2" style="text-align:center" bgcolor="#EEEEEE"|[[Image:Gauntlets 64 (TKD).png|175px|]]
| |
| |rowspan="2" bgcolor="#EEEEEE"|
| |
| :古今無双
| |
| :Nomi no Sukune
| |
| |-
| |
| |bgcolor="#EEEEEE"|
| |
| *'''Weapon Line:''' 天拳・慈恩
| |
| *'''Cost:''' 480,000
| |
| |-
| |
| |colspan="3" bgcolor="#EEEEEE"|'''In-Game Description:'''
| |
| |-bgcolor="#EEEEEE"
| |
| |colspan="2" bgcolor="#D5DADE"|<div style="text-align: center">'''[[Ieyasu Tokugawa#Character Symbolism|(東照権現)]]'''</div>
| |
| |rowspan="2" bgcolor="#EEEEEE"|<div style="column-count:2;-moz-column-count:2;-webkit-column-count:2">
| |
| *'''Attack:''' 895
| |
| *'''Critical:''' 0 (60)
| |
| *'''Attribute:''' Water 40 (100)
| |
| *'''Slots:''' 3 (+2 & +5)
| |
| *'''Rank:''' 6
| |
| </div>
| |
| |-
| |
| |rowspan="2" style="text-align:center" bgcolor="#EEEEEE"|[[Image:Gauntlets 65 (TKD).png|175px|]]
| |
| |rowspan="2" bgcolor="#EEEEEE"|
| |
| :猛拳・建御名方
| |
| :[[Tokugawa Ieyasu]]
| |
| |-
| |
| |bgcolor="#EEEEEE"|
| |
| *'''Weapon Line:''' 夜刀・手甲拵え
| |
| *'''Cost:''' 260,000
| |
| |-
| |
| |colspan="3" bgcolor="#EEEEEE"|'''In-Game Description:'''
| |
| |-bgcolor="#EEEEEE"
| |
| |colspan="2" bgcolor="#D5DADE"|<div style="text-align: center">'''(熊落)'''</div>
| |
| |rowspan="2" bgcolor="#EEEEEE"|<div style="column-count:2;-moz-column-count:2;-webkit-column-count:2">
| |
| *'''Attack:''' 808
| |
| *'''Critical:''' 0
| |
| *'''Attribute:''' Water 269 (429)
| |
| *'''Slots:''' 3 (+2 & +4)
| |
| *'''Rank:''' 9
| |
| </div>
| |
| |-
| |
| |rowspan="2" style="text-align:center" bgcolor="#EEEEEE"|[[Image:Gauntlets 66 (TKD).png|175px|]]
| |
| |rowspan="2" bgcolor="#EEEEEE"|
| |
| :東照権現
| |
| :Sakata no Kintoki
| |
| |-
| |
| |bgcolor="#EEEEEE"|
| |
| *'''Weapon Line:''' 夜刀・手甲拵え
| |
| *'''Cost:''' 480,000
| |
| |-
| |
| |colspan="3" bgcolor="#EEEEEE"|'''In-Game Description:'''
| |
| |-bgcolor="#EEEEEE"
| |
| |colspan="2" bgcolor="#D5DADE"|<div style="text-align: center">'''[[Shingen Takeda#Character Symbolism|(風林火山)]]'''</div>
| |
| |rowspan="2" bgcolor="#EEEEEE"|<div style="column-count:2;-moz-column-count:2;-webkit-column-count:2">
| |
| *'''Attack:''' 858 (898)
| |
| *'''Critical:''' 0 (40)
| |
| *'''Attribute:''' Fire 81
| |
| *'''Slots:''' 3 (+2 & +5)
| |
| *'''Rank:''' 6
| |
| </div>
| |
| |-
| |
| |rowspan="2" style="text-align:center" bgcolor="#EEEEEE"|[[Image:Gauntlets 67 (TKD).png|175px|]]
| |
| |rowspan="2" bgcolor="#EEEEEE"|
| |
| :[[Yoshihiro Shimazu#Character Symbolism|皇拳・武甕槌]]
| |
| :[[Takeda Shingen]]
| |
| |-
| |
| |bgcolor="#EEEEEE"|
| |
| *'''Weapon Line:''' 王拳・天手力雄
| |
| *'''Cost:''' 260,000
| |
| |-
| |
| |colspan="3" bgcolor="#EEEEEE"|'''In-Game Description:'''
| |
| |-bgcolor="#EEEEEE"
| |
| |colspan="2" bgcolor="#D5DADE"|<div style="text-align: center">'''(蘇民将来)'''</div>
| |
| |rowspan="2" bgcolor="#EEEEEE"|<div style="column-count:2;-moz-column-count:2;-webkit-column-count:2">
| |
| *'''Attack:''' 810
| |
| *'''Critical:''' 0 (80)
| |
| *'''Attribute:''' Fire 269
| |
| *'''Slots:''' 3 (+2 & +6)
| |
| *'''Rank:''' 9
| |
| </div>
| |
| |-
| |
| |rowspan="2" style="text-align:center" bgcolor="#EEEEEE"|[[Image:Gauntlets 68 (TKD).png|175px|]]
| |
| |rowspan="2" bgcolor="#EEEEEE"|
| |
| :風林火山
| |
| :[[Susanoo]]
| |
| |-
| |
| |bgcolor="#EEEEEE"|
| |
| *'''Weapon Line:''' 王拳・天手力雄
| |
| *'''Cost:''' 480,000
| |
| |-
| |
| |colspan="3" bgcolor="#EEEEEE"|'''In-Game Description:'''
| |
| |}
| |
| {{BR}}
| |
| |-|Kusarigamas=
| |
| ::''See also: [[Toukiden/Weapon Movesets#Kusarigama|Kusarigama Moveset]] [[Image:Kusarigama Icon (TKD).png|right|border]]
| |
| {|border="1" align="left" cellspacing="2"
| |
| |-style="text-align:center" bgcolor="#BCC6CE"
| |
| |width="160"|'''Image'''
| |
| |width="180"|'''Recipe'''
| |
| |width="320"|'''Weapon Information'''
| |
| |-bgcolor="#EEEEEE"
| |
| |colspan="2" bgcolor="#D5DADE"|<div style="text-align: center">'''(首薙鎌)'''</div>
| |
| |rowspan="2" bgcolor="#EEEEEE"|<div style="column-count:2;-moz-column-count:2;-webkit-column-count:2">
| |
| *'''Attack:''' 438
| |
| *'''Critical:''' 0
| |
| *'''Attribute:''' Poison 146 (226)
| |
| *'''Slots:''' 3 (+2 & +5)
| |
| *'''Rank:''' 6
| |
| </div>
| |
| |-
| |
| |rowspan="2" style="text-align:center" bgcolor="#EEEEEE"|[[Image:Kusarigama 63 (TKD).png|175px|]]
| |
| |rowspan="2" bgcolor="#EEEEEE"|
| |
| :森羅万象
| |
| :Shishido Baiken
| |
| |-
| |
| |bgcolor="#EEEEEE"|
| |
| *'''Weapon Line:''' 天鎖地鎌
| |
| *'''Cost:''' 260,000
| |
| |-
| |
| |colspan="3" bgcolor="#EEEEEE"|'''In-Game Description:'''
| |
| |-bgcolor="#EEEEEE"
| |
| |colspan="2" bgcolor="#D5DADE"|<div style="text-align: center">'''(ヨモツイクサ)'''</div>
| |
| |rowspan="2" bgcolor="#EEEEEE"|<div style="column-count:2;-moz-column-count:2;-webkit-column-count:2">
| |
| *'''Attack:''' 483
| |
| *'''Critical:''' 0
| |
| *'''Attribute:''' Stun 161 (241)
| |
| *'''Slots:''' 3 (+2 & +5)
| |
| *'''Rank:''' 9
| |
| </div>
| |
| |-
| |
| |rowspan="2" style="text-align:center" bgcolor="#EEEEEE"|[[Image:Kusarigama 64 (TKD).png|175px|]]
| |
| |rowspan="2" bgcolor="#EEEEEE"|
| |
| :首薙鎌
| |
| :[[Protagonist (Chronicles)#Character Symbolism|Izanami]]
| |
| |-
| |
| |bgcolor="#EEEEEE"|
| |
| *'''Weapon Line:''' 天鎖地鎌
| |
| *'''Cost:''' 480,000
| |
| |-
| |
| |colspan="3" bgcolor="#EEEEEE"|'''In-Game Description:'''
| |
| |-bgcolor="#EEEEEE"
| |
| |colspan="2" bgcolor="#D5DADE"|<div style="text-align: center">'''(天龍駿馬)'''</div>
| |
| |rowspan="2" bgcolor="#EEEEEE"|<div style="column-count:2;-moz-column-count:2;-webkit-column-count:2">
| |
| *'''Attack:''' 488 (528)
| |
| *'''Critical:''' 0 (40)
| |
| *'''Attribute:''' Fire 73
| |
| *'''Slots:''' 3 (+2 & +4)
| |
| *'''Rank:''' 6
| |
| </div>
| |
| |-
| |
| |rowspan="2" style="text-align:center" bgcolor="#EEEEEE"|[[Image:Kusarigama 65 (TKD).png|175px|]]
| |
| |rowspan="2" bgcolor="#EEEEEE"|
| |
| :霊刃・神度
| |
| :[[Sakamoto Ryoma]]
| |
| |-
| |
| |bgcolor="#EEEEEE"|
| |
| *'''Weapon Line:''' 夜刀・鎌拵え
| |
| *'''Cost:''' 260,000
| |
| |-
| |
| |colspan="3" bgcolor="#EEEEEE"|'''In-Game Description:'''
| |
| |-bgcolor="#EEEEEE"
| |
| |colspan="2" bgcolor="#D5DADE"|<div style="text-align: center">'''(牛若天狗)'''</div>
| |
| |rowspan="2" bgcolor="#EEEEEE"|<div style="column-count:2;-moz-column-count:2;-webkit-column-count:2">
| |
| *'''Attack:''' 539
| |
| *'''Critical:''' 0 (40)
| |
| *'''Attribute:''' Wind 107 (147)
| |
| *'''Slots:''' 3 (+2 & +5)
| |
| *'''Rank:''' 9
| |
| </div>
| |
| |-
| |
| |rowspan="2" style="text-align:center" bgcolor="#EEEEEE"|[[Image:Kusarigama 66 (TKD).png|175px|]]
| |
| |rowspan="2" bgcolor="#EEEEEE"|
| |
| :天龍駿馬
| |
| :[[Minamoto no Yoshitsune]]
| |
| |-
| |
| |bgcolor="#EEEEEE"|
| |
| *'''Weapon Line:''' 夜刀・鎌拵え
| |
| *'''Cost:''' 480,000
| |
| |-
| |
| |colspan="3" bgcolor="#EEEEEE"|'''In-Game Description:'''
| |
| |-bgcolor="#EEEEEE"
| |
| |colspan="2" bgcolor="#D5DADE"|<div style="text-align: center">'''[[Nobunaga Oda#Character Symbolism|(第六天魔王)]]'''</div>
| |
| |rowspan="2" bgcolor="#EEEEEE"|<div style="column-count:2;-moz-column-count:2;-webkit-column-count:2">
| |
| *'''Attack:''' 491 (551)
| |
| *'''Critical:''' 0
| |
| *'''Attribute:''' Heaven 73 (133)
| |
| *'''Slots:''' 3 (+2 & +4)
| |
| *'''Rank:''' 6
| |
| </div>
| |
| |-
| |
| |rowspan="2" style="text-align:center" bgcolor="#EEEEEE"|[[Image:Kusarigama 67 (TKD).png|175px|]]
| |
| |rowspan="2" bgcolor="#EEEEEE"|
| |
| :皇刃・阿遅鋤高日子根
| |
| :[[Oda Nobunaga]]
| |
| |-
| |
| |bgcolor="#EEEEEE"|
| |
| *'''Weapon Line:''' 王刃・都牟刈
| |
| *'''Cost:''' 260,000
| |
| |-
| |
| |colspan="3" bgcolor="#EEEEEE"|'''In-Game Description:'''
| |
| |-bgcolor="#EEEEEE"
| |
| |colspan="2" bgcolor="#D5DADE"|<div style="text-align: center">'''(魔風刃)'''</div>
| |
| |rowspan="2" bgcolor="#EEEEEE"|<div style="column-count:2;-moz-column-count:2;-webkit-column-count:2">
| |
| *'''Attack:''' 540
| |
| *'''Critical:''' 0 (60)
| |
| *'''Attribute:''' Wind 108
| |
| *'''Slots:''' 3 (+2 & +5)
| |
| *'''Rank:''' 9
| |
| </div>
| |
| |-
| |
| |rowspan="2" style="text-align:center" bgcolor="#EEEEEE"|[[Image:Kusarigama 68 (TKD).png|175px|]]
| |
| |rowspan="2" bgcolor="#EEEEEE"|
| |
| :第六天魔王
| |
| :[[Kotarō Fūma|Fūma Kotarō]]
| |
| |-
| |
| |bgcolor="#EEEEEE"|
| |
| *'''Weapon Line:''' 王刃・都牟刈
| |
| *'''Cost:''' 480,000
| |
| |-
| |
| |colspan="3" bgcolor="#EEEEEE"|'''In-Game Description:'''
| |
| |}
| |
| {{BR}}
| |
| |-|Bows=
| |
| ::''See also: [[Toukiden/Weapon Movesets#Bow|Bow Moveset]] [[Image:Bow Icon (TKD).png|right|border]]
| |
| {|border="1" align="left" cellspacing="2"
| |
| |-style="text-align:center" bgcolor="#BCC6CE"
| |
| |width="160"|'''Image'''
| |
| |width="180"|'''Recipe'''
| |
| |width="320"|'''Weapon Information'''
| |
| |-bgcolor="#EEEEEE"
| |
| |colspan="2" bgcolor="#D5DADE"|<div style="text-align: center">'''(日巫女)'''</div>
| |
| |rowspan="2" bgcolor="#EEEEEE"|<div style="column-count:2;-moz-column-count:2;-webkit-column-count:2">
| |
| *'''Attack:''' 458
| |
| *'''Critical:''' 0 (40)
| |
| *'''Attribute:''' Fire 127 (167)
| |
| *'''Slots:''' 3 (+2 & +6)
| |
| *'''Rank:''' 6
| |
| </div>
| |
| |-
| |
| |rowspan="2" style="text-align:center" bgcolor="#EEEEEE"|[[Image:Bow 61 (TKD).png|175px|]]
| |
| |rowspan="2" bgcolor="#EEEEEE"|
| |
| :愛染弓
| |
| :[[Himiko]]
| |
| |-
| |
| |bgcolor="#EEEEEE"|
| |
| *'''Weapon Line:''' 神鳴弓
| |
| *'''Cost:''' 260,000
| |
| |-
| |
| |colspan="3" bgcolor="#EEEEEE"|'''In-Game Description:'''
| |
| |-bgcolor="#EEEEEE"
| |
| |colspan="2" bgcolor="#D5DADE"|<div style="text-align: center">'''[[Chihiro Ashihara#Character Symbolism|(天之麻迦古弓)]]'''</div>
| |
| |rowspan="2" bgcolor="#EEEEEE"|<div style="column-count:2;-moz-column-count:2;-webkit-column-count:2">
| |
| *'''Attack:''' 560
| |
| *'''Critical:''' 0
| |
| *'''Attribute:''' Heaven 112 (192)
| |
| *'''Slots:''' 3 (+2 & +5)
| |
| *'''Rank:''' 9
| |
| </div>
| |
| |-
| |
| |rowspan="2" style="text-align:center" bgcolor="#EEEEEE"|[[Image:Bow 62 (TKD).png|175px|]]
| |
| |rowspan="2" bgcolor="#EEEEEE"|
| |
| :日巫女
| |
| :[[Himiko#Character Symbolism|Amaterasu]]
| |
| |-
| |
| |bgcolor="#EEEEEE"|
| |
| *'''Weapon Line:''' 神鳴弓
| |
| *'''Cost:''' 480,000
| |
| |-
| |
| |colspan="3" bgcolor="#EEEEEE"|'''In-Game Description:'''
| |
| |-bgcolor="#EEEEEE"
| |
| |colspan="2" bgcolor="#D5DADE"|<div style="text-align: center">'''(雷上動)'''</div>
| |
| |rowspan="2" bgcolor="#EEEEEE"|<div style="column-count:2;-moz-column-count:2;-webkit-column-count:2">
| |
| *'''Attack:''' 511 (531)
| |
| *'''Critical:''' 0 (20)
| |
| *'''Attribute:''' Heaven 76
| |
| *'''Slots:''' 3 (+2 & +6)
| |
| *'''Rank:''' 6
| |
| </div>
| |
| |-
| |
| |rowspan="2" style="text-align:center" bgcolor="#EEEEEE"|[[Image:Bow 63 (TKD).png|175px|]]
| |
| |rowspan="2" bgcolor="#EEEEEE"|
| |
| :隠弓・天探女
| |
| :Minamoto no Yorimasa
| |
| |-
| |
| |bgcolor="#EEEEEE"|
| |
| *'''Weapon Line:''' 夜刀・弓拵え
| |
| *'''Cost:''' 260,000
| |
| |-
| |
| |colspan="3" bgcolor="#EEEEEE"|'''In-Game Description:'''
| |
| |-bgcolor="#EEEEEE"
| |
| |colspan="2" bgcolor="#D5DADE"|<div style="text-align: center">'''(鎮西豪弓)'''</div>
| |
| |rowspan="2" bgcolor="#EEEEEE"|<div style="column-count:2;-moz-column-count:2;-webkit-column-count:2">
| |
| *'''Attack:''' 507
| |
| *'''Critical:''' 0
| |
| *'''Attribute:''' Stun 169 (249)
| |
| *'''Slots:''' 3 (+2 & +5)
| |
| *'''Rank:''' 9
| |
| </div>
| |
| |-
| |
| |rowspan="2" style="text-align:center" bgcolor="#EEEEEE"|[[Image:Bow 64 (TKD).png|175px|]]
| |
| |rowspan="2" bgcolor="#EEEEEE"|
| |
| :雷上動
| |
| :Minamoto no Tametomo
| |
| |-
| |
| |bgcolor="#EEEEEE"|
| |
| *'''Weapon Line:''' 夜刀・弓拵え
| |
| *'''Cost:''' 480,000
| |
| |-
| |
| |colspan="3" bgcolor="#EEEEEE"|'''In-Game Description:'''
| |
| |-bgcolor="#EEEEEE"
| |
| |colspan="2" bgcolor="#D5DADE"|<div style="text-align: center">'''(浄罪弓)'''</div>
| |
| |rowspan="2" bgcolor="#EEEEEE"|<div style="column-count:2;-moz-column-count:2;-webkit-column-count:2">
| |
| *'''Attack:''' 513 (533)
| |
| *'''Critical:''' 0 (20)
| |
| *'''Attribute:''' Fire 76
| |
| *'''Slots:''' 3 (+2 & +5)
| |
| *'''Rank:''' 6
| |
| </div>
| |
| |-
| |
| |rowspan="2" style="text-align:center" bgcolor="#EEEEEE"|[[Image:Bow 65 (TKD).png|175px|]]
| |
| |rowspan="2" bgcolor="#EEEEEE"|
| |
| :皇弓・高産霊
| |
| :Amakusa Shirō
| |
| |-
| |
| |bgcolor="#EEEEEE"|
| |
| *'''Weapon Line:''' 王弓・天之鹿児弓
| |
| *'''Cost:''' 260,000
| |
| |-
| |
| |colspan="3" bgcolor="#EEEEEE"|'''In-Game Description:'''
| |
| |-bgcolor="#EEEEEE"
| |
| |colspan="2" bgcolor="#D5DADE"|<div style="text-align: center">'''(与一弓)'''</div>
| |
| |rowspan="2" bgcolor="#EEEEEE"|<div style="column-count:2;-moz-column-count:2;-webkit-column-count:2">
| |
| *'''Attack:''' 564 (604)
| |
| *'''Critical:''' 0
| |
| *'''Attribute:''' Water 112 (152)
| |
| *'''Slots:''' 3 (+2 & +6)
| |
| *'''Rank:''' 9
| |
| </div>
| |
| |-
| |
| |rowspan="2" style="text-align:center" bgcolor="#EEEEEE"|[[Image:Bow 66 (TKD).png|175px|]]
| |
| |rowspan="2" bgcolor="#EEEEEE"|
| |
| :浄罪弓
| |
| :[[Ina#Character Symbolism|Nasu no Yoichi]]
| |
| |-
| |
| |bgcolor="#EEEEEE"|
| |
| *'''Weapon Line:''' 王弓・天之鹿児弓
| |
| *'''Cost:''' 480,000
| |
| |-
| |
| |colspan="3" bgcolor="#EEEEEE"|'''In-Game Description:'''
| |
| |}
| |
| {{BR}}
| |
| </tabber>
| |
|
| |
|
| ==Gallery== | | ==Gallery== |
| <gallery spacing="small" widths="155" bordersize="none" bordercolor="transparent"> | | <gallery mode=nolines> |
| Shikimi Concept (TKD).png|Portrait | | Shikimi-toukiden.jpg|CG render |
| </gallery> | | </gallery> |
|
| |
|
| {{Info Toukiden}} | | {{Info Toukiden}} |
| [[Category: Toukiden Characters]] | | [[Category: Toukiden Characters]] |
| [[Category: Gameplay]]
| |