-
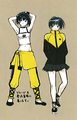
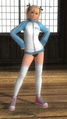
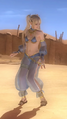
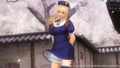
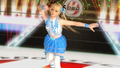
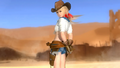
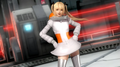
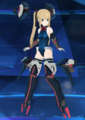
Dead or Alive 5 Ultimate concept art
-
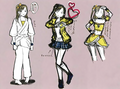
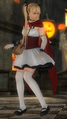
Concept art 2
-
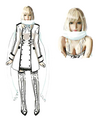
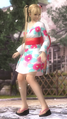
Concept art 3
-
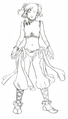
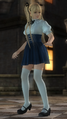
Concept art 4
-
Concept art 5
-
Concept art 6
-
Concept art 7
-
Concept art 8
-
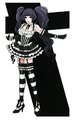
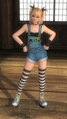
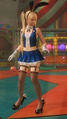
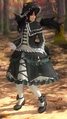
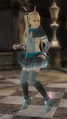
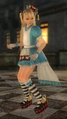
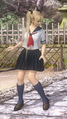
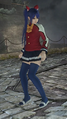
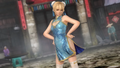
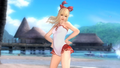
Alternate outfit
-
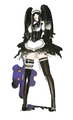
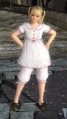
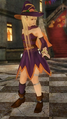
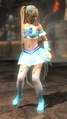
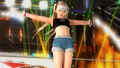
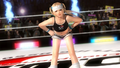
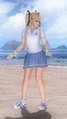
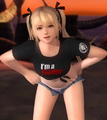
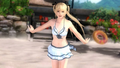
Alternate outfit 2
-
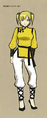
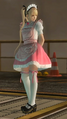
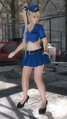
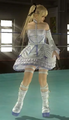
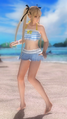
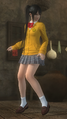
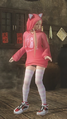
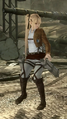
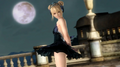
Alternate outfit 3
-
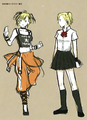
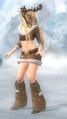
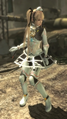
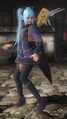
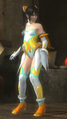
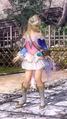
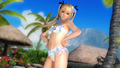
Alternate outfit 4
-
Alternate outfit 5
-
Alternate outfit 6
-
Alternate outfit 7
-
Alternate outfit 8
-
Alternate outfit 9
-
Alternate outfit 10
-
Alternate outfit 11
-
Alternate outfit 12
-
Alternate outfit 13
-
Alternate outfit 14
-
Alternate outfit 15
-
Alternate outfit 16
-
Alternate outfit 17
-
Alternate outfit 18
-
Alternate outfit 19
-
Alternate outfit 20
-
Alternate outfit 21
-
Alternate outfit 22
-
Alternate outfit 23
-
Alternate outfit 24
-
Alternate outfit 25
-
Alternate outfit 26
-
Alternate outfit 27
-
Alternate outfit 28
-
Alternate outfit 29
-
Alternate outfit 30
-
Alternate outfit 31
-
Alternate outfit 32
-
Alternate outfit 33
-
Alternate outfit 34
-
Alternate outfit 35
-
Alternate outfit 36
-
Alternate outfit 37
-
Alternate outfit 38
-
Alternate outfit 39
-
Alternate outfit 40
-
Alternate outfit 41
-
Alternate outfit 42
-
Alternate outfit 43
-
Alternate outfit 44
-
Alternate outfit 45
-
Alternate outfit 46
-
Alternate outfit 47
-

Alternate outfit 48
-
Alternate outfit 49
-
Alternate outfit 50
-
Alternate outfit 51
-
Alternate outfit 52
-
Alternate outfit 53
-
Alternate outfit 54
-
Alternate outfit 55
-

Alternate outfit 56
-
Alternate outfit 57
-
Alternate outfit 58
-
Alternate outfit 59
-
Alternate outfit 60
-
Dead or Alive 5 Infinite portrait
-
Alternate portrait
-
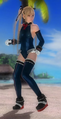
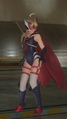
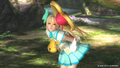
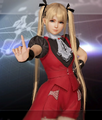
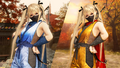
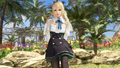
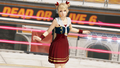
Dead or Alive 6 alternate outfit
-
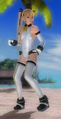
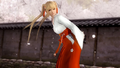
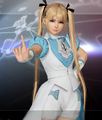
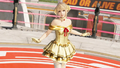
Alternate outfit 2
-
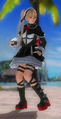
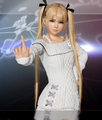
Alternate outfit 3
-

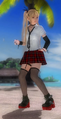
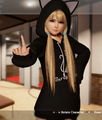
Alternate outfit 4
-

Alternate outfit 5
-
Alternate outfit 6
-
Alternate outfit 7
-
Alternate outfit 8
-

Alternate outfit 9
-
Alternate outfit 10
-

Alternate outfit 11
-
Alternate outfit 12
-

Alternate outfit 13
-
Alternate outfit 14
-
Alternate outfit 15
-

Alternate outfit 16
-
Alternate outfit 17
-
Alternate outfit 18
-
Alternate outfit 19
-
Alternate outfit 20
-

Alternate outfit 21
-
Alternate outfit 22
-
Alternate outfit 23
-
Alternate outfit 24
-
Alternate outfit 25
-
Alternate outfit 26
-
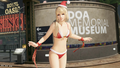
Destiny Child collaboration outfit
-
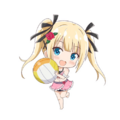
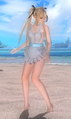
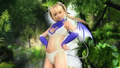
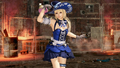
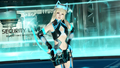
Dead or Alive Xtreme Venus Vacation SD appearance
-
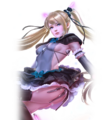
Haruhi Suzumiya collaboration outfit
-
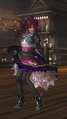
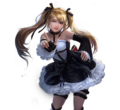
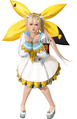
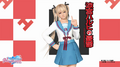
Senran Kagura: New Link collaboration outfit
(Adding categories) |
Guan Yunping (talk | contribs) No edit summary |
||
| (18 intermediate revisions by 4 users not shown) | |||
| Line 9: | Line 9: | ||
|measure = 74cm - 56cm - 78cm | |measure = 74cm - 56cm - 78cm | ||
|bloodtype = AB | |bloodtype = AB | ||
|occupation= | |occupation= Helena's servant | ||
|weapon = | |weapon = Systema martial arts | ||
|footnotes = }} | |||
|footnotes = | '''Marie Rose''' (マリー・ローズ, ''Marī Rōzu'') is a character from the ''Dead or Alive'' series who made her debut in ''Dead or Alive 5 Ultimate Arcade''. | ||
}} | |||
'''Marie Rose''' (マリー・ローズ, ''Marī Rōzu'') is a character from the ''Dead or Alive'' series who made her debut in '' | |||
She appears as a playable character in ''[[Warriors All-Stars]]''. | She appears as a playable character in ''[[Warriors All-Stars]]''. | ||
| Line 27: | Line 25: | ||
On one hand, Marie is mischievous, confident and playful. On the other, she can be absolutely brutal towards her opponents. She is especially sensitive about any remarks regarding her height. She appears to enjoy [[Honoka]]'s company. | On one hand, Marie is mischievous, confident and playful. On the other, she can be absolutely brutal towards her opponents. She is especially sensitive about any remarks regarding her height. She appears to enjoy [[Honoka]]'s company. | ||
==Quotes== | === Voice Actors === | ||
:''See also: [[Marie Rose/Quotes]] | |||
* [[Mai Aizawa]] - ''Dead or Alive'' & ''Warriors All-Stars'' series (Japanese) | |||
* Christine Marie Cabanos - ''Dead or Alive'' series (English) | |||
== Quotes== | |||
:''See also: [[Marie Rose/Quotes]]'' | |||
==Gameplay== | ==Gameplay== | ||
{{keys}} | {{keys}} | ||
:{{S}}, {{S}}, {{S}}, {{S}}, {{S}}, {{S}}: Marie does a roundhouse kick to the left, then kicks upwards. She then swings her right fist to the right, then kicks to the right with her right leg. She then punches forward, then finishes with a roundhouse kick to the right. | :{{S}}, {{S}}, {{S}}, {{S}}, {{S}}, {{S}}: Marie does a roundhouse kick to the left, then kicks upwards. She then swings her right fist to the right, then kicks to the right with her right leg. She then punches forward, then finishes with a roundhouse kick to the right. | ||
:{{T}}: Marie stomps her feet on the ground as if throwing a tantrum, damaging enemies in her immediate vicinity. | :{{T}}: Marie stomps her feet on the ground as if throwing a tantrum, damaging enemies in her immediate vicinity. | ||
:{{S}}, {{T}}: Marie does a rising upwards kick, then continues to kick repeatedly as she descends to the ground. | : {{S}}, {{T}}: Marie does a rising upwards kick, then continues to kick repeatedly as she descends to the ground. | ||
:{{S}}, {{S}}, {{T}}, ({{T}}): Marie swipes her left fist to the left, then to the right. She then swings upwards with an uppercut, then thrusts forward with both fists. | : {{S}}, {{S}}, {{T}}, ({{T}}): Marie swipes her left fist to the left, then to the right. She then swings upwards with an uppercut, then thrusts forward with both fists. | ||
:{{S}}, {{S}}, {{S}}, {{T}}: Marie smacks the enemies into the air and turns around and thrusts her rear end at the enemies to tackle them. | :{{S}}, {{S}}, {{S}}, {{T}}: Marie smacks the enemies into the air and turns around and thrusts her rear end at the enemies to tackle them. | ||
:{{S}}, {{S}}, {{S}}, {{S}}, {{T}}: Marie swings forward, generating a shockwave. | : {{S}}, {{S}}, {{S}}, {{S}}, {{T}}: Marie swings forward, generating a shockwave. | ||
:{{S}}, {{S}}, {{S}}, {{S}}, {{S}}, {{T}}, ({{T}}), ({{T}}): Marie somersaults on the ground and tumbles forward, damaging any enemies in her path. She then does a handstand to kick enemies up, then starts twirling on one leg with her other leg extended for a spinning kick attack. She finishes with a final roundhouse kick to the right. | : {{S}}, {{S}}, {{S}}, {{S}}, {{S}}, {{T}}, ({{T}}), ({{T}}): Marie somersaults on the ground and tumbles forward, damaging any enemies in her path. She then does a handstand to kick enemies up, then starts twirling on one leg with her other leg extended for a spinning kick attack. She finishes with a final roundhouse kick to the right. | ||
:Dashing + {{T}}: Marie punches forward. | :Dashing + {{T}}: Marie punches forward. | ||
| Line 49: | Line 52: | ||
;Hero Skill | ;Hero Skill | ||
:"Little" Devil's Smile: slightly lowers enemy's defense. | :"Little" Devil's Smile: slightly lowers enemy's defense. | ||
;Awakened Skill | ; Awakened Skill | ||
:Bloody Rose: inflicts damage in a radius around her and slightly lowers enemy defense. | :Bloody Rose: inflicts damage in a radius around her and slightly lowers enemy defense. | ||
;Combined Skill | ;Combined Skill | ||
: | : | ||
===Fighting Style=== | ===Fighting Style === | ||
Marie is a very slow burner when it comes to performance. She's far outstripped by most characters when it comes to her initial kit, and that includes her fellow defaults Kasumi and Honoka. At level 5, she actually gets trickier to play since her fifth normal attack adds a huge knockback that reduces her single-target control, which is about the only positive she has initially. | Marie is a very slow burner when it comes to performance. She's far outstripped by most characters when it comes to her initial kit, and that includes her fellow defaults Kasumi and Honoka. At level 5, she actually gets trickier to play since her fifth normal attack adds a huge knockback that reduces her single-target control, which is about the only positive she has initially. | ||
She shows her strength when the difficulty is raised to Hard or higher: at this point positional defense actually matters, and her attack strings do not leave her open to frontal counters nor flanking. She does not need Tenacity, for example, which is almost a no-brainer for many others. She can focus much more heavily on offensive Hero teams and card abilities because she already has survivability. Her normal string is very good against enemy Heroes and her C6 enables her to fight them in the midst of a horde of troops. | She shows her strength when the difficulty is raised to Hard or higher: at this point positional defense actually matters, and her attack strings do not leave her open to frontal counters nor flanking. She does not need Tenacity, for example, which is almost a no-brainer for many others. She can focus much more heavily on offensive Hero teams and card abilities because she already has survivability. Her normal string is very good against enemy Heroes and her C6 enables her to fight them in the midst of a horde of troops. | ||
C1 is an effective knockup to grounded opponents, | C1 is an effective knockup to grounded opponents, C2 is the fastest burst damage she has and is more useful at high Bravery levels to clear small groups of soldiers. C3 is a good stun that becomes a good crowd-clear with a Love card equipped. The follow-up attack from it is more useful to evade oncoming attacks than it is as an actual attack since it scatters targets dealing little damage. C4 is pretty forgettable, being a high-knockback with a circular splash, pretty much the opposite of what's required for crowd-clearing. This is a big part of why she underperforms initially. C5 is a typical high knockup, but she doesn't really need to use it. C6 is a spring kick that applies status. The follow-up spinning whirlwind kick is often a waste of time since targets are often dead by that point, but is useful as an attack on Heroes while in a crowd or if a Fire card is equipped. Seeing as crowd-clear is more of an issue to her than duelling, which she's very good at, Love is generally a more useful element for her than the other obvious choice, Fire. Her C3, C4, C5, C6 and jump charge attacks all inflict status at or near 100% rate to targets. | ||
Her Musou consists of three increasingly-long lunges, so to make best use of it, you must be fairly close to the target(s) at the beginning. That said, the first two strikes do very little compared to the third, so missing with one or both is no big deal. | Her Musou consists of three increasingly-long lunges, so to make best use of it, you must be fairly close to the target(s) at the beginning. That said, the first two strikes do very little compared to the third, so missing with one or both is no big deal. | ||
| Line 66: | Line 69: | ||
==Gallery== | ==Gallery== | ||
<gallery | <tabber>Dead or Alive= | ||
<gallery mode=nolines> | |||
Marie Rose Concept Art (DOA5U).png|Dead or Alive 5 Ultimate concept art | |||
Marie Rose Concept Art 2 (DOA5U).png|Concept art 2 | |||
Marie Rose Concept Art 3 (DOA5U).png|Concept art 3 | |||
Marie Rose Concept Art 4 (DOA5U).png|Concept art 4 | |||
Marie Rose Concept Art 5 (DOA5U).png|Concept art 5 | |||
Marie Rose Concept Art 6 (DOA5U).png|Concept art 6 | |||
Marie Rose Concept Art 7 (DOA5U).png|Concept art 7 | |||
Marie Rose Concept Art 8 (DOA5U).png|Concept art 8 | |||
Marie Rose Alternate Costume (DOA5U).png|Alternate outfit | |||
Marie Rose Alternate Costume 2 (DOA5U).png|Alternate outfit 2 | |||
Marie Rose Alternate Costume 3 (DOA5U).png|Alternate outfit 3 | |||
Marie Rose Alternate Costume 4 (DOA5U).png|Alternate outfit 4 | |||
Marie Rose Alternate Costume 5 (DOA5U).png|Alternate outfit 5 | |||
Marie Rose Alternate Costume 6 (DOA5U).png|Alternate outfit 6 | |||
Marie Rose Alternate Costume 7 (DOA5U).png|Alternate outfit 7 | |||
Marie Rose Alternate Costume 8 (DOA5U).png|Alternate outfit 8 | |||
Marie Rose Alternate Costume 9 (DOA5U).png|Alternate outfit 9 | |||
Marie Rose Alternate Costume 10 (DOA5U).png|Alternate outfit 10 | |||
Marie Rose Alternate Costume 11 (DOA5U).png|Alternate outfit 11 | |||
Marie Rose Alternate Costume 12 (DOA5U).png|Alternate outfit 12 | |||
Marie Rose Alternate Costume 13 (DOA5U).png|Alternate outfit 13 | |||
Marie Rose Alternate Costume 14 (DOA5U).png|Alternate outfit 14 | |||
Marie Rose Alternate Costume 15 (DOA5U).png|Alternate outfit 15 | |||
Marie Rose Alternate Costume 16 (DOA5U).png|Alternate outfit 16 | |||
Marie Rose Alternate Costume 17 (DOA5LR).png|Alternate outfit 17 | |||
Marie Rose Alternate Costume 18 (DOA5LR).png|Alternate outfit 18 | |||
Marie Rose Alternate Costume 19 (DOA5LR).png|Alternate outfit 19 | |||
Marie Rose Alternate Costume 20 (DOA5LR).png|Alternate outfit 20 | |||
Marie Rose Alternate Costume 21 (DOA5LR).png|Alternate outfit 21 | |||
Marie Rose Alternate Costume 22 (DOA5LR).png|Alternate outfit 22 | |||
Marie Rose Alternate Costume 23 (DOA5LR).png|Alternate outfit 23 | |||
Marie Rose Alternate Costume 24 (DOA5LR).png|Alternate outfit 24 | |||
Marie Rose Alternate Costume 25 (DOA5LR).png|Alternate outfit 25 | |||
Marie Rose Alternate Costume 26 (DOA5LR).png|Alternate outfit 26 | |||
Marie Rose Alternate Costume 27 (DOA5LR).png|Alternate outfit 27 | |||
Marie Rose Alternate Costume 28 (DOA5LR).png|Alternate outfit 28 | |||
Marie Rose Alternate Costume 29 (DOA5LR).png|Alternate outfit 29 | |||
Marie Rose Alternate Costume 30 (DOA5LR).png|Alternate outfit 30 | |||
Marie Rose Alternate Costume 31 (DOA5LR).png|Alternate outfit 31 | |||
Marie Rose Alternate Costume 32 (DOA5LR).png|Alternate outfit 32 | |||
Marie Rose Alternate Costume 33 (DOA5LR).png|Alternate outfit 33 | |||
Marie Rose Alternate Costume 34 (DOA5LR).png|Alternate outfit 34 | |||
Marie Rose Alternate Costume 35 (DOA5LR).png|Alternate outfit 35 | |||
Marie Rose Alternate Costume 36 (DOA5LR).png|Alternate outfit 36 | |||
Marie Rose Alternate Costume 37 (DOA5LR).png|Alternate outfit 37 | |||
Marie Rose Alternate Costume 38 (DOA5LR).png|Alternate outfit 38 | |||
Marie Rose Alternate Costume 39 (DOA5LR).png|Alternate outfit 39 | |||
Marie Rose Alternate Costume 40 (DOA5LR).png|Alternate outfit 40 | |||
Marie Rose Alternate Costume 41 (DOA5LR).png|Alternate outfit 41 | |||
Marie Rose Alternate Costume 42 (DOA5LR).png|Alternate outfit 42 | |||
Marie Rose Alternate Costume 43 (DOA5LR).png|Alternate outfit 43 | |||
Marie Rose Alternate Costume 44 (DOA5LR).png|Alternate outfit 44 | |||
Marie Rose Alternate Costume 45 (DOA5LR).png|Alternate outfit 45 | |||
Marie Rose Alternate Costume 46 (DOA5LR).png|Alternate outfit 46 | |||
Marie Rose Alternate Costume 47 (DOA5LR).png|Alternate outfit 47 | |||
Marie Rose Alternate Costume 48 (DOA5LR).png|Alternate outfit 48 | |||
Marie Rose Alternate Costume 49 (DOA5LR).png|Alternate outfit 49 | |||
Marie Rose Alternate Costume 50 (DOA5LR).png|Alternate outfit 50 | |||
Marie Rose Alternate Costume 51 (DOA5LR).png|Alternate outfit 51 | |||
Marie Rose Alternate Costume 52 (DOA5LR).png|Alternate outfit 52 | |||
Marie Rose Alternate Costume 53 (DOA5LR).png|Alternate outfit 53 | |||
Marie Rose Alternate Costume 54 (DOA5LR).png|Alternate outfit 54 | |||
Marie Rose Alternate Costume 55 (DOA5LR).png|Alternate outfit 55 | |||
Marie Rose Alternate Costume 56 (DOA5LR).png|Alternate outfit 56 | |||
Marie Rose Alternate Costume 57 (DOA5LR).png|Alternate outfit 57 | |||
Marie Rose Alternate Costume 58 (DOA5LR).png|Alternate outfit 58 | |||
Marie Rose Alternate Costume 59 (DOA5LR).png|Alternate outfit 59 | |||
Marie Rose Alternate Costume 60 (DOA5LR).png|Alternate outfit 60 | |||
Marie Rose (DOA5I).png|Dead or Alive 5 Infinite portrait | |||
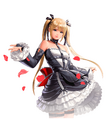
Marie Rose 2 (DOA5I).png|Alternate portrait | |||
Marie Rose Alternate Costume (DOA6).png|Dead or Alive 6 alternate outfit | |||
Marie Rose Alternate Costume 2 (DOA6).png|Alternate outfit 2 | |||
Marie Rose Alternate Costume 3 (DOA6).png|Alternate outfit 3 | |||
Marie Rose Alternate Costume 4 (DOA6).png|Alternate outfit 4 | |||
Marie Rose Alternate Costume 5 (DOA6).png|Alternate outfit 5 | |||
Marie Rose Alternate Costume 6 (DOA6).png|Alternate outfit 6 | |||
Marie Rose Alternate Costume 7 (DOA6).png|Alternate outfit 7 | |||
Marie Rose Alternate Costume 8 (DOA6).png|Alternate outfit 8 | |||
Marie Rose Alternate Costume 9 (DOA6).png|Alternate outfit 9 | |||
Marie Rose Alternate Costume 10 (DOA6).png|Alternate outfit 10 | |||
Marie Rose Alternate Costume 11 (DOA6).png|Alternate outfit 11 | |||
Marie Rose Alternate Costume 12 (DOA6).png|Alternate outfit 12 | |||
Marie Rose Alternate Costume 13 (DOA6).png|Alternate outfit 13 | |||
Marie Rose DLC Alternate Costume (DOA6).png|Alternate outfit 14 | |||
Marie Rose DLC Alternate Costume 2 (DOA6).png|Alternate outfit 15 | |||
Marie Rose DLC Alternate Costume 3 (DOA6).png|Alternate outfit 16 | |||
Marie Rose DLC Alternate Costume 4 (DOA6).png|Alternate outfit 17 | |||
Marie Rose DLC Alternate Costume 5 (DOA6).png|Alternate outfit 18 | |||
Marie Rose DLC Alternate Costume 6 (DOA6).png|Alternate outfit 19 | |||
Marie Rose DLC Alternate Costume 7 (DOA6).png|Alternate outfit 20 | |||
Marie Rose DLC Alternate Costume 8 (DOA6).png|Alternate outfit 21 | |||
Marie Rose DLC Alternate Costume 9 (DOA6).png|Alternate outfit 22 | |||
Marie Rose DLC Alternate Costume 10 (DOA6).png|Alternate outfit 23 | |||
Marie Rose DLC Alternate Costume 11 (DOA6).png|Alternate outfit 24 | |||
Marie Rose DLC Alternate Costume 12 (DOA6).png|Alternate outfit 25 | |||
Marie Rose DLC Alternate Costume 13 (DOA6).png|Alternate outfit 26 | |||
Marie Rose DC Collaboration (DOAXVV).png|Destiny Child collaboration outfit | |||
Marie Rose SD Form (DOAXVV).png|Dead or Alive Xtreme Venus Vacation SD appearance | |||
Marie Rose SH Collaboration (DOAXVV).png|Haruhi Suzumiya collaboration outfit | |||
Marie Rose SKNL Collaboration (DOAXVV).png|Senran Kagura: New Link collaboration outfit | |||
</gallery> | |||
|-|Miscellaneous= | |||
<gallery mode=nolines> | |||
Marie Rose - Bath Outfit (MS).png|Bath outfit | Marie Rose - Bath Outfit (MS).png|Bath outfit | ||
Marie Rose Bonus Costume (MS DLC).png|[[Warriors All-Stars/DLC|Opoona downloadable | Marie Rose Bonus Costume (MS DLC).png|[[Warriors All-Stars/DLC|Opoona downloadable outfit]] | ||
Marie Rose Costume (WAS DLC).png|[[Warriors All-Stars/DLC#Downloadable Costumes 6|Christophorus downloadable | Marie Rose Costume (WAS DLC).png|[[Warriors All-Stars/DLC#Downloadable Costumes 6|Christophorus downloadable outfit]] | ||
Marie Rose (SC).png|Dead or Alive 6 collaboration card in [[Samurai Cats]] | Marie Rose (SC).png|Dead or Alive 6 collaboration card in [[Samurai Cats]] | ||
Marie Rose (KOFAS).png|The King of Fighters All Star portrait | |||
Marie Rose 2 (KOFAS).png|Alternate portrait | |||
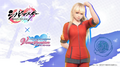
Marie Rose (SKPBS).png|Senran Kagura: Peach Beach Splash artwork | |||
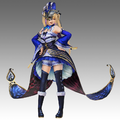
Marie Rose (AZLA).png|Azur Lane collaboration portrait | |||
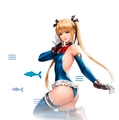
Marie Rose 2 (AZLA).png|Alternate portrait 2 | |||
Marie Rose 3 (AZLA).png|Alternate portrait 3 | |||
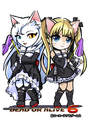
Marie Rose (AGEA).png|Alice Gear Aegis collaboration appearance | |||
Marie Rose (DOWA).png|Dolphin Wave collaboration portrait | |||
</gallery> | </gallery> | ||
</tabber> | |||
==External Links== | ==External Links== | ||
{{Stub}} | {{Stub}} | ||
[[Category:Warriors All-Stars Characters]] | [[Category:Warriors All-Stars Characters]] | ||
[[Category:Dead | [[Category:Dead or Alive Characters]] | ||
Latest revision as of 06:41, 31 March 2024
Marie Rose (マリー・ローズ, Marī Rōzu) is a character from the Dead or Alive series who made her debut in Dead or Alive 5 Ultimate Arcade.
She appears as a playable character in Warriors All-Stars.
Role in Game
Character Information
Development
Aizawa noted that Marie is in a lot of character scenarios, so she took care to make Marie sound as soft as possible. She hopes everyone gets invested in the game for them.
Personality
On one hand, Marie is mischievous, confident and playful. On the other, she can be absolutely brutal towards her opponents. She is especially sensitive about any remarks regarding her height. She appears to enjoy Honoka's company.
Voice Actors
- Mai Aizawa - Dead or Alive & Warriors All-Stars series (Japanese)
- Christine Marie Cabanos - Dead or Alive series (English)
Quotes
- See also: Marie Rose/Quotes
Gameplay
| Keys: |
 , , , , , : Marie does a roundhouse kick to the left, then kicks upwards. She then swings her right fist to the right, then kicks to the right with her right leg. She then punches forward, then finishes with a roundhouse kick to the right.
 : Marie stomps her feet on the ground as if throwing a tantrum, damaging enemies in her immediate vicinity.
- , : Marie does a rising upwards kick, then continues to kick repeatedly as she descends to the ground.
- , , , (): Marie swipes her left fist to the left, then to the right. She then swings upwards with an uppercut, then thrusts forward with both fists.
- , , , : Marie smacks the enemies into the air and turns around and thrusts her rear end at the enemies to tackle them.
- , , , , : Marie swings forward, generating a shockwave.
- , , , , , , (), (): Marie somersaults on the ground and tumbles forward, damaging any enemies in her path. She then does a handstand to kick enemies up, then starts twirling on one leg with her other leg extended for a spinning kick attack. She finishes with a final roundhouse kick to the right.
- Dashing + : Marie punches forward.
- Dashing + : Marie punches forward.
- Jump + : Marie twirls in the air and lands on the ground with a forceful stomp that has a hitbox.
- Jump + : Marie does a double axe handle, swinging both fists downwards.
 : Marie smacks the enemies upwards, then does a flying forward kick at them, then flips into the air. Upon landing, Marie leaps forward with a flying drill kick.
- Hero Skill
- "Little" Devil's Smile: slightly lowers enemy's defense.
- Awakened Skill
- Bloody Rose: inflicts damage in a radius around her and slightly lowers enemy defense.
- Combined Skill
Fighting Style
Marie is a very slow burner when it comes to performance. She's far outstripped by most characters when it comes to her initial kit, and that includes her fellow defaults Kasumi and Honoka. At level 5, she actually gets trickier to play since her fifth normal attack adds a huge knockback that reduces her single-target control, which is about the only positive she has initially.
She shows her strength when the difficulty is raised to Hard or higher: at this point positional defense actually matters, and her attack strings do not leave her open to frontal counters nor flanking. She does not need Tenacity, for example, which is almost a no-brainer for many others. She can focus much more heavily on offensive Hero teams and card abilities because she already has survivability. Her normal string is very good against enemy Heroes and her C6 enables her to fight them in the midst of a horde of troops.
C1 is an effective knockup to grounded opponents, C2 is the fastest burst damage she has and is more useful at high Bravery levels to clear small groups of soldiers. C3 is a good stun that becomes a good crowd-clear with a Love card equipped. The follow-up attack from it is more useful to evade oncoming attacks than it is as an actual attack since it scatters targets dealing little damage. C4 is pretty forgettable, being a high-knockback with a circular splash, pretty much the opposite of what's required for crowd-clearing. This is a big part of why she underperforms initially. C5 is a typical high knockup, but she doesn't really need to use it. C6 is a spring kick that applies status. The follow-up spinning whirlwind kick is often a waste of time since targets are often dead by that point, but is useful as an attack on Heroes while in a crowd or if a Fire card is equipped. Seeing as crowd-clear is more of an issue to her than duelling, which she's very good at, Love is generally a more useful element for her than the other obvious choice, Fire. Her C3, C4, C5, C6 and jump charge attacks all inflict status at or near 100% rate to targets.
Her Musou consists of three increasingly-long lunges, so to make best use of it, you must be fairly close to the target(s) at the beginning. That said, the first two strikes do very little compared to the third, so missing with one or both is no big deal.
When facing Marie as an opponent, be careful of her upgraded Hero skill Bloody Rose on the rare occasion that she's high enough Bravery to access it. It finishes with an invisible shockwave that has no telegraph and deals considerable damage at considerable range.
Gallery
.png)
.png)
.png)
.png)
.png)
.png)
.png)
.png)
.png)
.png)
.png)
.png)
.png)
.png)
.png)
.png)
.png)
.png)
.png)
.png)
.png)
.png)
.png)
.png)
.png)
.png)
.png)
.png)
.png)
.png)
.png)
.png)
.png)
.png)
.png)
.png)
.png)
.png)
.png)
.png)
.png)
.png)
.png)
.png)
.png)
.png)
.png)
.png)
.png)
.png)
.png)
.png)
.png)
.png)
.png)
.png)
.png)
.png)
.png)
.png)
.png)
.png)
.png)
.png)
.png)
.png)
.png)
.png)
.png)
.png)
.png)
.png)
.png)
.png)
.png)
.png)
.png)
.png)
.png)
.png)
.png)
.png)
.png)
.png)
.png)
.png)
.png)
.png)
.png)
.png)
.png)
.png)
.png)
.png)
.png)
.png)
.png)
.png)
.png)
-
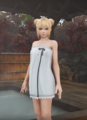
Bath outfit
-

-
-
Dead or Alive 6 collaboration card in Samurai Cats
-
The King of Fighters All Star portrait
-
Alternate portrait
-
Senran Kagura: Peach Beach Splash artwork
-
Azur Lane collaboration portrait
-
Alternate portrait 2
-
Alternate portrait 3
-
Alice Gear Aegis collaboration appearance
-
Dolphin Wave collaboration portrait
.png)
.png)
.png)
.png)
.png)
.png)
.png)
.png)
.png)
.png)
.png)
.png)
External Links
This article is a stub. You can help the wiki by expanding it.